11-4-20
I hope you’ve enjoyed reading about the re-fit as much as I’ve enjoyed doing it, this week has seen me put a lot of the small finishing touches to the build, its doing these little bits that make you realise that its nearly finished.
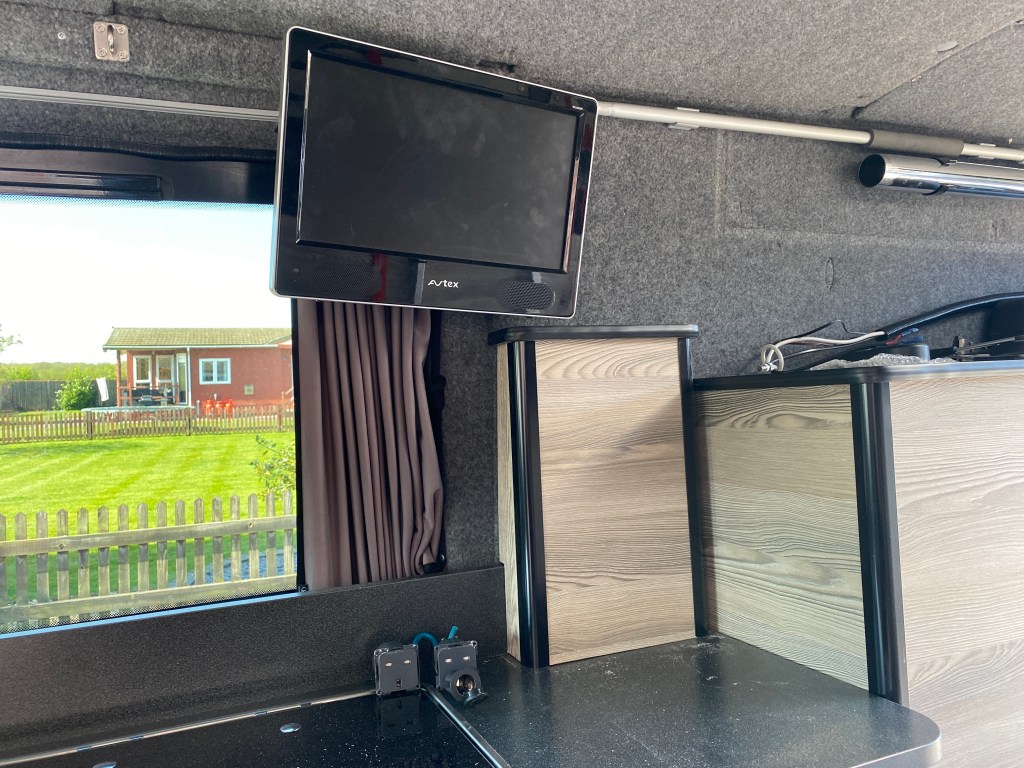
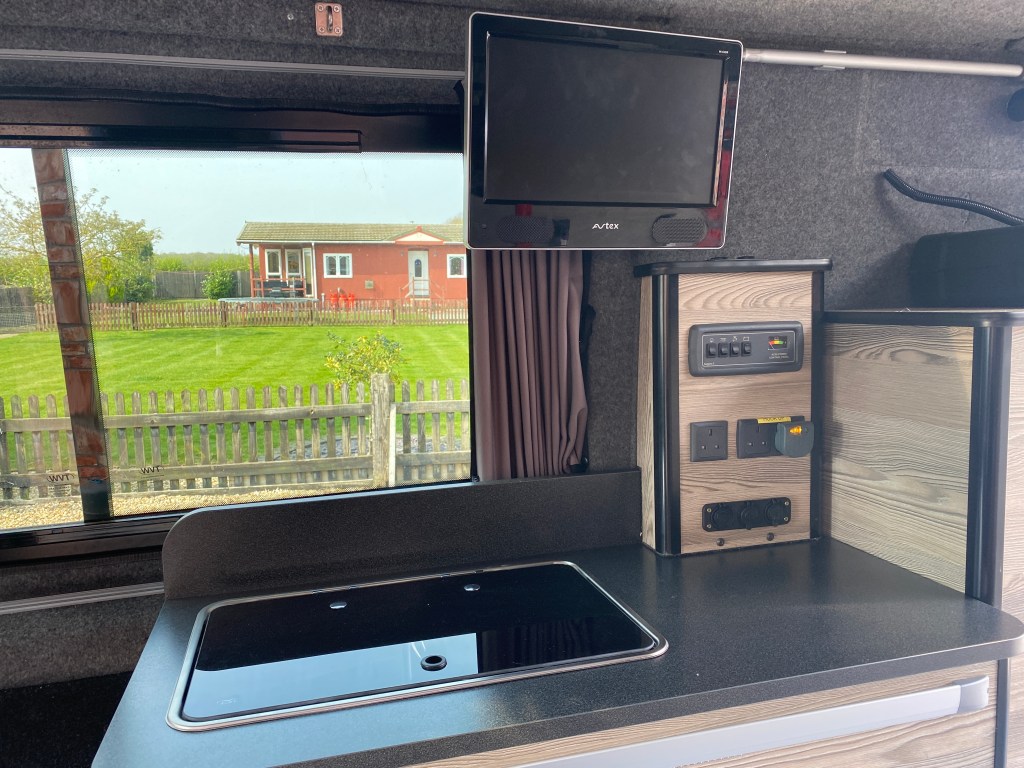
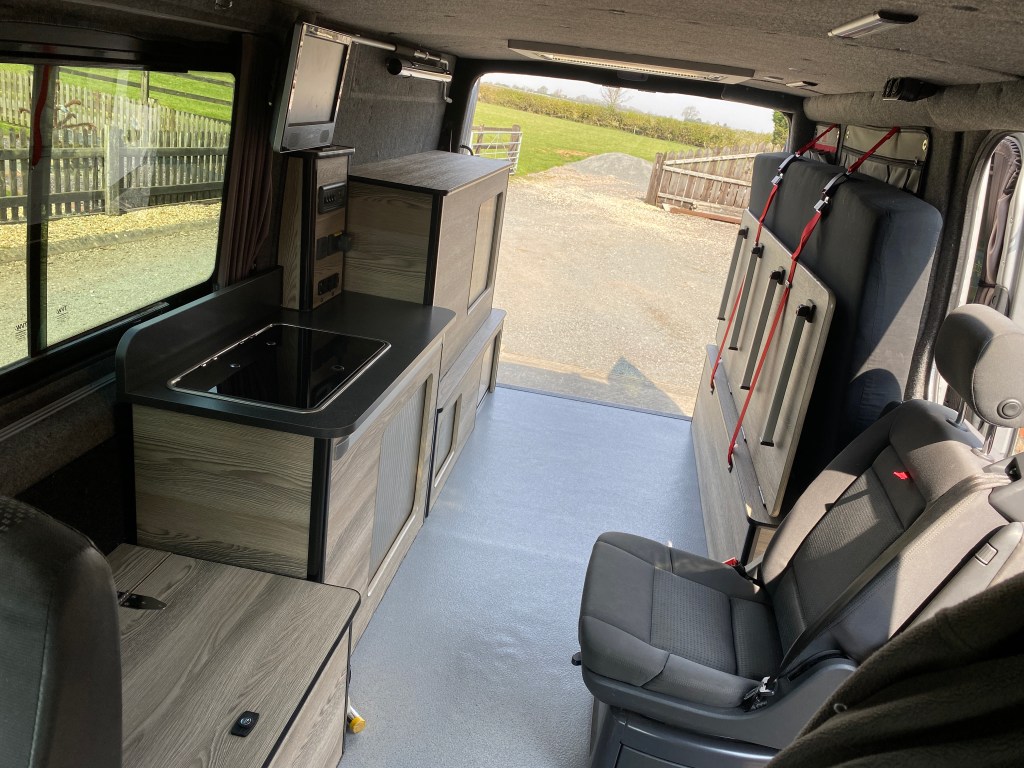
With all the cabinets made and fitted, the main electrics are in place it was time to fit the main control unit and power sockets somewhere. I had originally intended to fit them on the front of the kitchen unit but after looking at some other conversions I decided to build a dedicated console on the rear wall to the right hand side of the worktop thus keeping any trailing wires to a minimum.
This console would house the control unit, sockets for the inverter and mains hook up, 12 volt and USB sockets on the front and a pair of dedicated 12 volt sockets on top for the TV and Aerial amplifier.
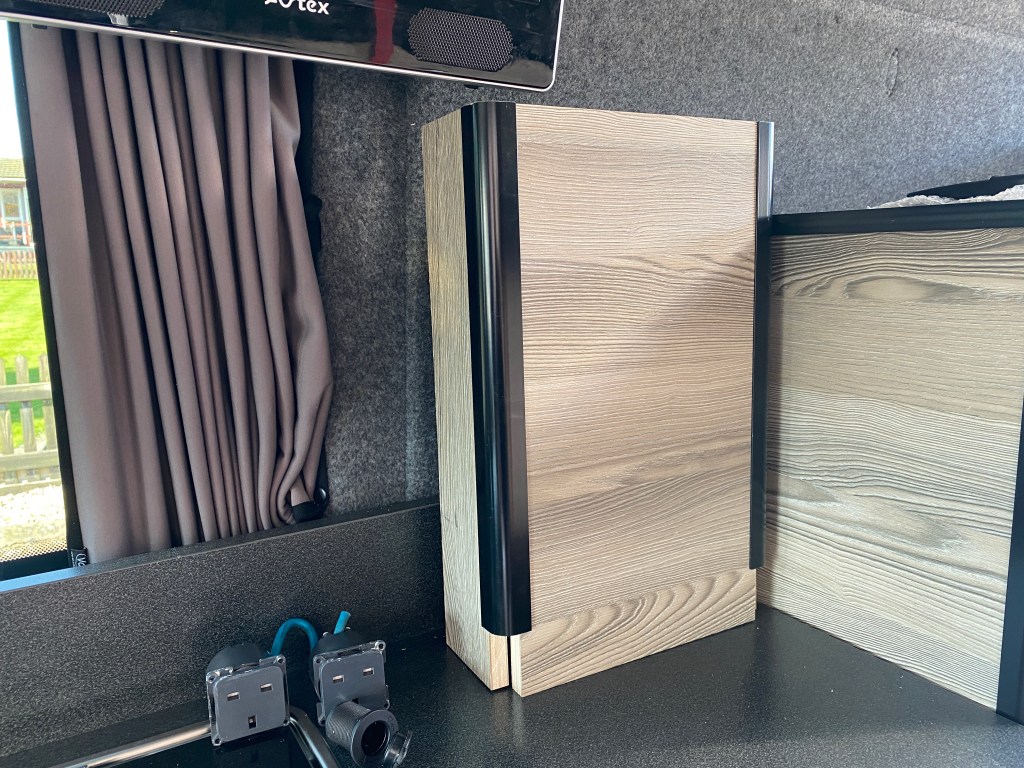
With the size and shape sorted I made the unit up, again nothing gets screwed together until I’m happy that it will all work out, that way its easy to modify it as you go along.
Once I was happy with the shape it was hole cutting time, at least if mistakes are made here I’ve plenty of off cuts to use up, but luckily it worked out first time.
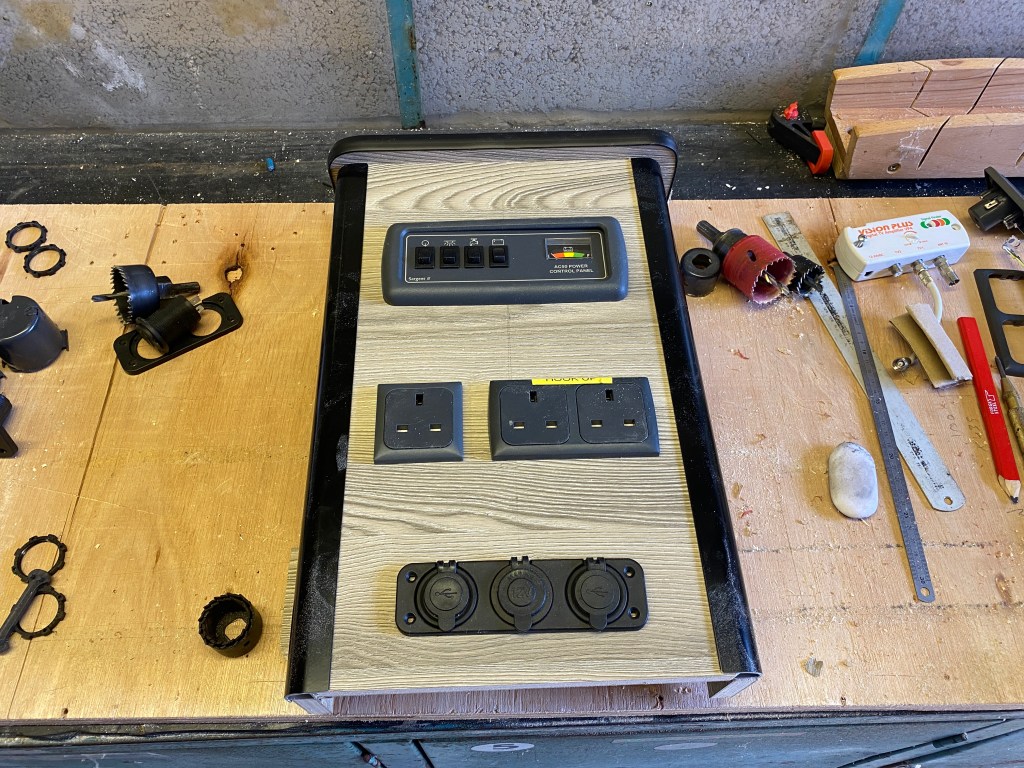
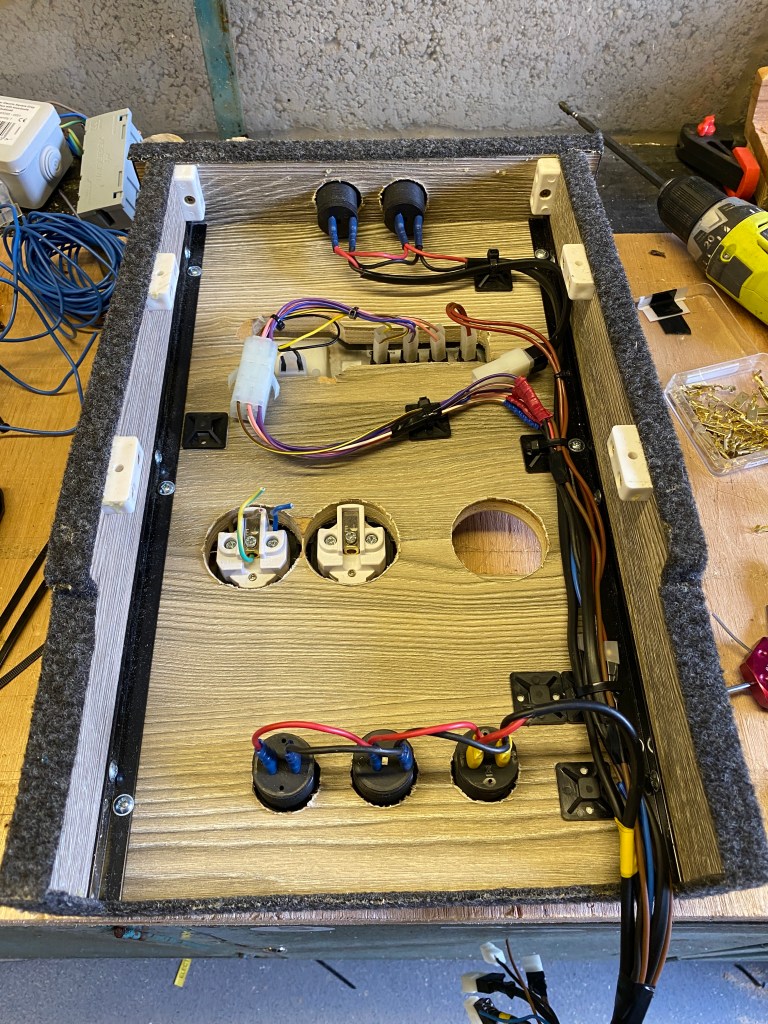
With the holes all cut all the bits fitted in place the unit was fastened together, the carpet on the edges are there to stop any rattles or squeaks when the van is being driven due to the flexing of the body. Wiring up the control unit is pretty straight forward, theres a master switch that operates a relay on the main fuse box that isolates most off the auxiliary side of the system, the night heater and fridge are the only things that stay permanently live, a light switch (self explanatory) and a switch for the water pump to the sink so that it doesn’t accidentally get left on and flood the van. The auxiliary 12 volt sockets are all wired in series as non are going to take a huge loading and every thing connects to the wiring loom in the lower cabinet for easy access or alteration at a later date, the whole lot can just be unplugged and removed from there without disturbing anything else.
Next on the list was to fit the sink in properly, you may remember me saying that it was sat 6mm too high, well after a really informative chat with a highly experienced joiner ( eldest brother ), the idea was to use a hole saw to cut down into the worktop the 6mm needed and then use a multi tool to cut out the waste wood, I had to fill in one side of the existing hole for the pilot drill of the hole saw to get a grip into, the other side had enough meat on it to work OK.
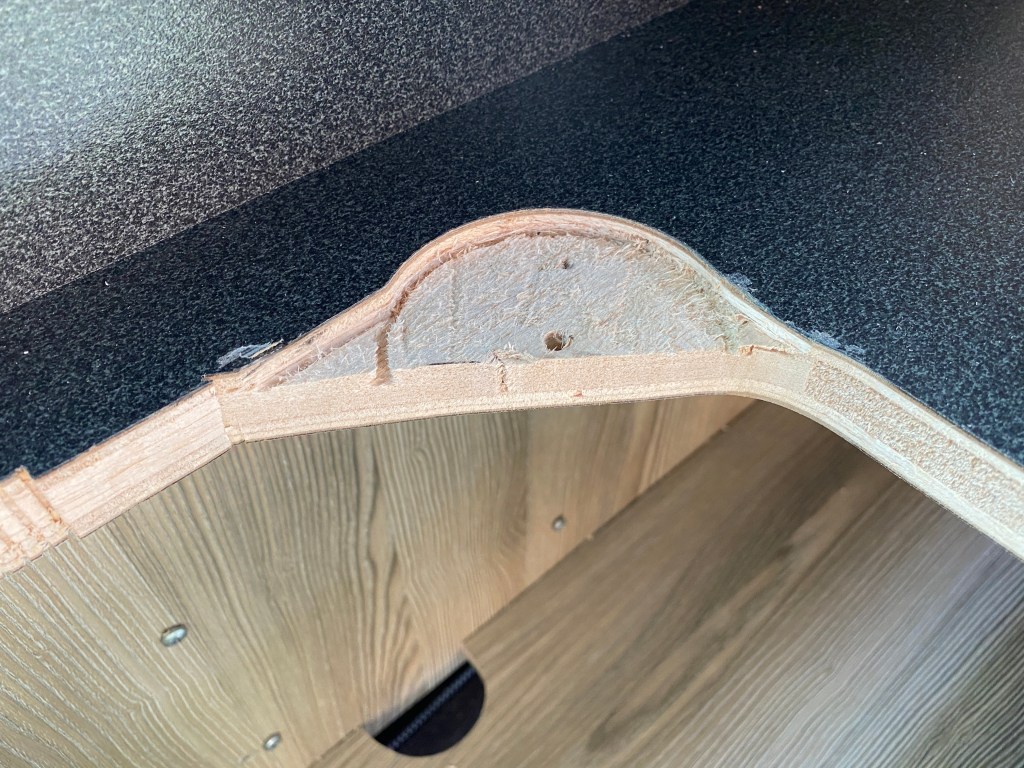


With the hole trimmed to the right depth and sink/hob sat in the hole it looks so much better, I’m still waiting for the gear to plumb it in so for now its just sat in place, it will eventually get screwed in and with a seal placed between the hob and cabinet.
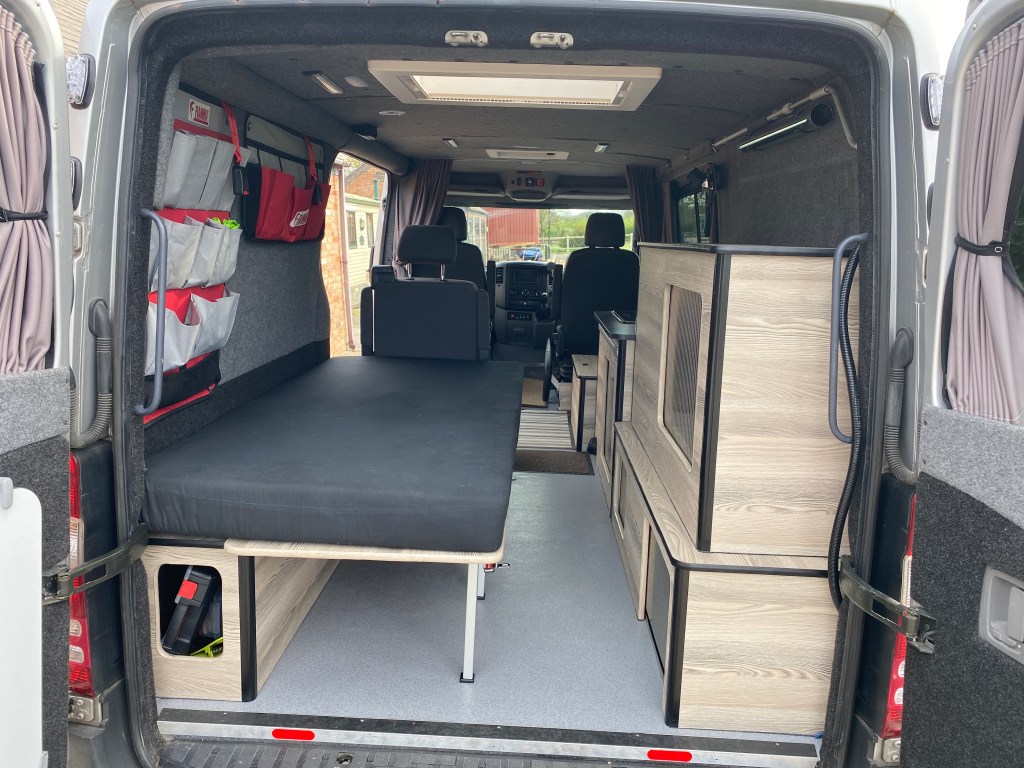
One job that was started but not finished was the bed, when you last saw it, it was just stood up against the side of the van, well the goodies arrived mid week to get it fitted, first to go on were the four T-hinges so that it folds up and down (obviously). To stop it just flopping onto the floor I had various ideas but the simplest seemed to be legs that fold flat against the bed when folded up. So 2 were ordered and promptly delivered. But there was a problem, because the plywood base is only 15mm thick and six feet long it flexes quite a bit, the side with the hinges on is OK as that rests on the edge of the base cabinet, but the other side would need more support, especially given my “not so racing snake figure”. So two more legs were duly ordered and then these were fitted directly opposite the hinges
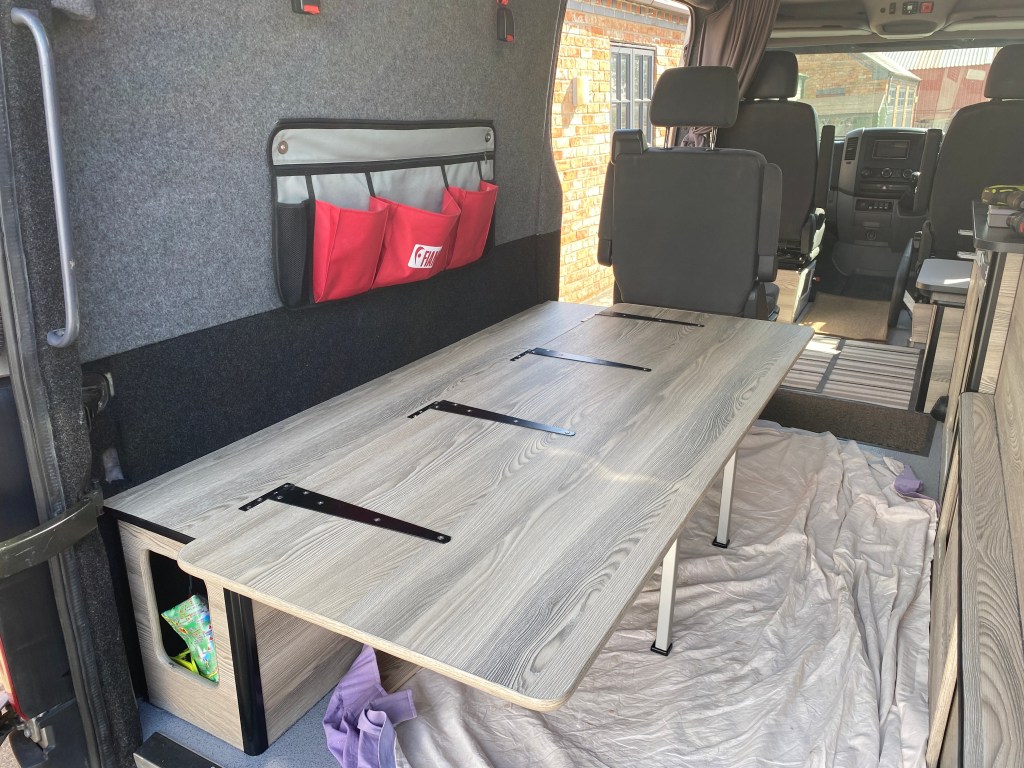
The above pic shows the two legs in place awaiting the other pair to arrive, these were originally going to be spaced further apart.


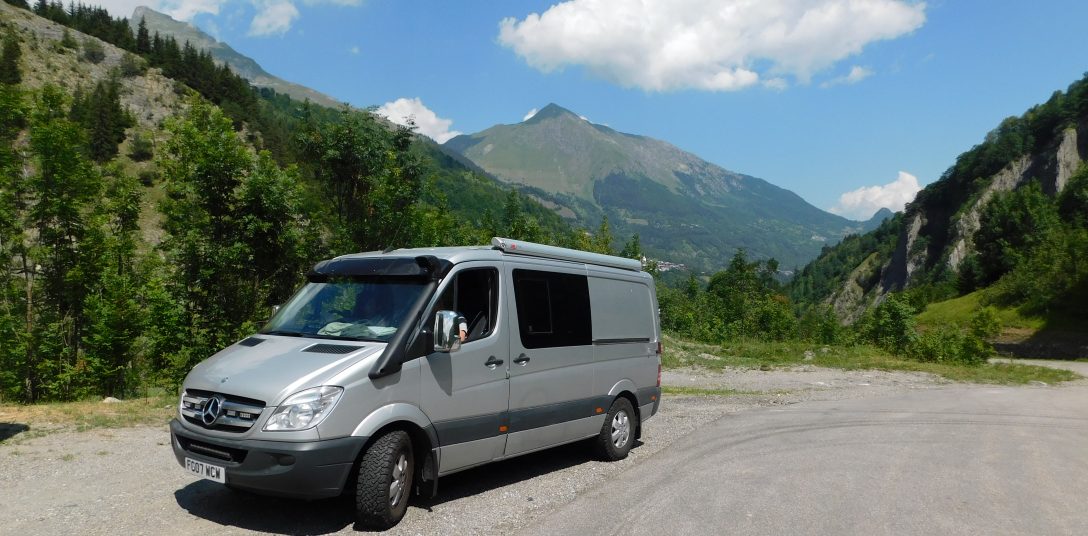
When I decided to do a re-fit on the van I wanted to be able to use it everyday to carry stuff as well as use it as a camper so that was when the idea for a fold up bed was dreamt up, there were quite a few conversion that used this idea but a lot of them were either too bulky, ugly or they never allowed for the fact that your bedding needs to stay in place on the mattress so that its a two second job to lower the bed, climb in and go to sleep, essential when your wanting to clock up the miles on a road trip.
A few other jobs done be can seen in the pics, extra storage is via the Fiamma organisers on the wall and the table is now stored on one of the rear doors, with the post and awning wind out handle stored on the other wall.
Well thats all for now folks, its the weekend, its going to be hot and sunny, and were still in lockdown so we cant go anywhere to try out the van. Only a couple of small jobs left to do when the bits arrive, but its been a busy couple of months to get this far, I’ve done the upgrades that were needed after last years trip, hopefully this will be the last time I mess with the interior of the van as its been changed about three times so far.
Unfortunately due to Covid-19 my plans for the road trip in June are cancelled, we’ll just have to wait and see if I can get away later in the year but that would probably just be somewhere in the UK.
Stay safe people.

You’ve done a great job! Looks fab!!
LikeLike
Thanks, its been a blast !! I’m pleased you like the blog.
LikeLike