Hopefully during the summer you will follow me on my journey from my home town of Lincoln (UK) through Europe up to the Scandinavian countries then back down passing through the Baltic states and Poland into Germany in time to attend the Abenteuer and Allrad show at Bad Kissingen around the 20th to 24th June 2019.
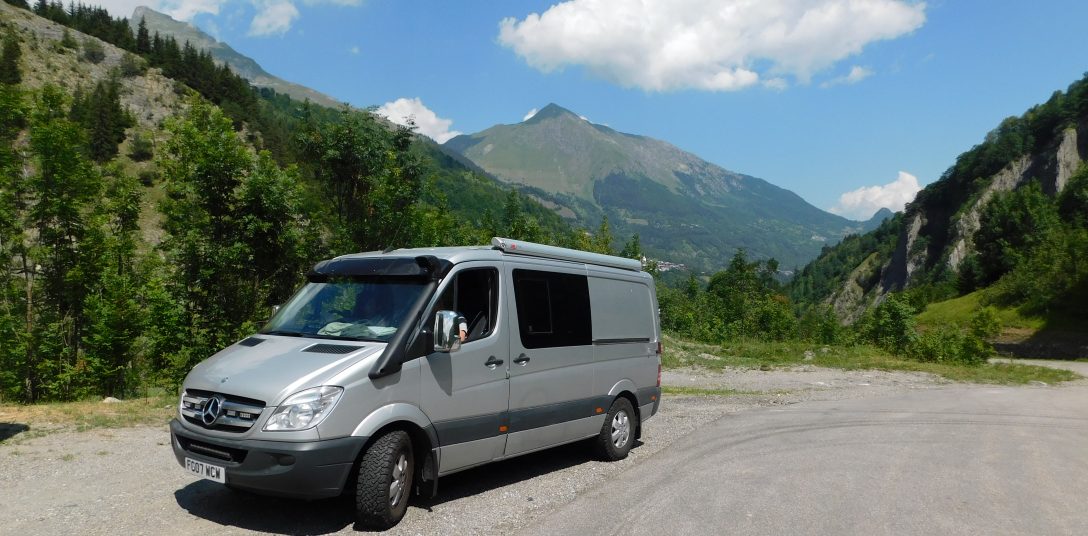
I will be tackling this mammoth journey alone in my prized Mercedes Sprinter camper, its already had a few forays in to France and Germany in the last few years but nothing on this scale.
This is my first attempt at writing a Blog about my travels so don’t be expecting an all singing all dancing site, it was a spur of the moment idea so that friends and family can follow my progress and it also gives me a chance to record the trip for posterity. Please feel free to comment on the blog layout/content or the journey itself as its all a steep learning curve for me using all this new fandangled technology.
The route planning for the trip was literally done in a couple of evenings whilst consuming immeasurable amounts of real ale, this lead to it going from a fortnight in Norway to a prolonged trip of up to around 6000 miles. Searching Google for what interesting sites were not to be missed I realised it would take a year or more to see all the best places so the list was whittled down to a few that interested me and would be on a route that took in a variety of landscapes.
The time I’ve allowed is enough for me to travel 5 days out of 7, so that I can alter the route whilst travelling or lay up in a beautiful place for a couple of days to get in some rest and relaxation. I plan on wild camping for a few days then stop overnight in a proper campsite to allow me to refresh the van and use the WiFi to update this blog.
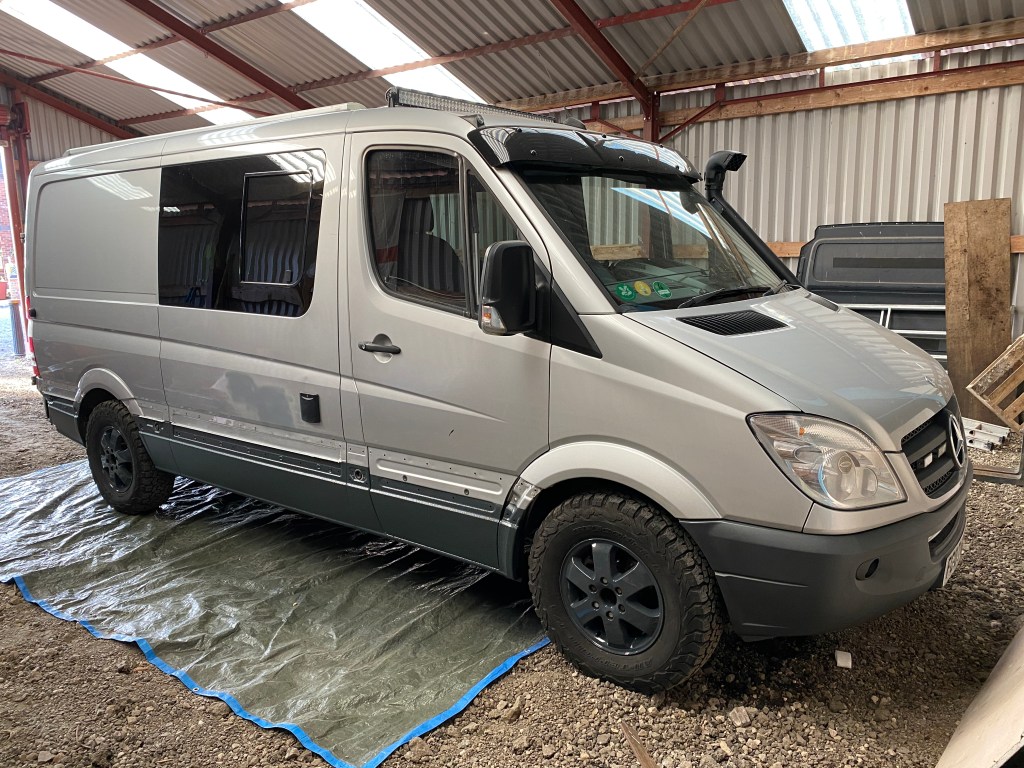
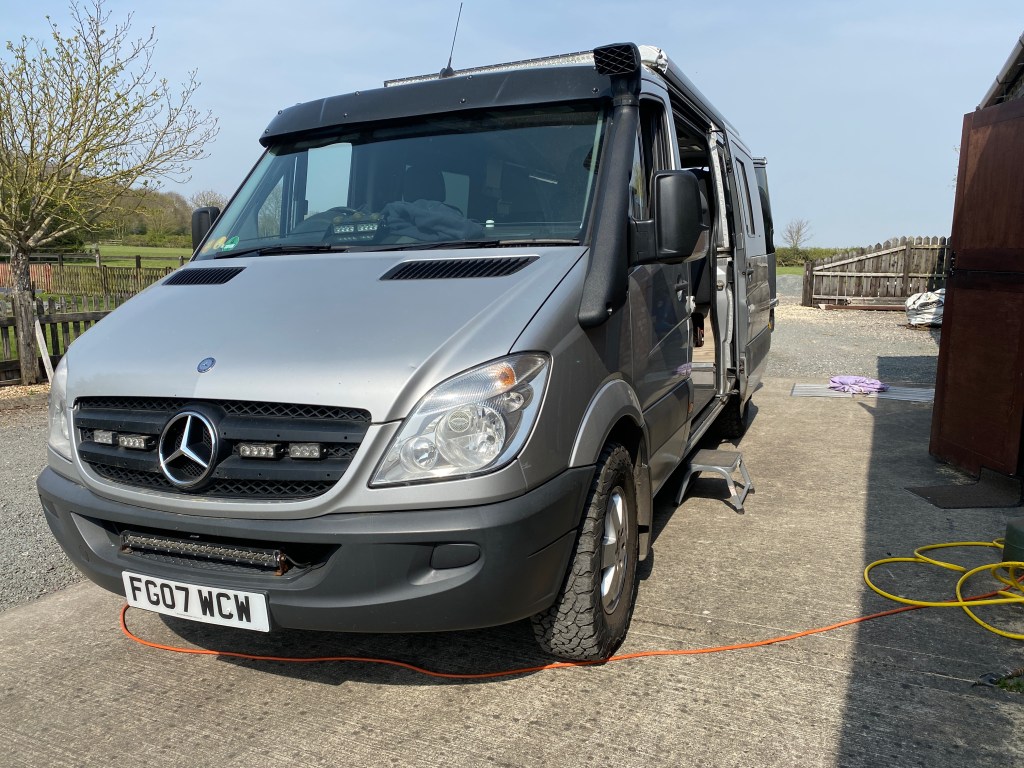
It is with a heavy heart I finally say goodbye to my beloved van. After all the blood, sweat and tears that went into converting it over the last 6 years it was finally time to let it go and move onto pastures new.
It has been a tremendous experience to buy a plain old van and then convert it to a truly one off adventure van, it may not have been to most peoples taste but it certainly stood out of the crowd, and you could never lose it in a supermarket carpark.
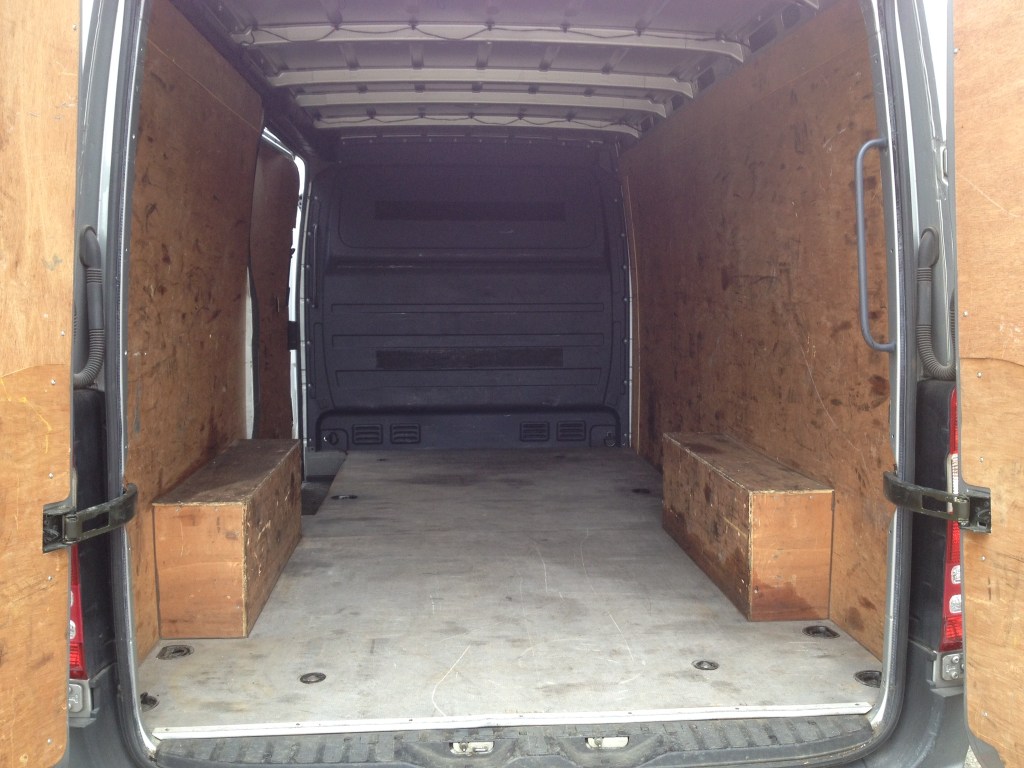
The van as it was the first day I saw it.Bare canvas ready to be transformed.I eventually ended up with the “Swamper” look.
I never had the intension of buying a small van like this but after seeing how bad a condition most of the other vans in my price range were I was quite surprised how tidy this one was, and it was the only one I had seen that came with Air-con and alloy wheels.
The first few months were taken up with doing the basics like removing the bulkhead, fitting a single passenger seat, insulating every square inch of bare metal and boarding out with carpet lined plywood.
Insulation going in. Getting there with the boarding out.The only job I contracted out was to fit the side and rear tinted windows, it worked out just as cheap to get a specialist in to do it rather than do it myself.
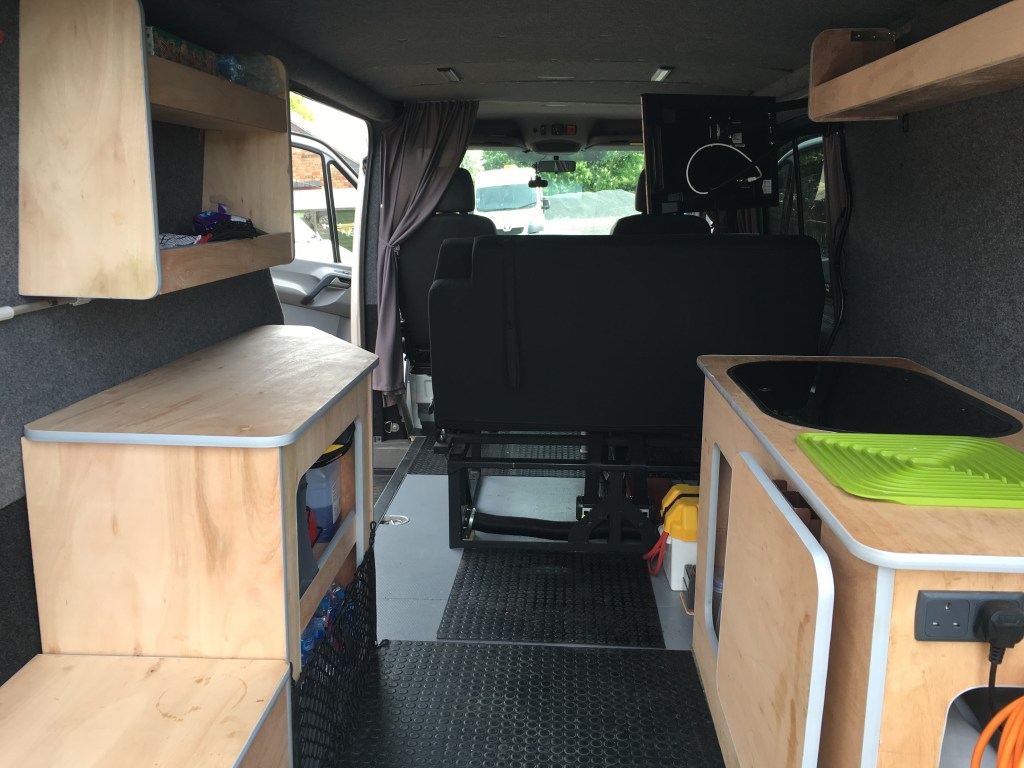
The interior layout has probably had more changes than the government does U-turns.
The original layout.
2nd layout, as it was for the big European trip.And finally as it was when it was sold.
Of course there were a thousand and one things done to it over those 6 years. full off grid electrical system, better stereo, cruise control added, and all the little accessories that add a bit of luxury and convenience.
As with any project there were highs and lows, there were times I thought it would never be finished, only to take a trip and then start changing the interior all over again and the times when the credit card bill looked like the national debt of a small country.
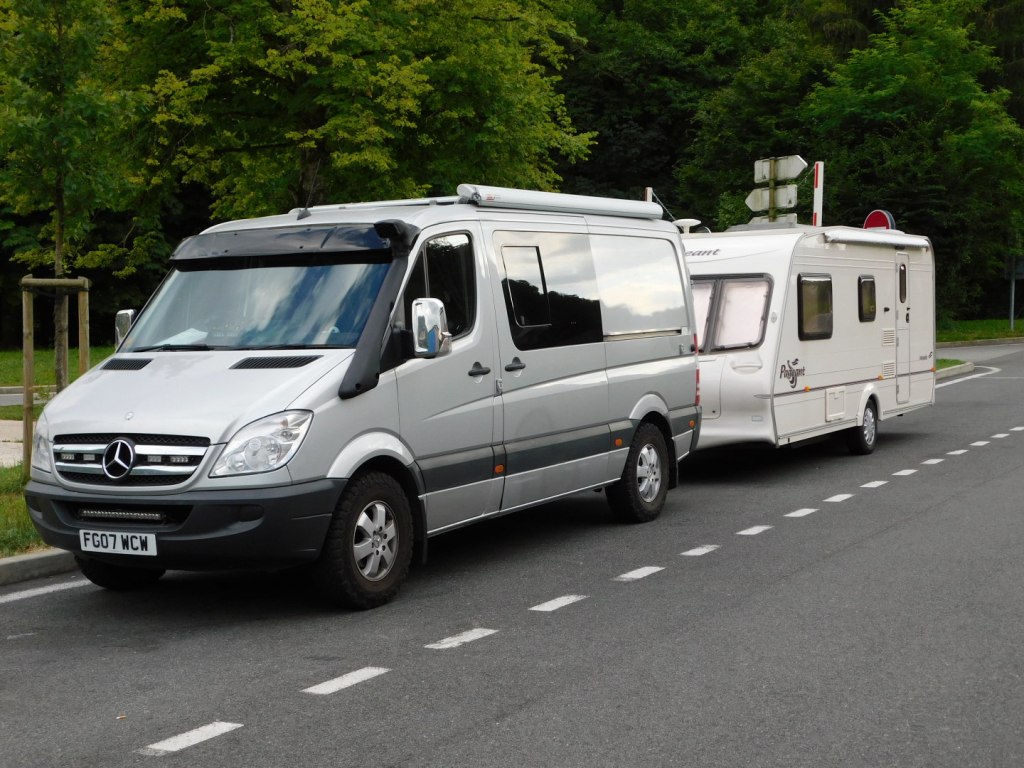
But for every low there were some really great highs, trips to Scotland, Cornwall, the Lake District and all the trips into Europe, like the time we took the caravan up to the French Alps.
Stopping for a break before hitting the Alps.
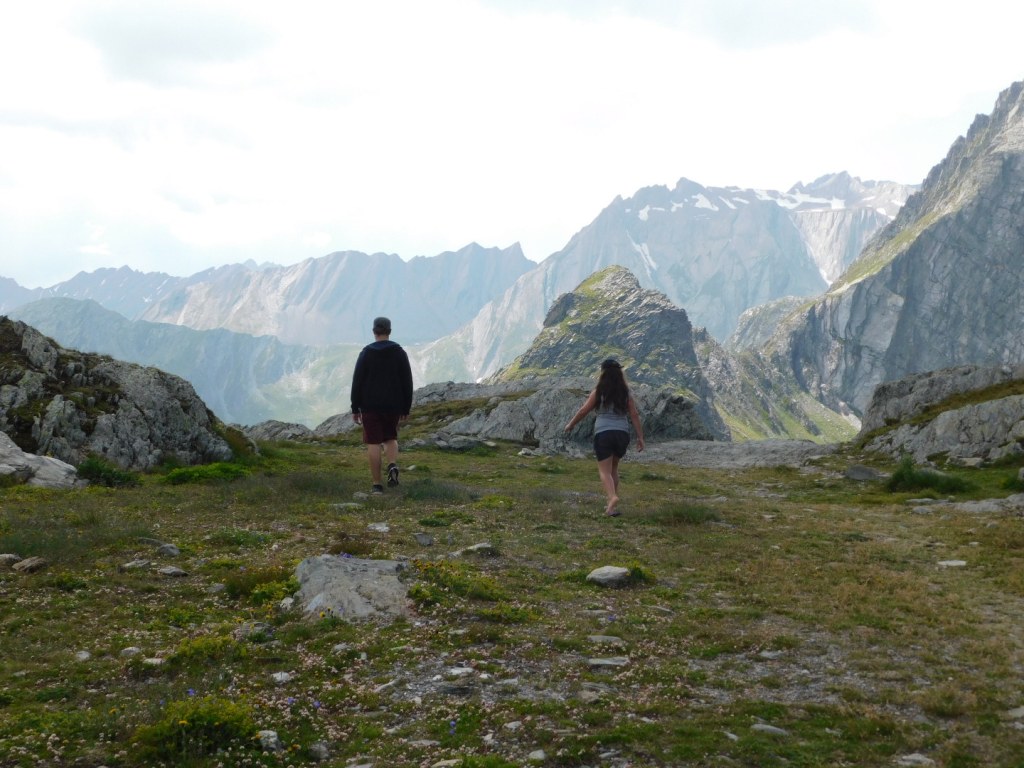
Caravan dropped on site and heading off to explore the hills.
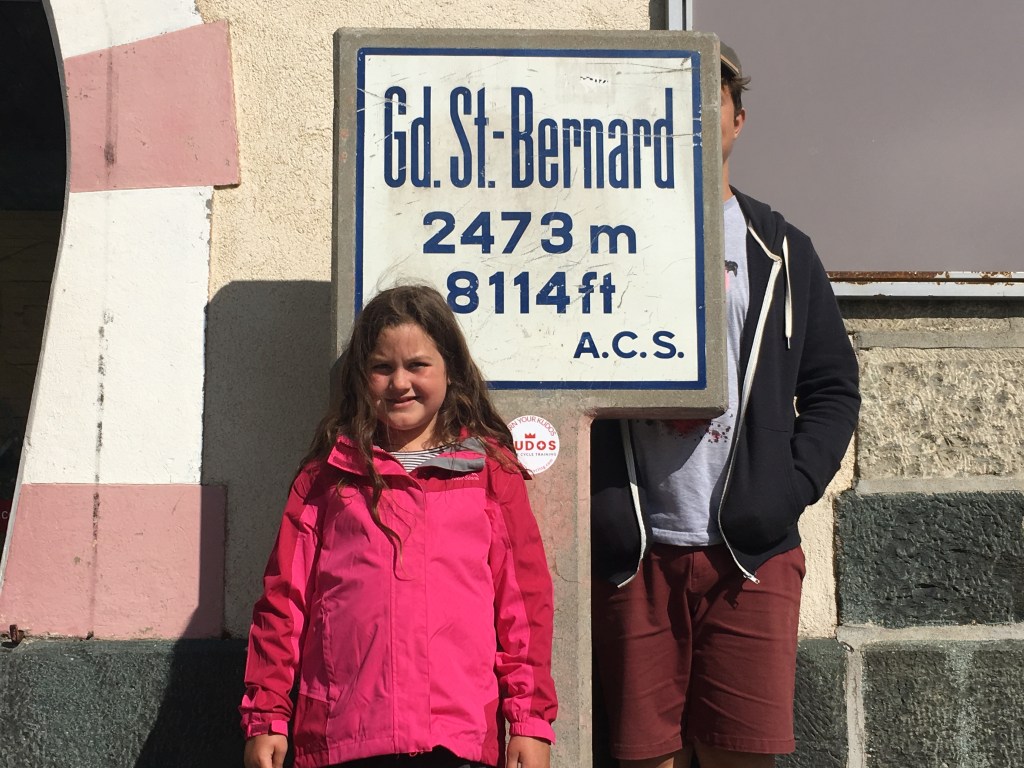
The time we didn’t take the tunnel and drove around Mont Blanc into Switzerland and Italy and finally back to the campsite, 12 hours and about 250 miles but what great views.
Great St Bernard Pass.
The little trip to Germany.
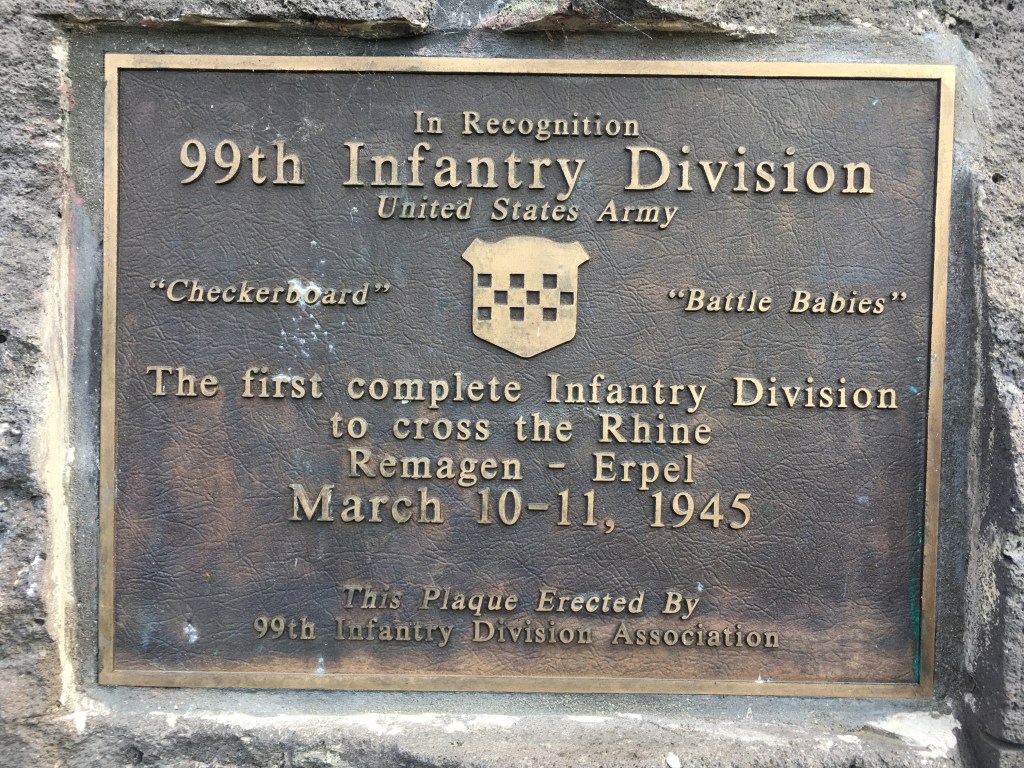
On the way to Bad Kissengen Allrad Show. The museum at Remagen, Germany, the first bridge over the Rhine to be captured intact by the Allies in 1945.The Rhine, you can just see the remaining turrets of the bridge on the left of the pic.
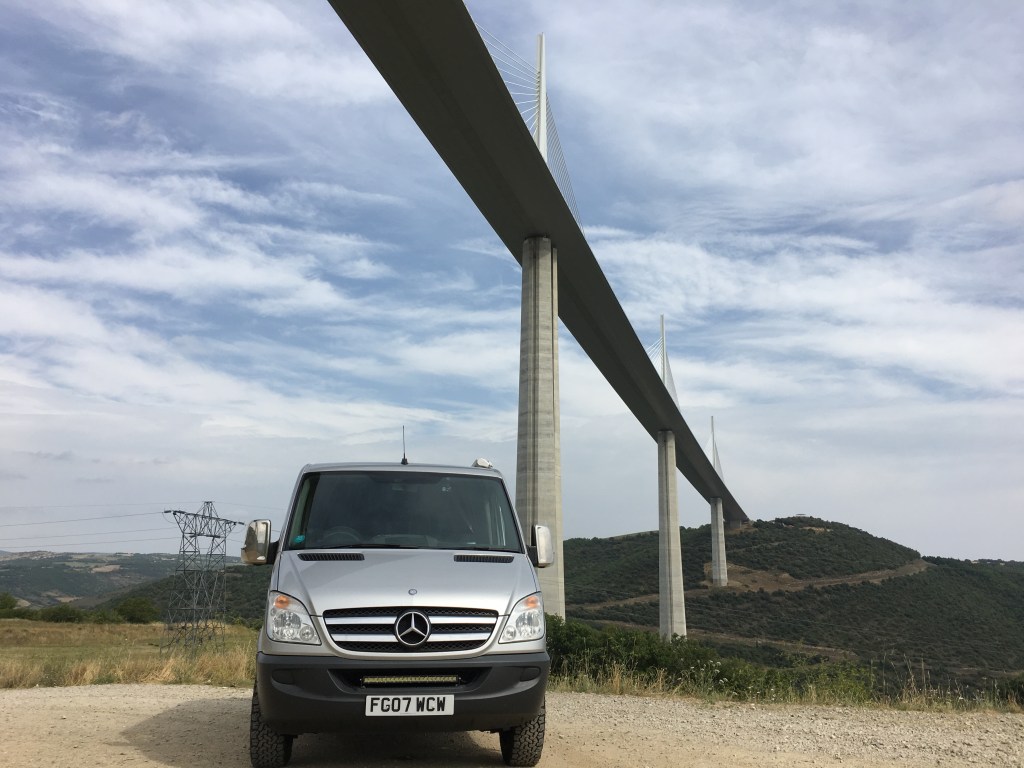
The trip to the Loire valley and Millau Viaduct.
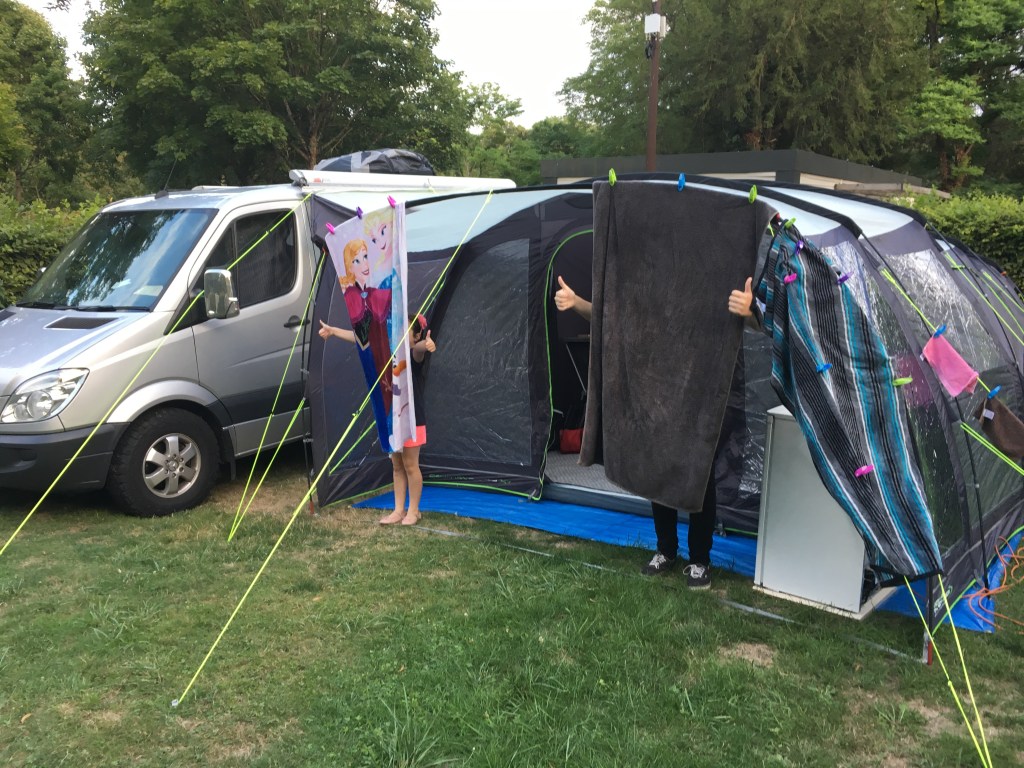
Coutres, Loire. The kids never did camping under canvas again after that. Too cold at night, poor souls. Saumur, Loire. Millau Viaduct, unbelievable bit of engineering.
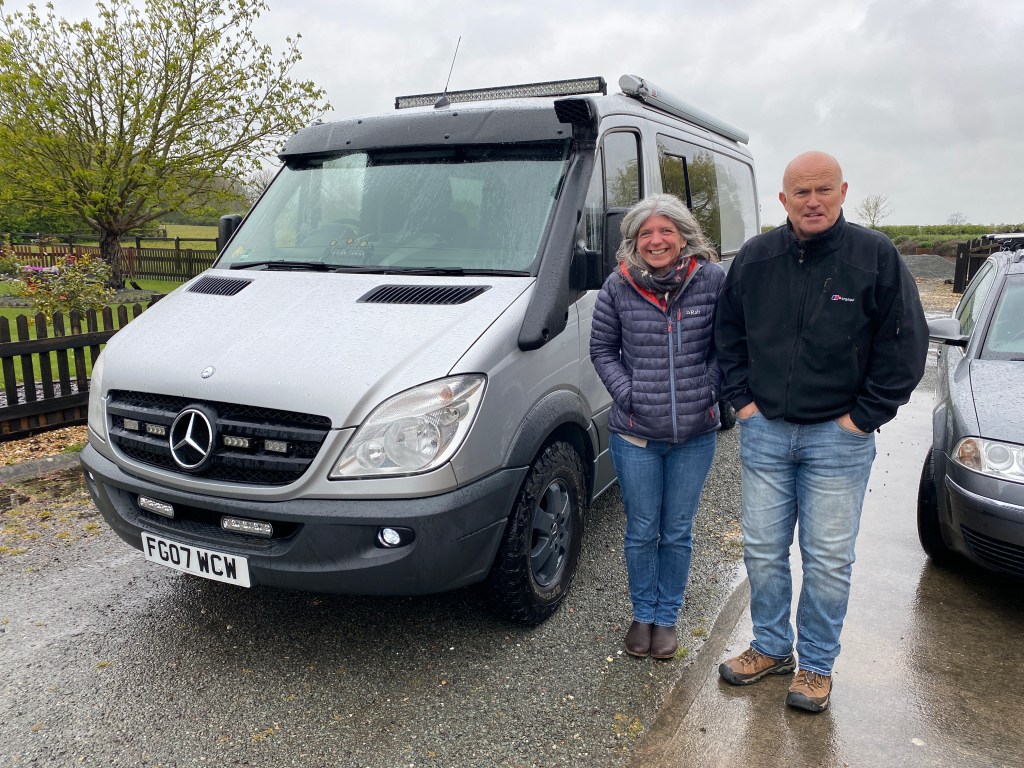
So this is the last picture I have of the van, along with its new owners, unfortunately even that didn’t go without a little SNAFU, but thankfully Andy was very very patient and the problem got resolved in the end.
I wish them both all the best and hope they have some great trips and enjoy it as much as myself and the kids have.
As for the future, I’ll wait a while before getting another van so it’s looking like for the next trip I’ll be using my car and will be when all the restrictions forced onto us by Covid are lifted, possibly this winter, maybe next summer, but rest assured I’ll still do the blog.
So please, if you’ve enjoyed reading my blog, like it, leave a comment and then tell all your friends about it.
Happy New Year to you all. Hope you’ve all recovered from the New year celebrations, it’s been a strange year, unfortunately it looks like it will continue for some time yet.
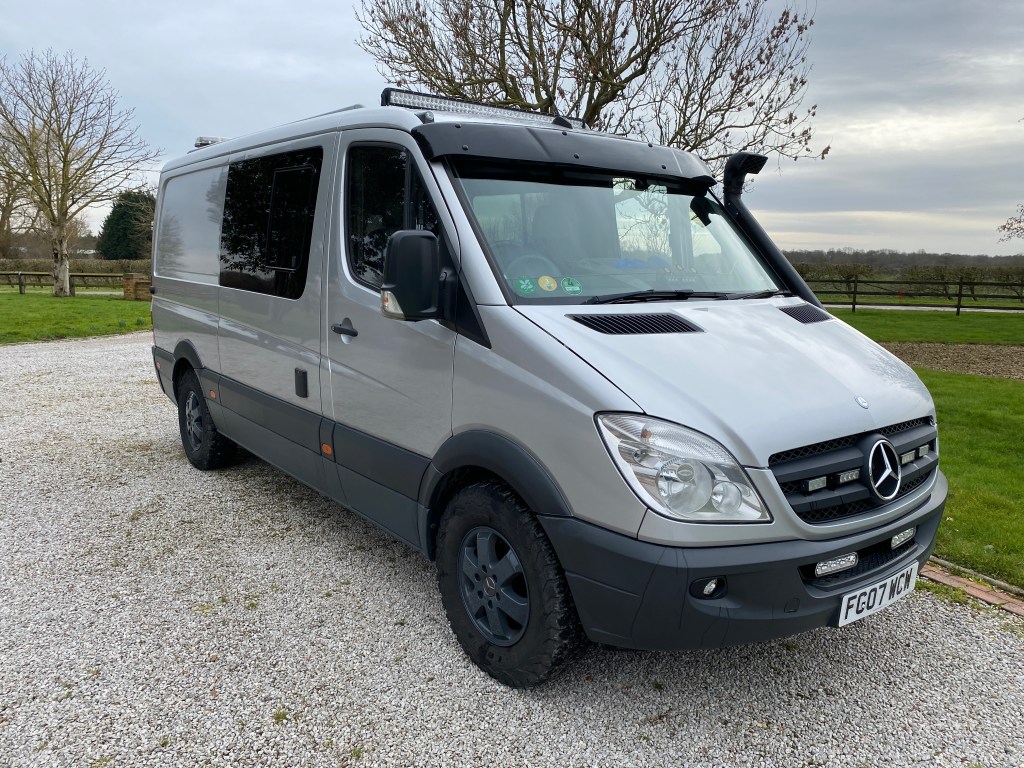
It’s been a while since I last posted here mainly due to having a heavy workload after Lockdown 1, I’ve managed to get a few more jobs done on the van during what little spare time I’ve had. I seem to have got the sequences all arse about face as the last job I had done was to have the exterior partially repainted.
Before preparing the van for the paintshop I had a couple of jobs to do, one was fitting a pair of Daytime Running Lights (DRL’s), these are a safety item fitted to all new cars and they come on with the engine running , these aftermarket ones also dim when the headlights are switched on so as to not dazzle other drivers. I had seen a friend fit the same ones into his motorhome and thought it would be a good addition to the van.
Smart new DRL’s fitted.
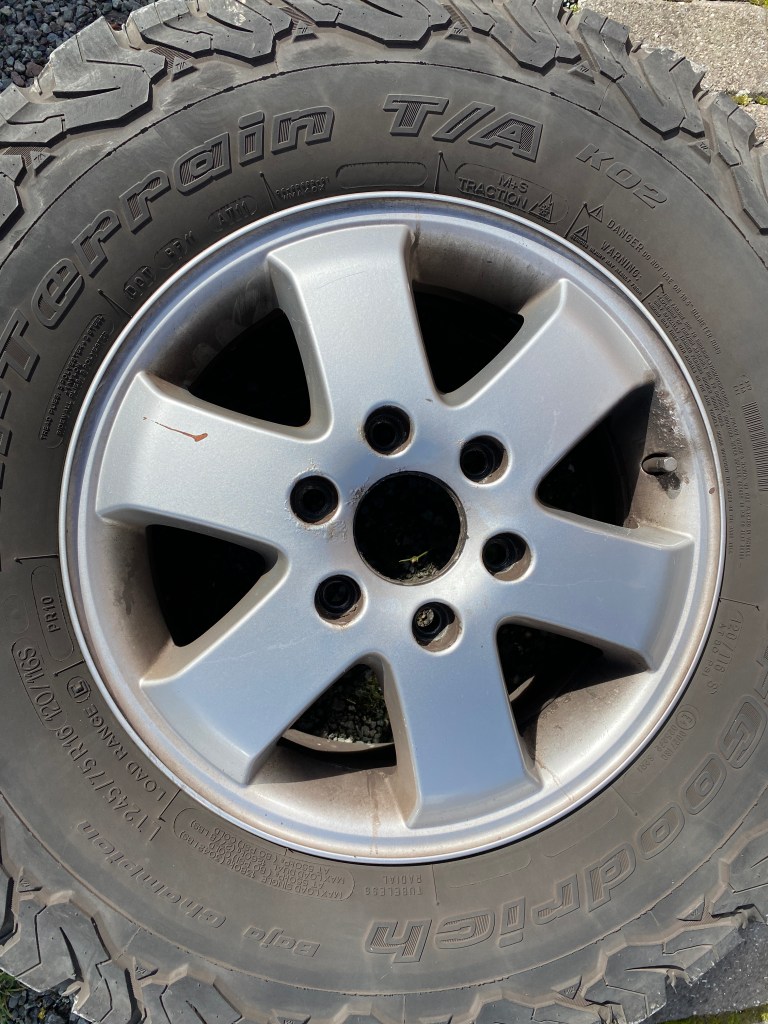
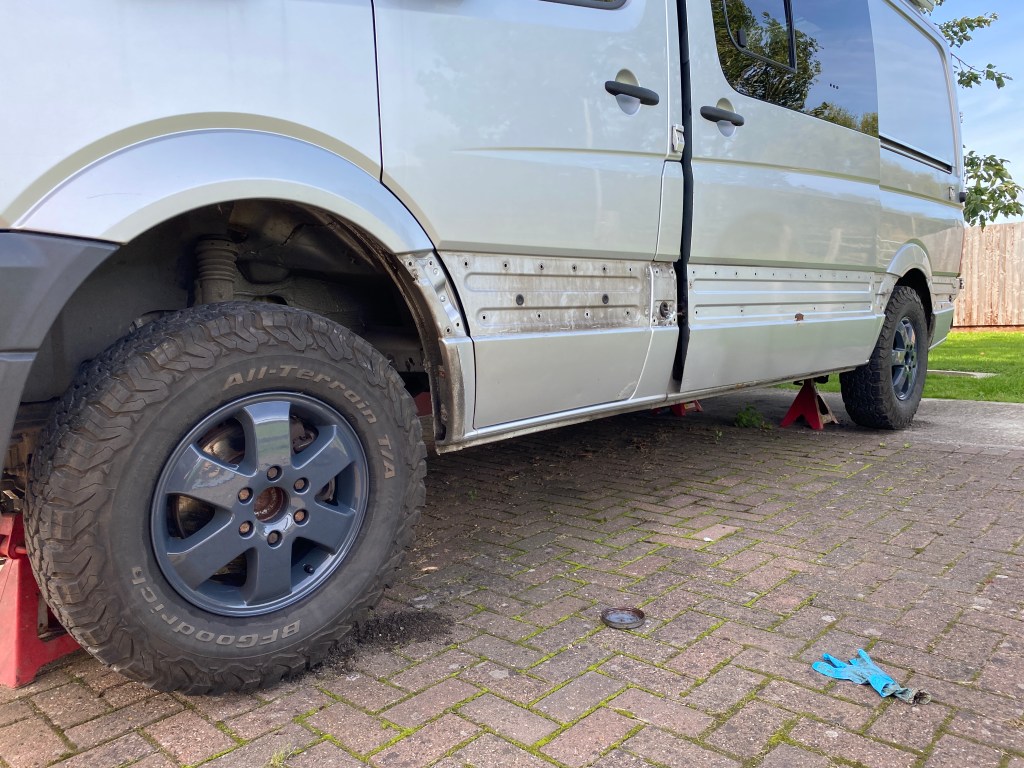
Next on the list was to sort the alloy wheels out as they were starting to look a bit scruffy, although not actually damaged at all the alloy was starting to corrode, after looking at what was involved with getting them painted myself I decided to get a local bodyshop to refurbish them, I wasn’t too happy with what it was going to cost but thought they would certainly look better than what I could achieve. I was right, when I went to collect them after they had been repainted I couldn’t believe they were the same wheels, the finish on them was incredible, I had gone for Anthracite as the colour and what a really deep shine they had got, there was no sign of the corrosion that was there before hand.
One of the wheels with some of the corrosion visible near the centre.The new wheels being fitted, so pleased with them
After fitting the wheels it really showed up how bad the body work was getting so it was decided to repair the rust spots and respray the lower part of the van in Anthracite to match the wheels, but this would be done with “Raptor Liner” truck bed liner paint, its a tough spray on liner usually used for the bed of a pick-up. It’s possible to buy the Raptor paint and add a tint of the colour you want so that it’s totally customisable.
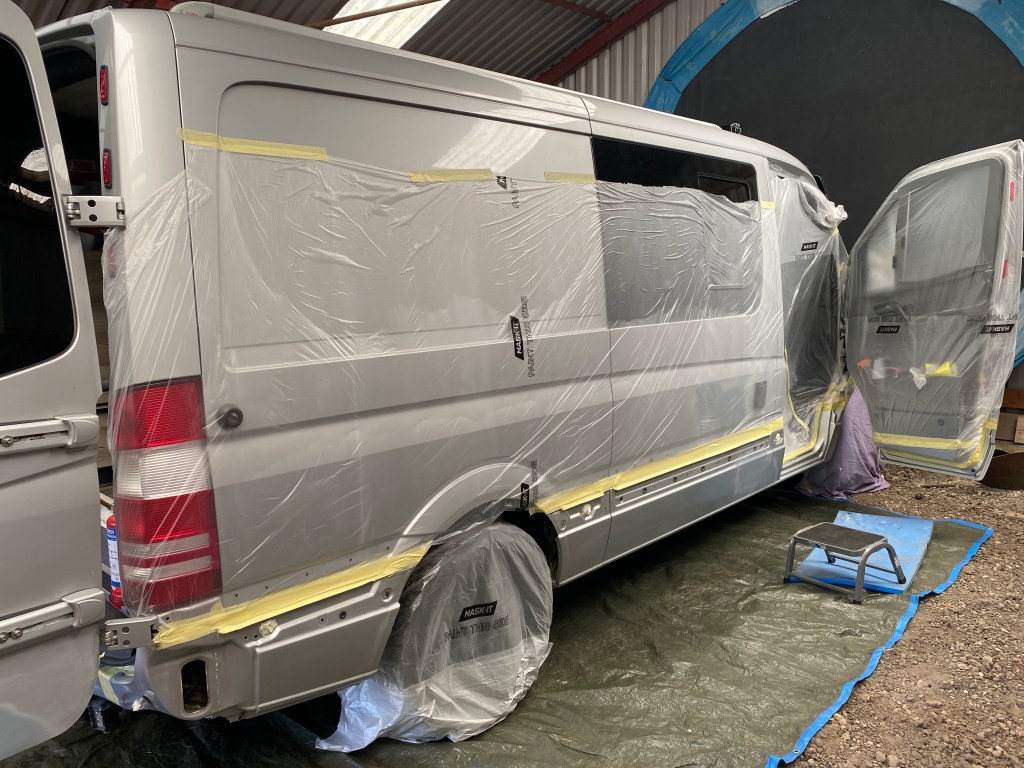
The first thing to do was strip off the lower trim panels and grind out the rust spots, these were then treated with Jenolite on the bare metal, then fillered and primer applied. I had bought all the gear to spray it myself and after watching a couple of Youtube video’s I was confident it would be OK, the worst part was masking off the rest of the van to avoid overspray, think I overdid that part !!
All the rust spots filled. Masking off ready for the Raptor LinerThe Anthracite matches well with the Silver. Just the silver to get sprayed now.
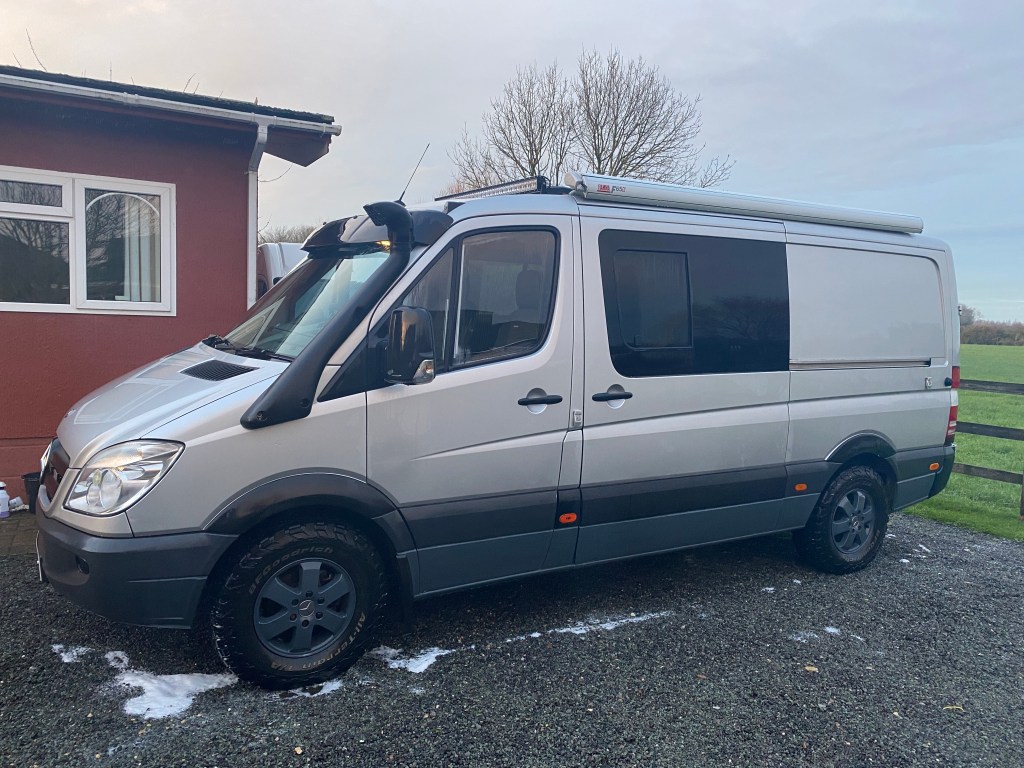
Once the Raptor liner had cured it was time to sort out the main panels which would be remaining silver, as winter was drawing in and with no workshop that had any heat in it for curing the paint I got the bodyshop that did the wheels to do the painting, not a cheap option but they once again did a great job and I got the van back within a week, I am really pleased with the finished results and there was no way I could have got such a good finish myself.
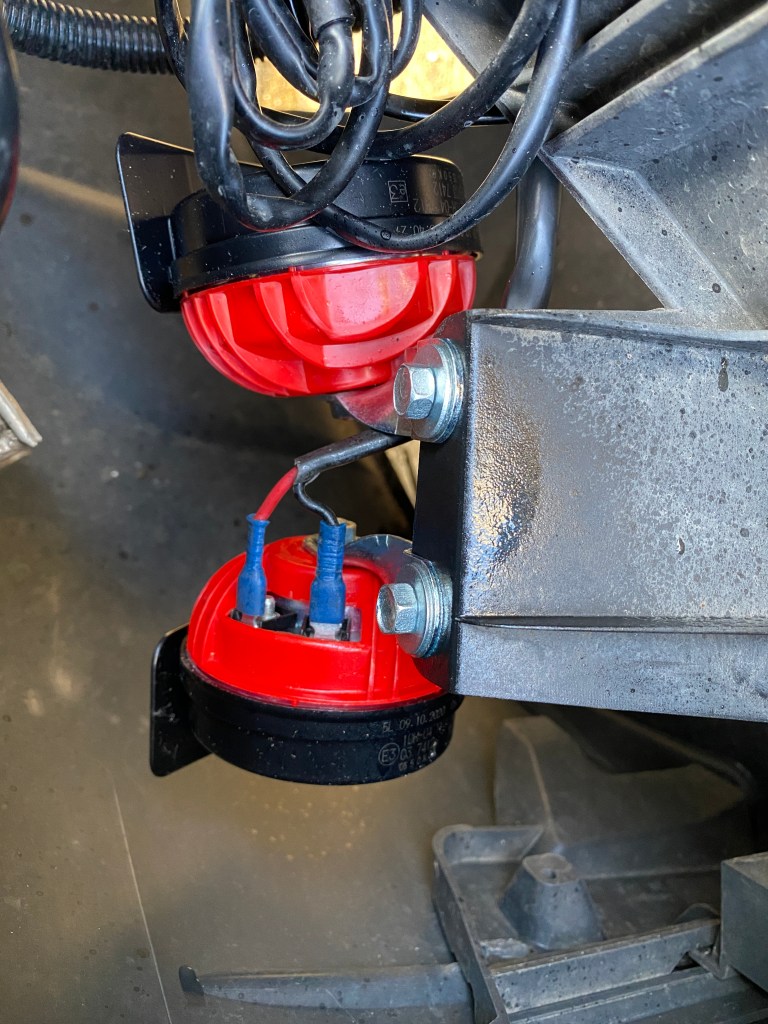
The finished item, looking good, and just enough to be different from most other vans. A little upgrade on the horn front, A pair of Fiamm horns replace the original ones that were an embarrassment
Thats about it for now, there’s still a few small jobs to do but mainly I’m just waiting for the country to get back to normal, hopefully before June so that I can once again get away to sunnier climes for a while.
Another week has gone by and the list of jobs to do is getting less and less, but there’s always that one job that starts out as a supposedly 5 minute fix that turns into a major repair.
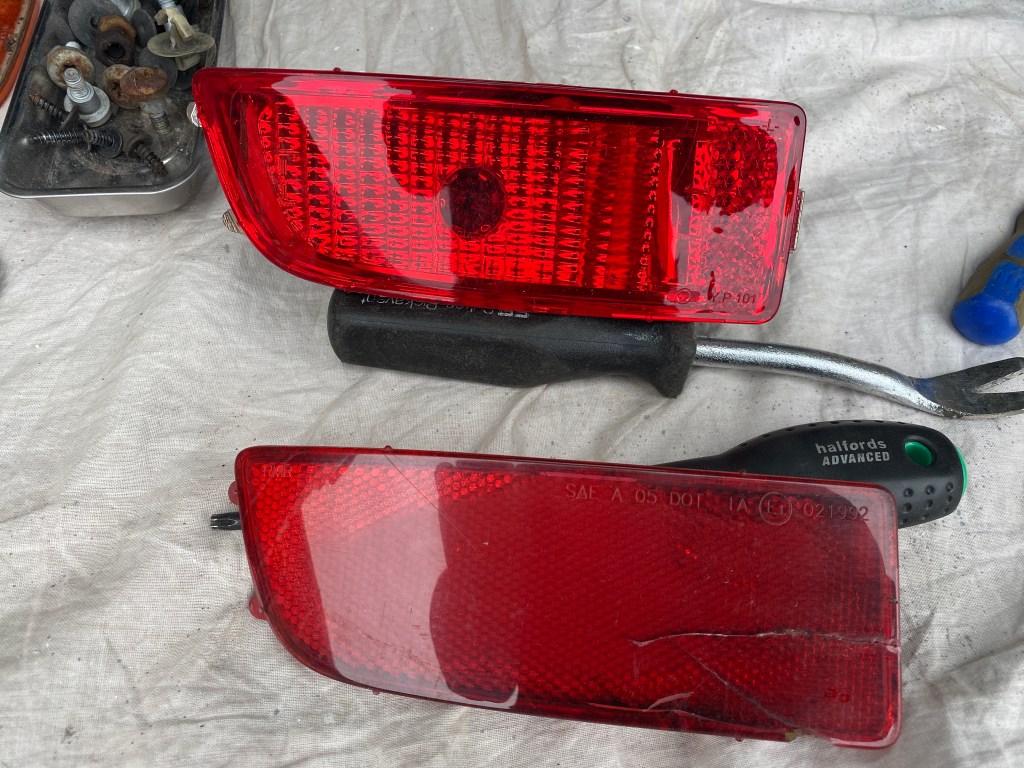
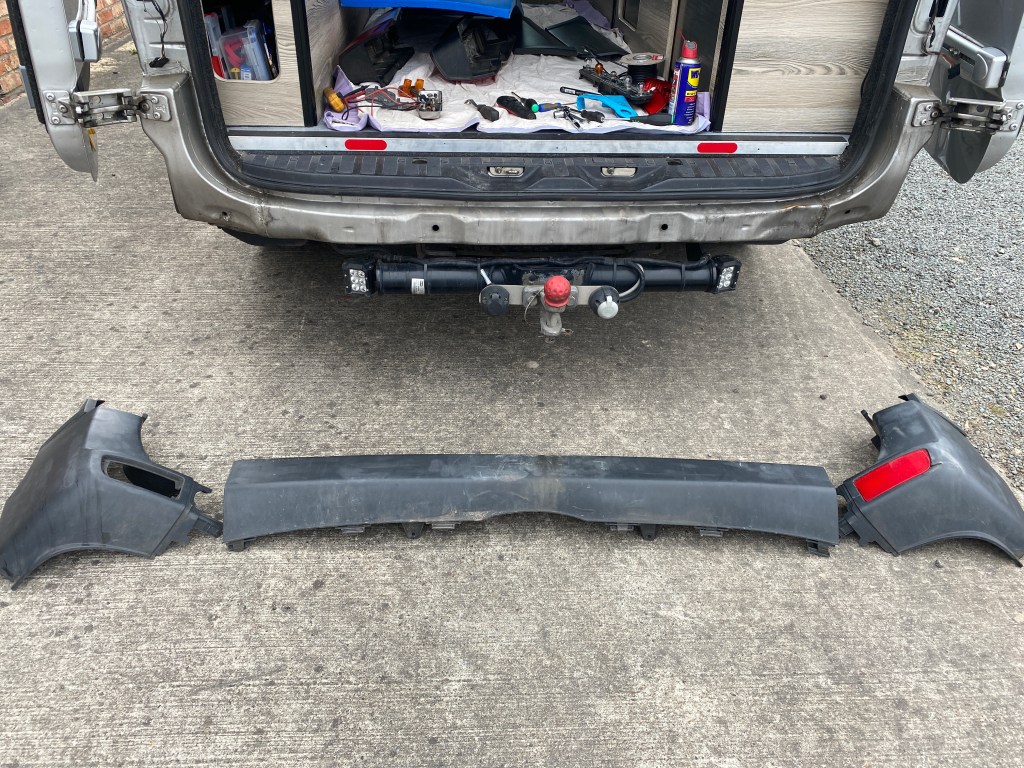
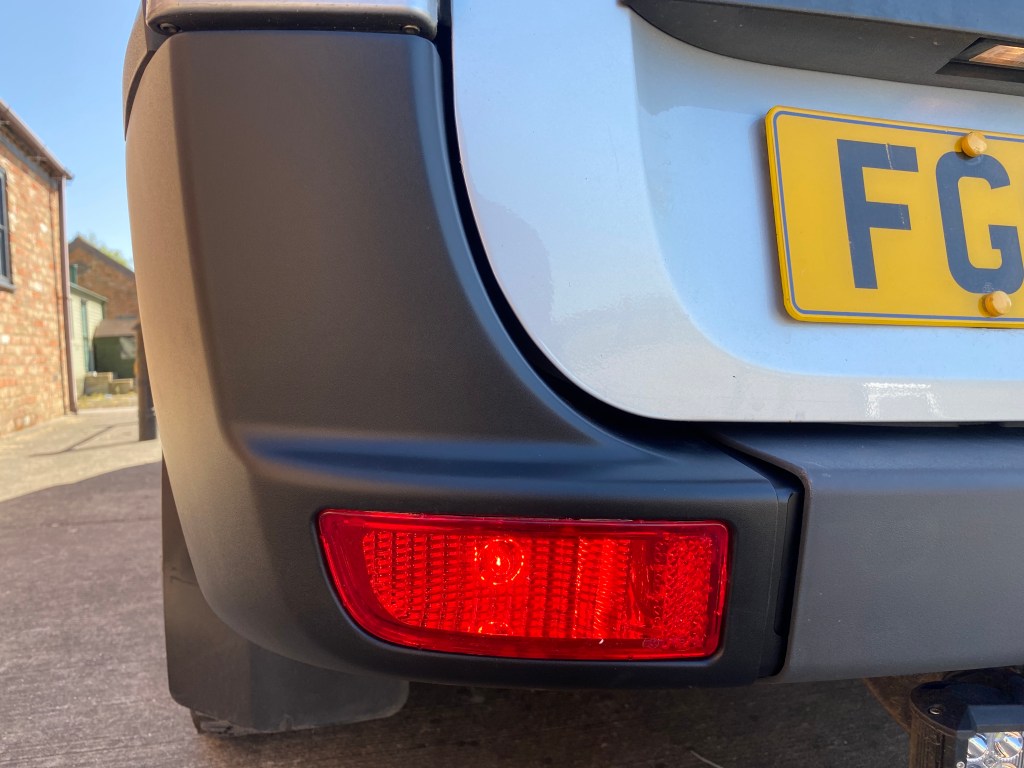
I had a pair of side lights to fit into the rear bumper corners in place of the standard reflectors, easy enough, just drop some wiring down from the rear lights and clip in the new lights…
Out with the old, in with the new.
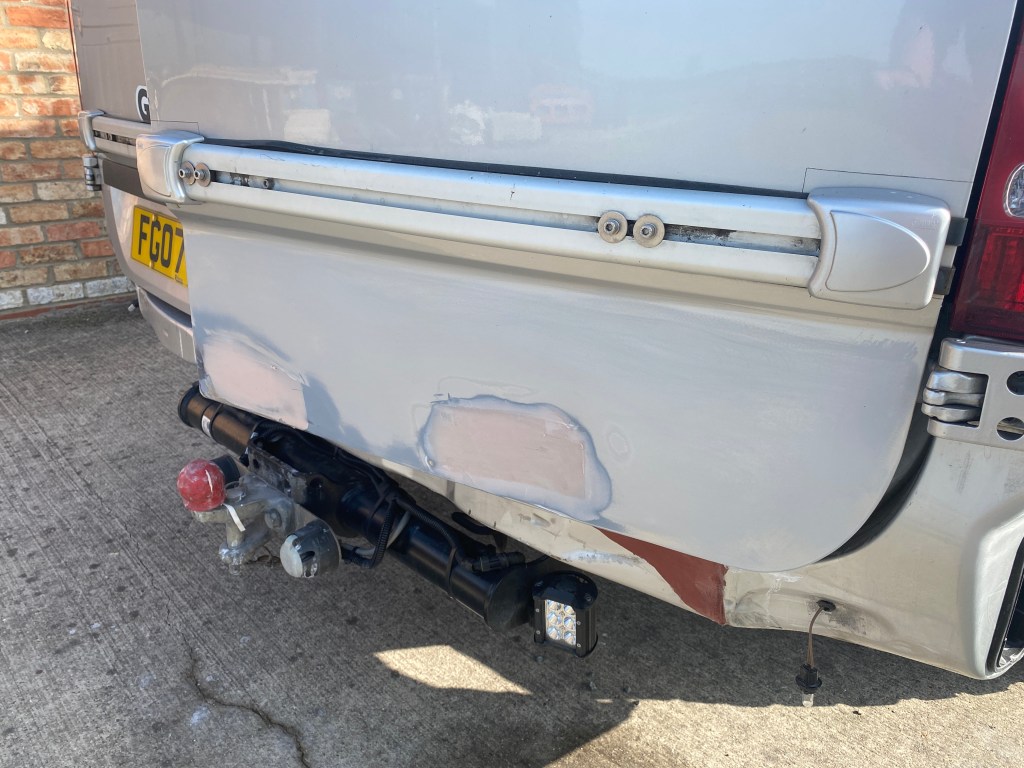
Oh if it were only that simple, on removing the corners of the bumper to route the wires I couldn’t help but notice how badly damaged one of them was, and the rear bumper itself looked very scruffy.
Definitely letting the side down, time for some new ones.
A quick search onE-bay found a complete new bumper assembly for a very reasonable price, the plastic trim on the side loading door could also do with replacing as it too was an embarrassment, with the parts duly ordered and with time on my hands it gave me the chance to fit the blinds for the rear doors.
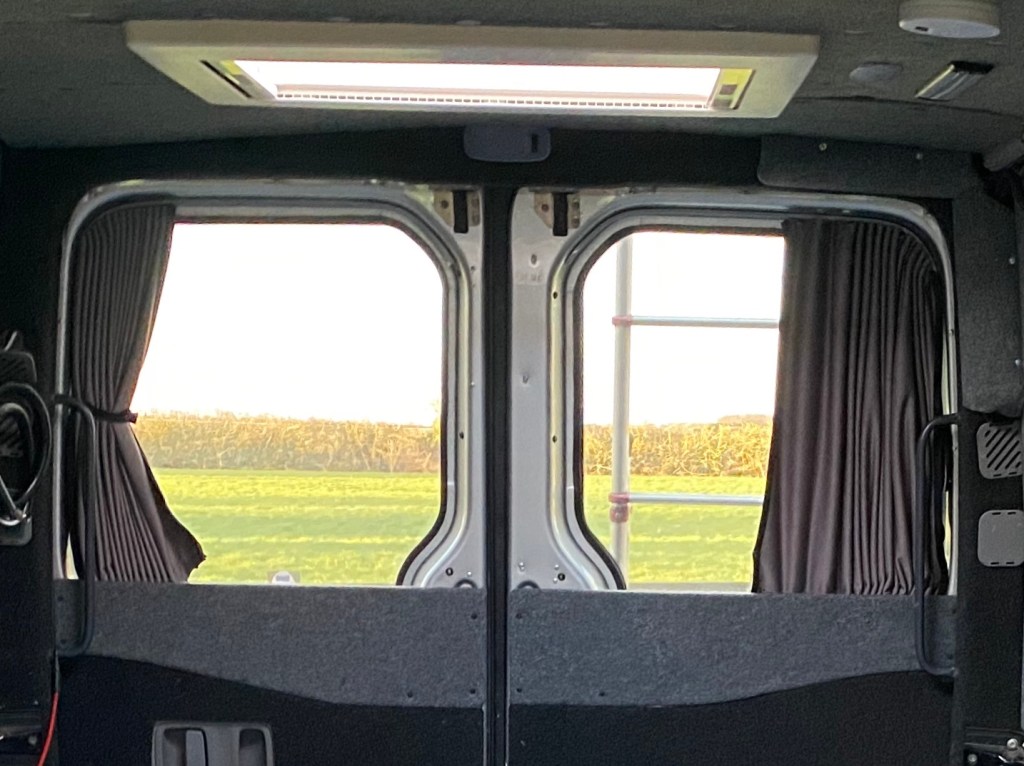
I already had curtains fitted but due to the random shape of the Sprinter doors they weren’t quite up to the job, they were good quality black out curtains but you couldn’t quite get the edges to seal properly against the bodywork and you would often be woken by the early morning sun blasting through the tiniest of gaps and blinding you before your properly awake.
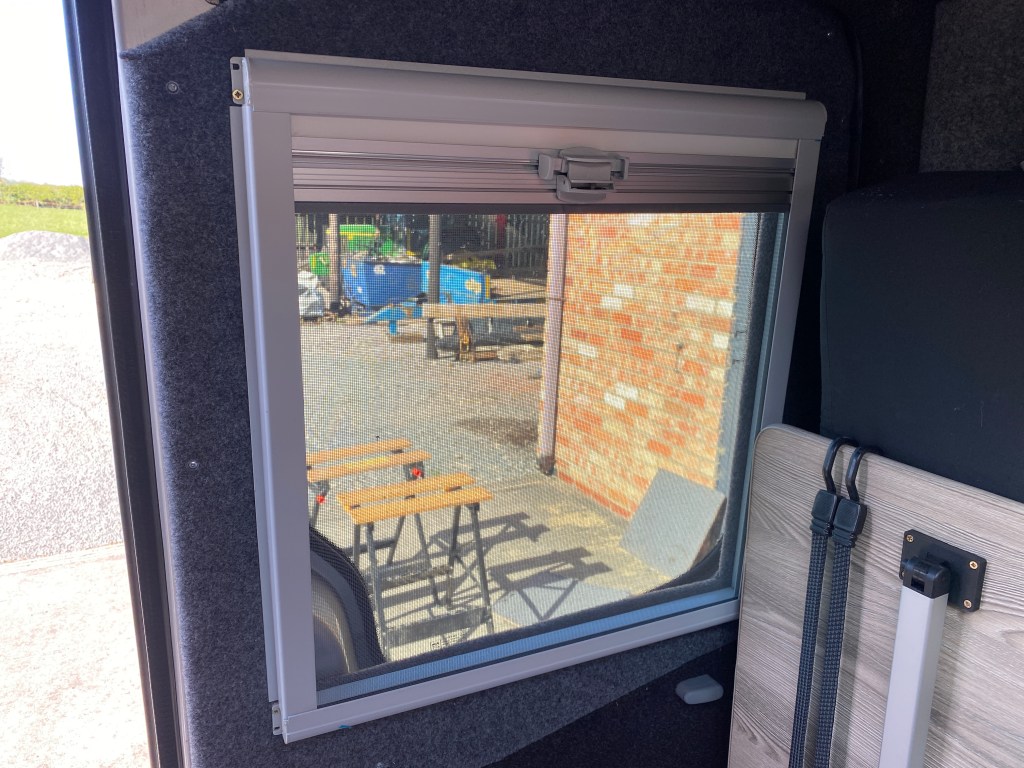
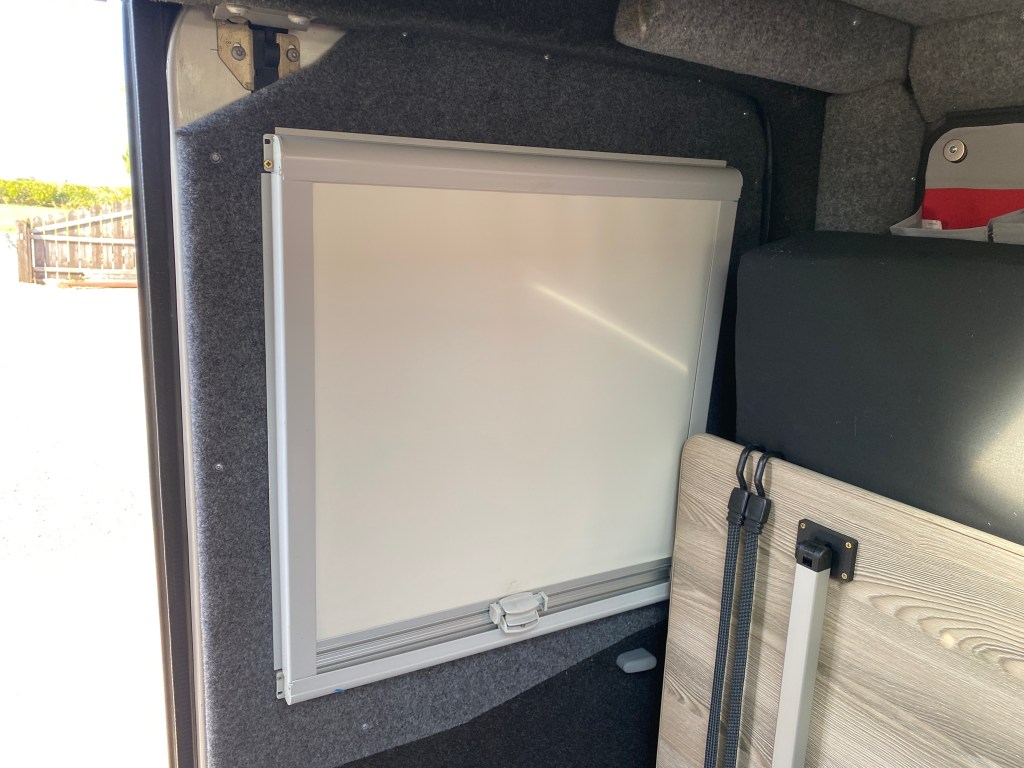
For a professional look most motorhomes use a 2 in 1 blind that has a built in fly screen and blackout blind set in a plastic case, although my rear windows don’t open the fly screens adds a bit more privacy on top of the tinted windows.
When I first bought the van it had ply panels on the solid rear doors, I had the windows fitted and so the top half of the ply got dumped at the back of the shed, it was these plywood panels that were going to be re-fitted with the blinds attached. They would need recovering with fabric as someone had been using them to lay on whilst fitting their towbar a few years back.
Not so clean panels being measured for blinds. How the curtains looked, bit of a mess really. Sooo much tidier. Open. Closed. Neither open nor closed.
Unfortunately I have run out of the adhesive to finish the other side, so once again waiting on Postie to deliver supplies.
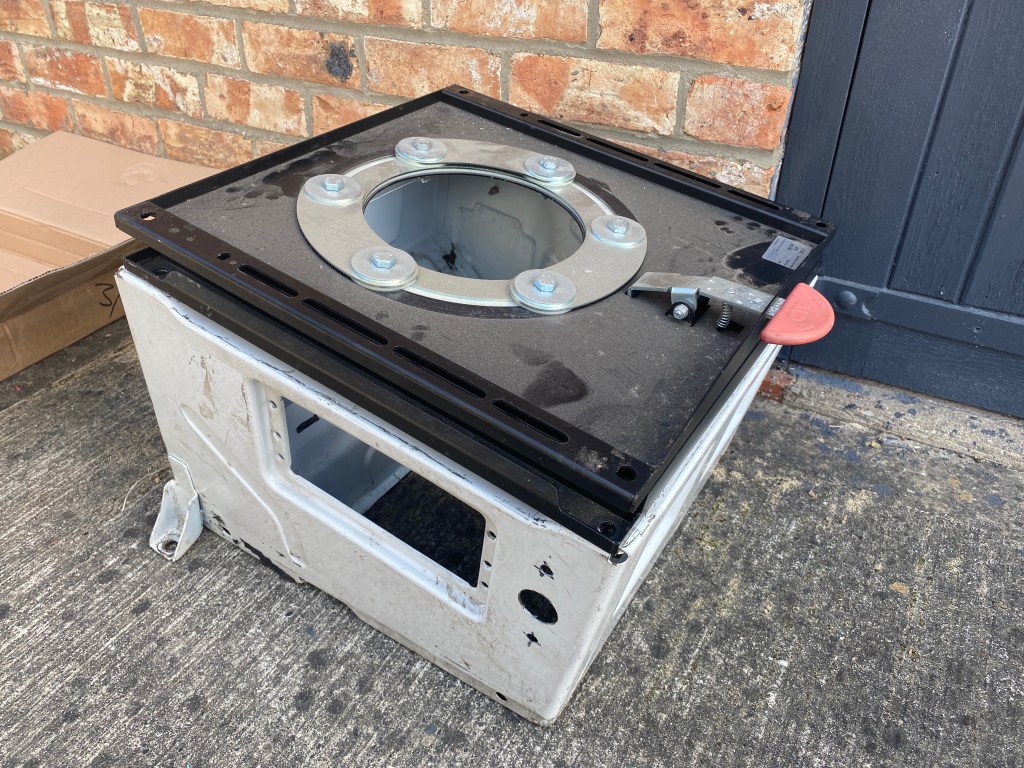
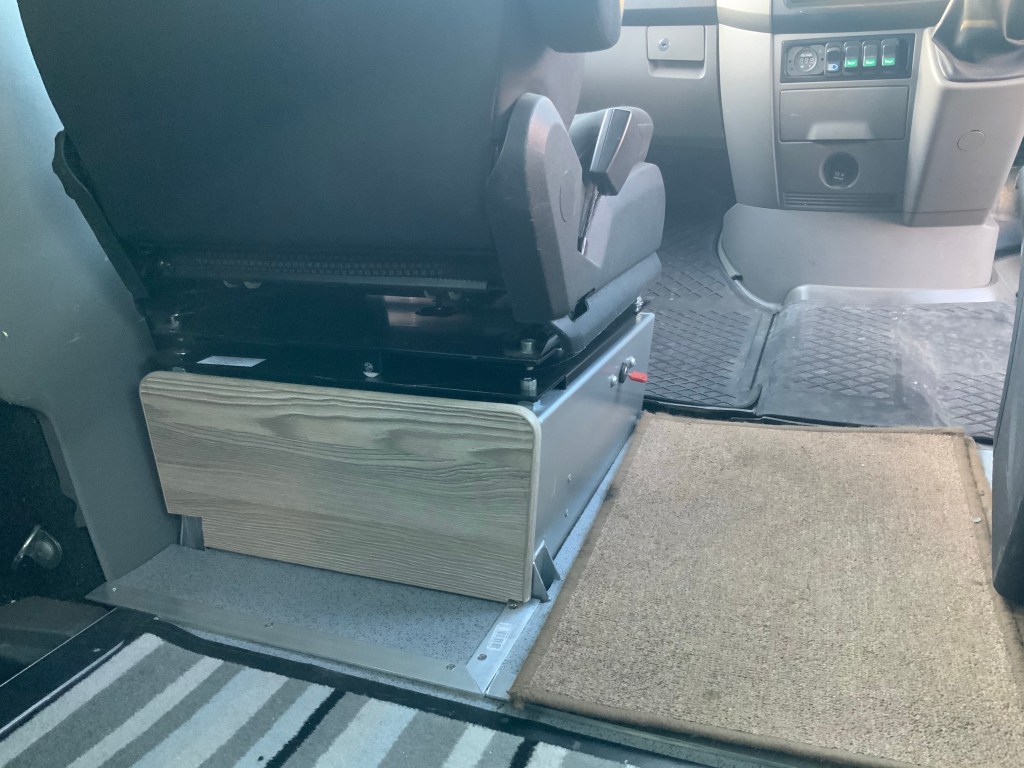
Another job to do was to swap out the old passenger seat base and swivel for new ones acquired from a company that specialises in supplying aftermarket seats and associated accessories to the HGV and PSV industry. They offer a seat base that is lowered by 70mm to allow for either a swivel to be fitted or a mechanical suspension seat and retain the original ride height for the occupant, as my current set up is on a normal seat base it sits about 50mm too high and you end up with dangly legs syndrome, its like being a 6 year old sat at the dining room table, legs swaying away never getting near the floor.
Out with the leg dangler. In with a bit of comfort.
Whilst the seat was out it gave me the chance to tidy up all the wiring that is underneath it and move the fuse boxes to a place thats easily accessible without having to remove the seat itself. The base was also spray painted silver to match the rest of the van.
Tidied up the wiring to give easy access to the fuses.
Last of the jobs was to fit the new bumper when it arrived, pretty simple task as its just 7 bolts and a few plastic clips. Plug in the new lights and clip in place. Job done, 15 minutes tops. So much better looking now.
New light in a new bumper. Looking good. Can anybody spot whats next on the “to do” list ???
Just a short one this week, but I’m sure there will be more to come.
One last thing, well done to Captain Bob for being such an inspiration to us all and raising such a huge amount for the NHS. Well done to everyone that is out there raising money or volunteering to help others in these dire times, you all deserve our respect and admiration.
I hope you’ve enjoyed reading about the re-fit as much as I’ve enjoyed doing it, this week has seen me put a lot of the small finishing touches to the build, its doing these little bits that make you realise that its nearly finished.
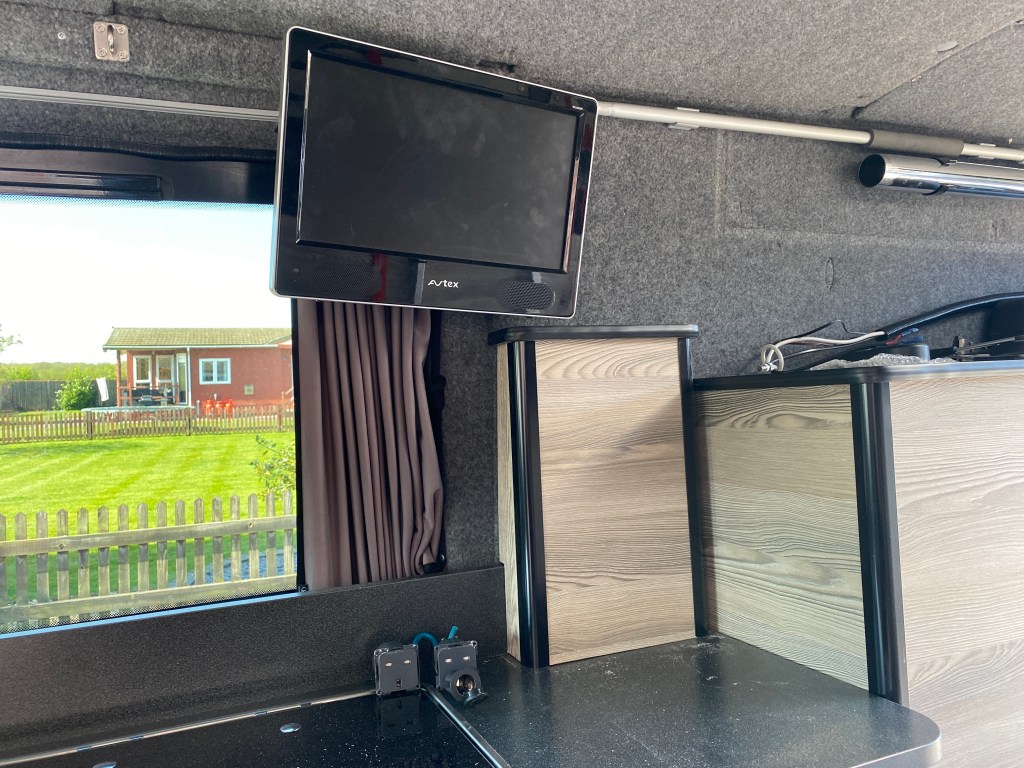
With all the cabinets made and fitted, the main electrics are in place it was time to fit the main control unit and power sockets somewhere. I had originally intended to fit them on the front of the kitchen unit but after looking at some other conversions I decided to build a dedicated console on the rear wall to the right hand side of the worktop thus keeping any trailing wires to a minimum.
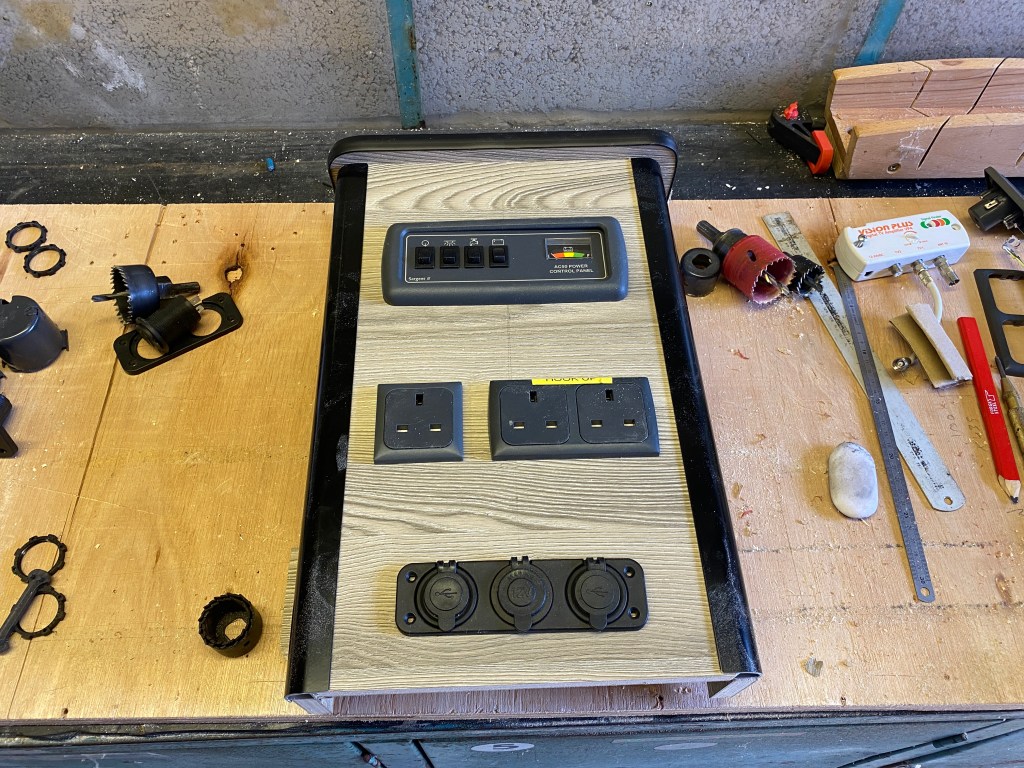
This console would house the control unit, sockets for the inverter and mains hook up, 12 volt and USB sockets on the front and a pair of dedicated 12 volt sockets on top for the TV and Aerial amplifier.
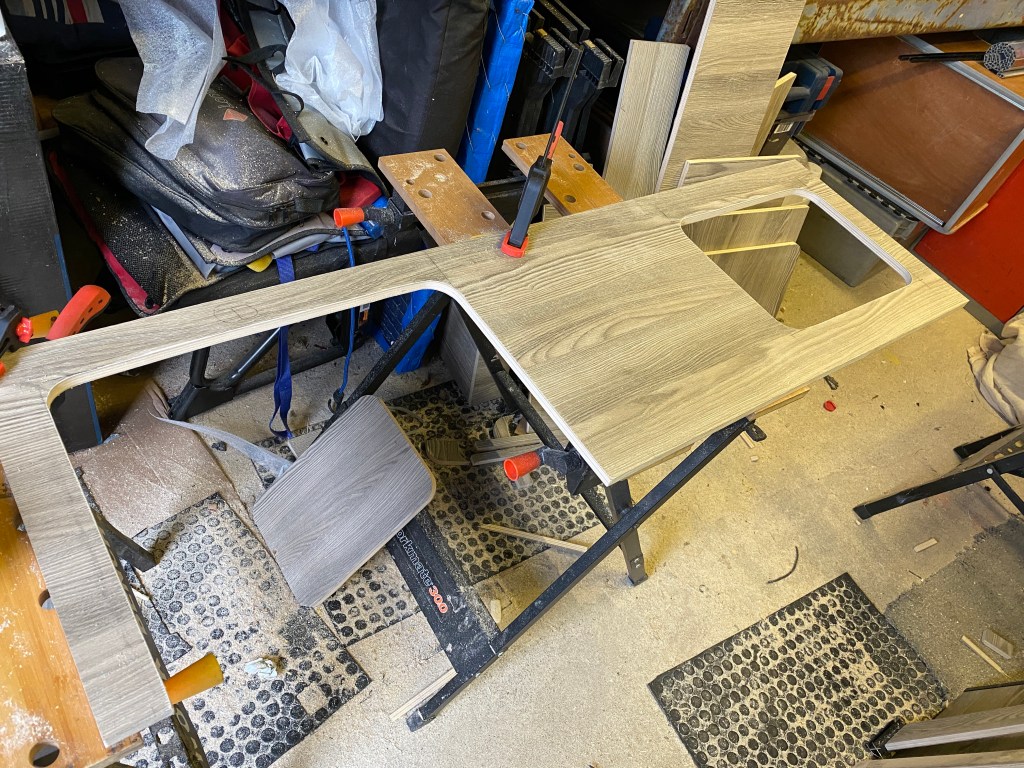
Just a guide to see what it would look like.Happy with the size, It was onto the actual one.
With the size and shape sorted I made the unit up, again nothing gets screwed together until I’m happy that it will all work out, that way its easy to modify it as you go along.
Once I was happy with the shape it was hole cutting time, at least if mistakes are made here I’ve plenty of off cuts to use up, but luckily it worked out first time.
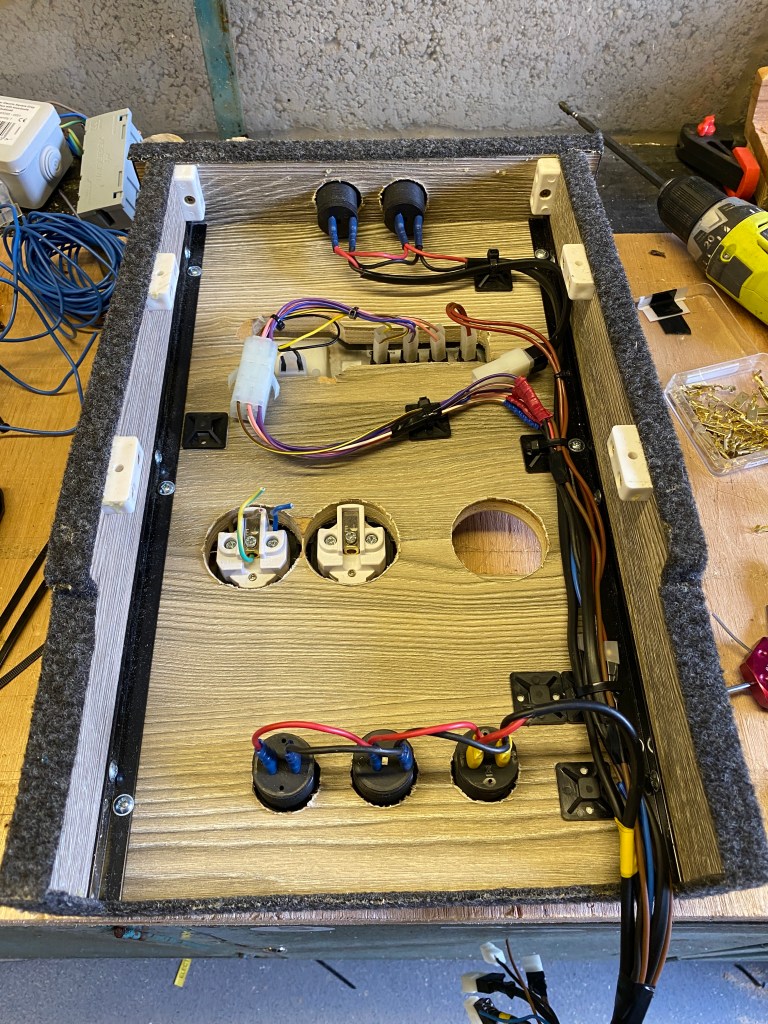
Holes cut, all in the right place.Time for the fun and games, wiring it up.
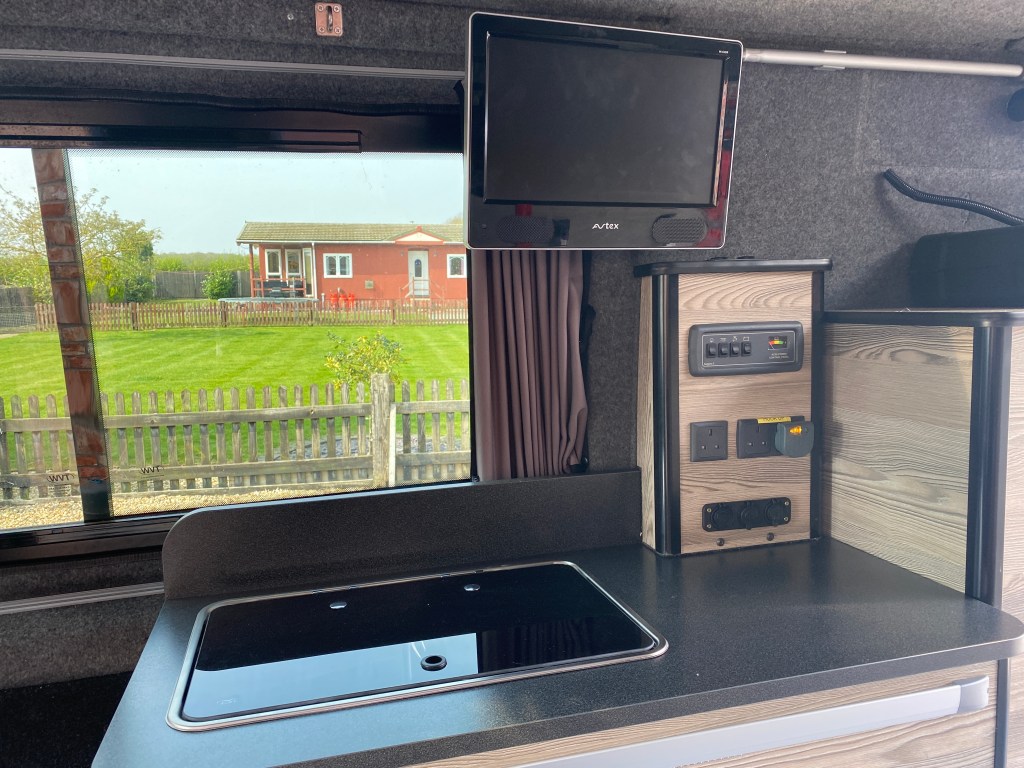
With the holes all cut all the bits fitted in place the unit was fastened together, the carpet on the edges are there to stop any rattles or squeaks when the van is being driven due to the flexing of the body. Wiring up the control unit is pretty straight forward, theres a master switch that operates a relay on the main fuse box that isolates most off the auxiliary side of the system, the night heater and fridge are the only things that stay permanently live, a light switch (self explanatory) and a switch for the water pump to the sink so that it doesn’t accidentally get left on and flood the van. The auxiliary 12 volt sockets are all wired in series as non are going to take a huge loading and every thing connects to the wiring loom in the lower cabinet for easy access or alteration at a later date, the whole lot can just be unplugged and removed from there without disturbing anything else.
And its done, only took two days.
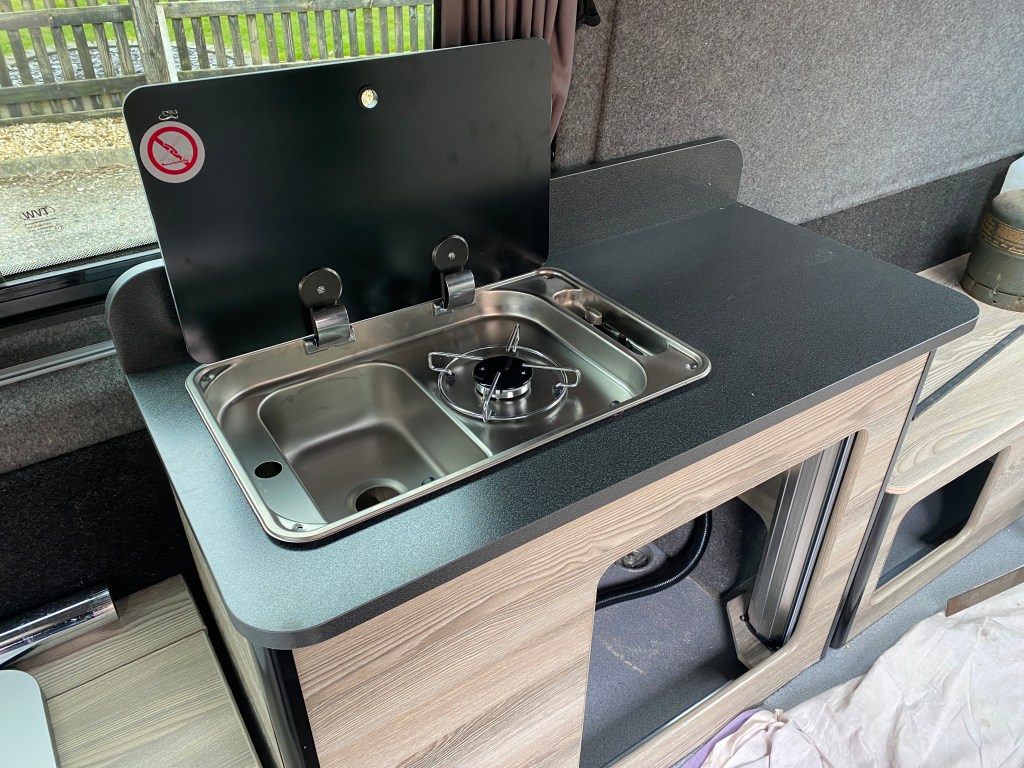
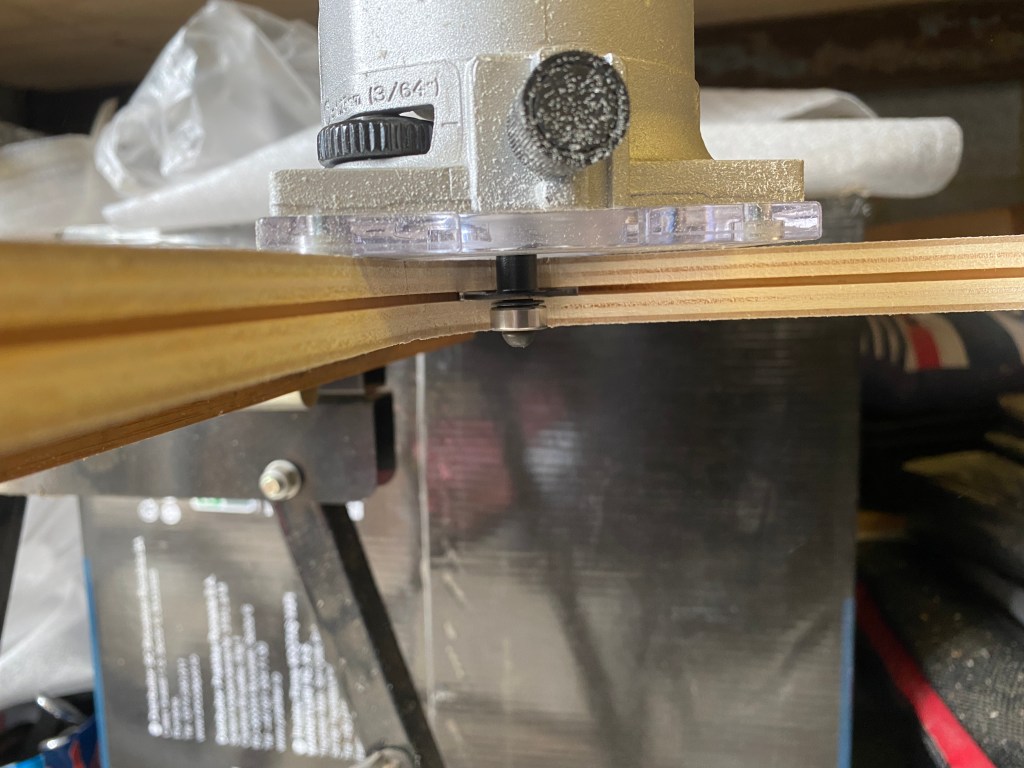
Next on the list was to fit the sink in properly, you may remember me saying that it was sat 6mm too high, well after a really informative chat with a highly experienced joiner ( eldest brother ), the idea was to use a hole saw to cut down into the worktop the 6mm needed and then use a multi tool to cut out the waste wood, I had to fill in one side of the existing hole for the pilot drill of the hole saw to get a grip into, the other side had enough meat on it to work OK.
Cut with the hole saw and waste material removed. Looking about right……Yep, thats perfect.
With the hole trimmed to the right depth and sink/hob sat in the hole it looks so much better, I’m still waiting for the gear to plumb it in so for now its just sat in place, it will eventually get screwed in and with a seal placed between the hob and cabinet.
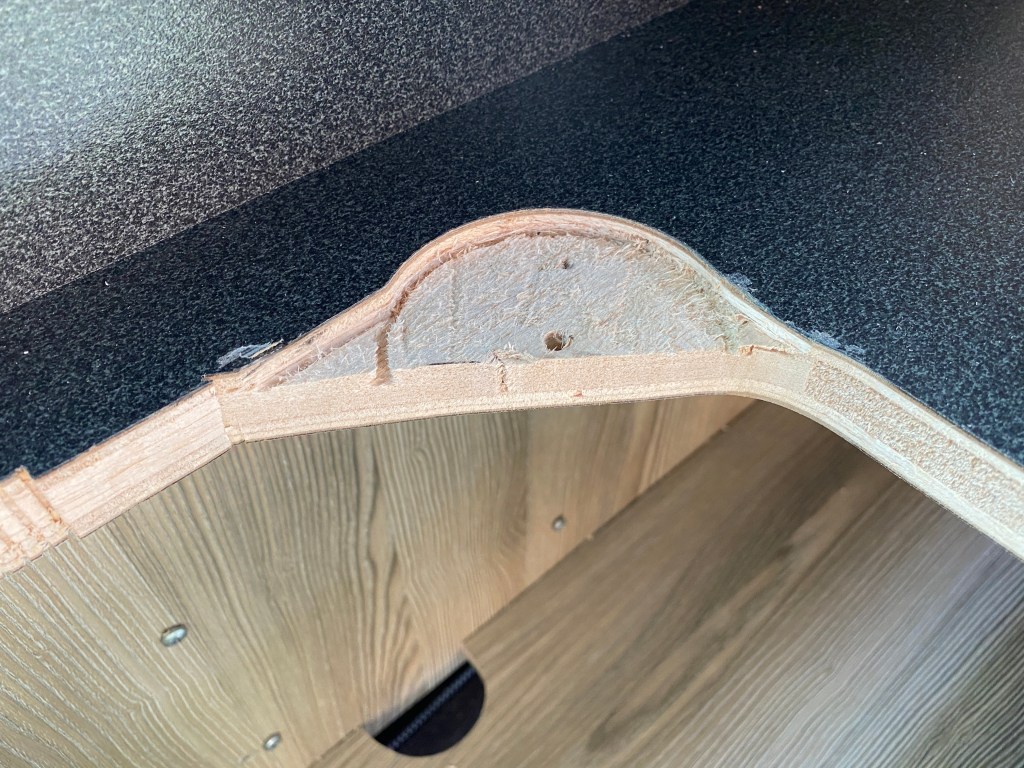
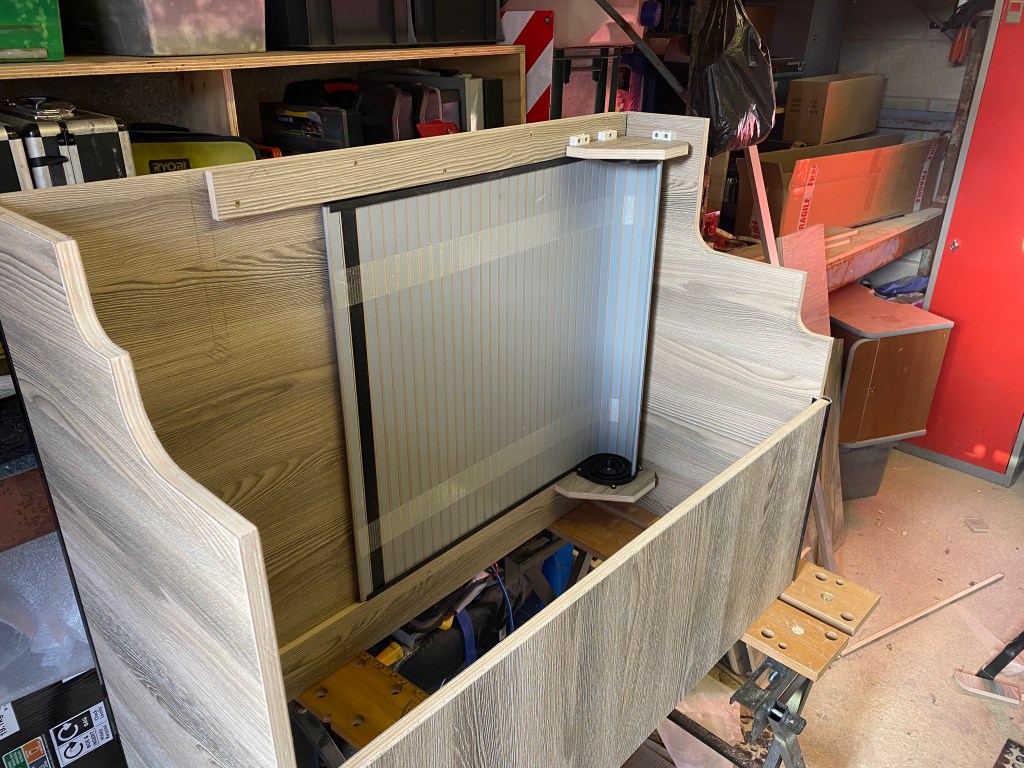
One job that was started but not finished was the bed, when you last saw it, it was just stood up against the side of the van, well the goodies arrived mid week to get it fitted, first to go on were the four T-hinges so that it folds up and down (obviously). To stop it just flopping onto the floor I had various ideas but the simplest seemed to be legs that fold flat against the bed when folded up. So 2 were ordered and promptly delivered. But there was a problem, because the plywood base is only 15mm thick and six feet long it flexes quite a bit, the side with the hinges on is OK as that rests on the edge of the base cabinet, but the other side would need more support, especially given my “not so racing snake figure”. So two more legs were duly ordered and then these were fitted directly opposite the hinges
Four hinges. But only two legs.
The above pic shows the two legs in place awaiting the other pair to arrive, these were originally going to be spaced further apart.
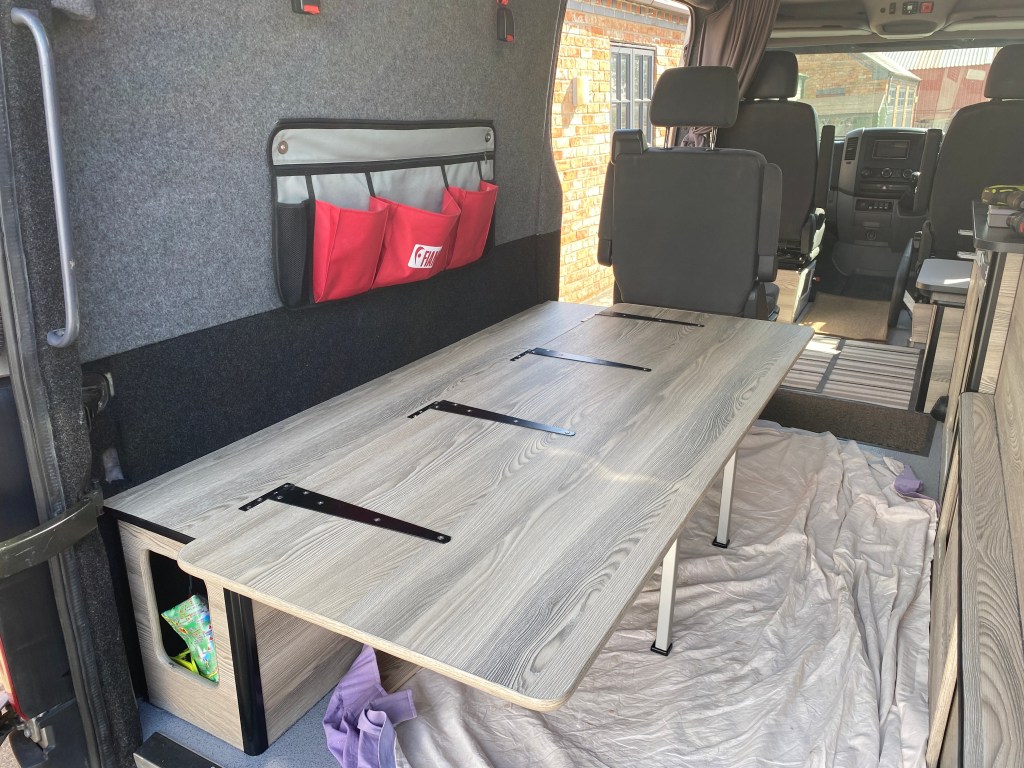
And with four legs on. Four legs on and solid as a rock.
When I decided to do a re-fit on the van I wanted to be able to use it everyday to carry stuff as well as use it as a camper so that was when the idea for a fold up bed was dreamt up, there were quite a few conversion that used this idea but a lot of them were either too bulky, ugly or they never allowed for the fact that your bedding needs to stay in place on the mattress so that its a two second job to lower the bed, climb in and go to sleep, essential when your wanting to clock up the miles on a road trip.
A few other jobs done be can seen in the pics, extra storage is via the Fiamma organisers on the wall and the table is now stored on one of the rear doors, with the post and awning wind out handle stored on the other wall.
Well thats all for now folks, its the weekend, its going to be hot and sunny, and were still in lockdown so we cant go anywhere to try out the van. Only a couple of small jobs left to do when the bits arrive, but its been a busy couple of months to get this far, I’ve done the upgrades that were needed after last years trip, hopefully this will be the last time I mess with the interior of the van as its been changed about three times so far.
Unfortunately due to Covid-19 my plans for the road trip in June are cancelled, we’ll just have to wait and see if I can get away later in the year but that would probably just be somewhere in the UK.
Two weeks into lockdown and I’ve been as busy as ever, after all the planning that went into the build you would have thought it would be a straight forward job to knock the cabinets together, but best laid plans and all that…….
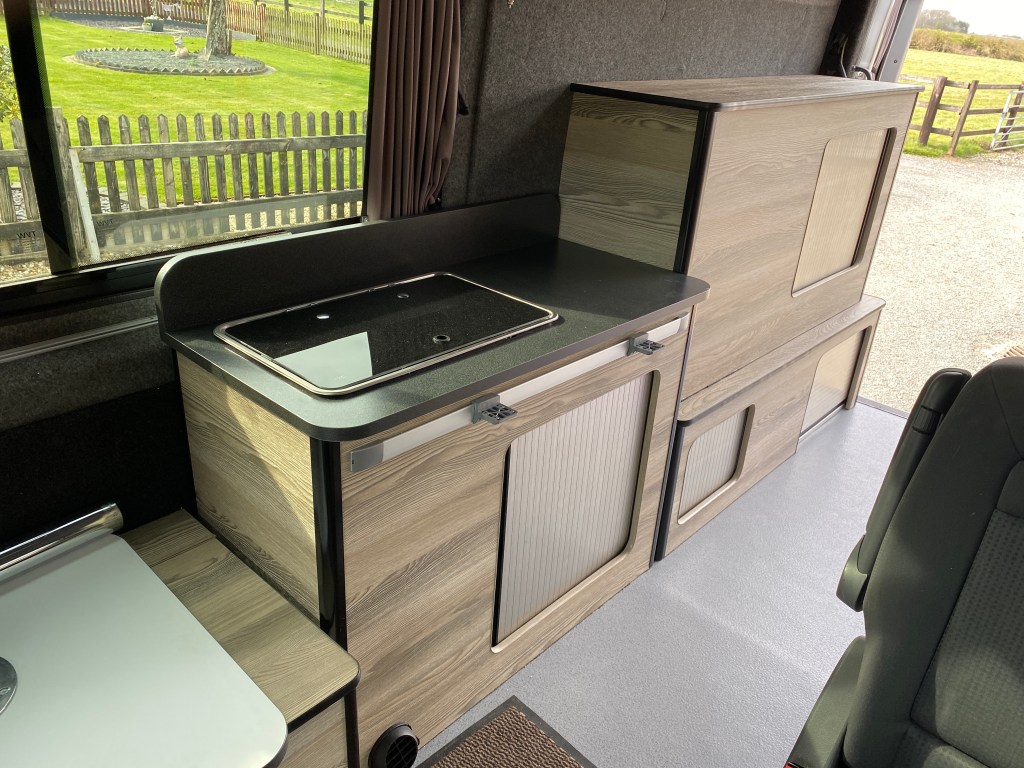
After the success of fitting everything into the battery box next in line was the kitchen unit, this houses the hob/sink combo, the night heater, water containers and gas bottle. It wasn’t until I sized up the Tambour door that a problem reared it ugly head, the door wouldn’t slide around the side of the unit due to the wheel arch intruding into the sidewall. The Tambour doors as standard come with a spiral mount for the door to slide into as opposed to my intention of running it around the side of the cabinet, so in the end this had to be utilised, but that meant I don’t have room for the Gas Locker that I had intended to fit.
Tambour door with spiral mount, the cutout is for the wheel arch.
I should be able to fit a smaller gas locker that accepts the 907 Campingaz canisters that I use when abroad, but not the 4.5 kg propane I had hope to fit, oh well.
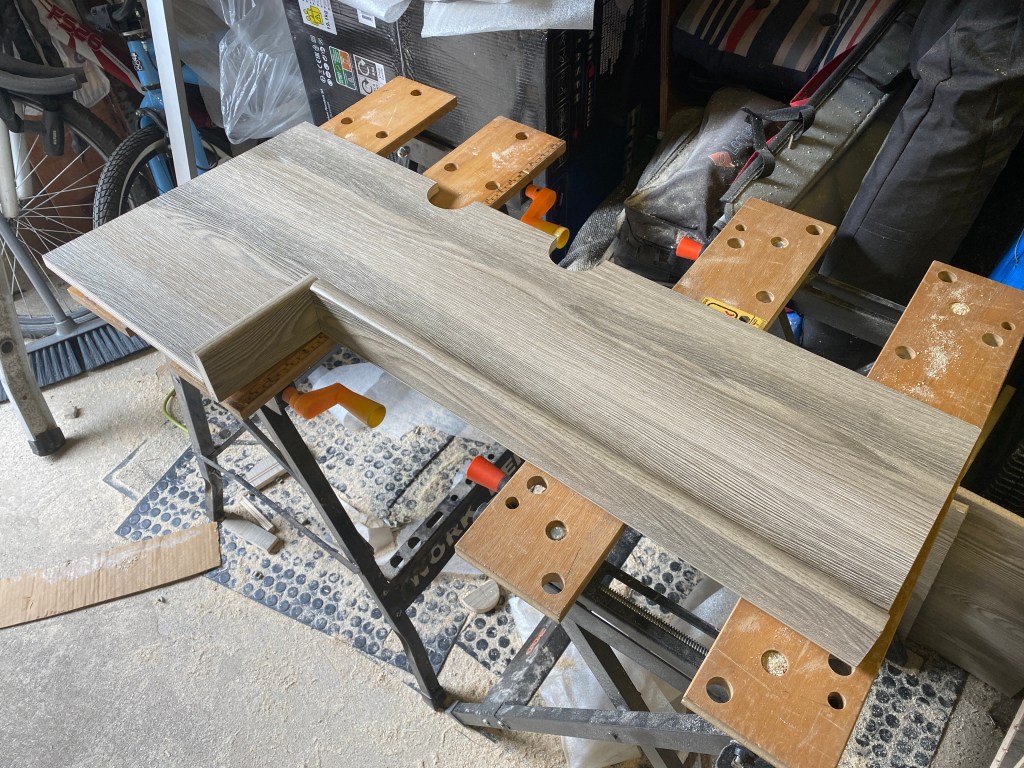
Ive got the width and height, just an inch short on the depth for the gas locker. Making up the shelf for the kitchen cabinet.
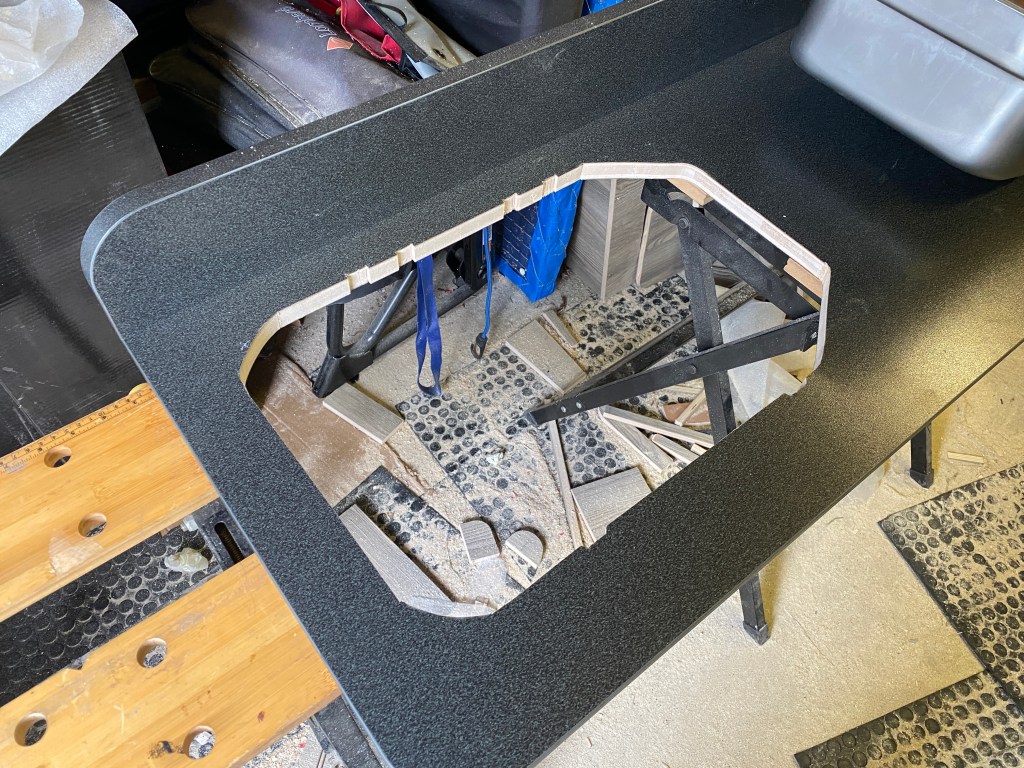
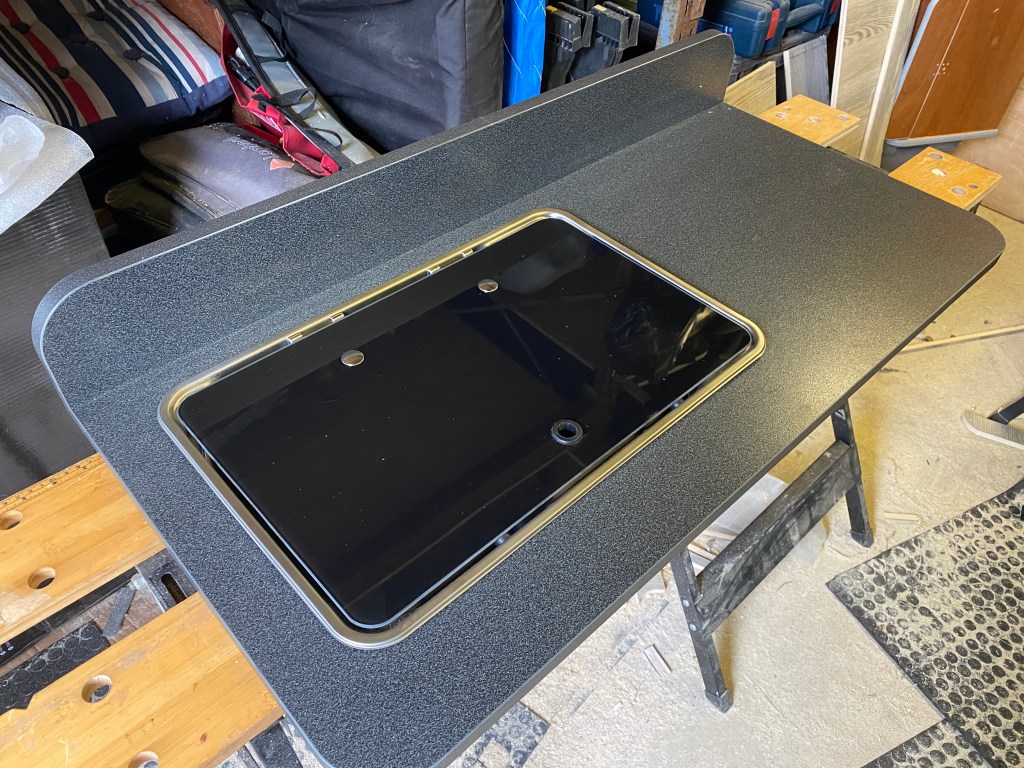
Once the cabinet was made up and the worktop fastened on it was time to cut a hole for the hob/sink combo, and once again the manufacturers of these things make it as difficult as possible for the diy’er to fit them. My original Smev unit was a pig to fit due to the cutout being such an awkward shape and the fact no template is supplied by Smev to help. The new one I’m fitting is by Can, an Italian manufacturer, and has a far simpler shape to cut out, but and its a big but, the corners need to be recessed 6mm into the worktop. No problem for a properly equipped joinery shop, but try cutting that by hand is a no go, it needs routing and for that you need to build a jig, so for now its sitting 6mm proud until I can sort something out.
Marking out the underside of the worktop. And its cut.
The picture above shows the fairly simple shape that was cut, but I also had to allow for the massive pan head screws they use to hold the lid hinges on with, because the Italians have never heard of countersunk screws, see what I mean.
And its in, albeit 6mm high. In place waiting for the gas and water to be plumbed in.
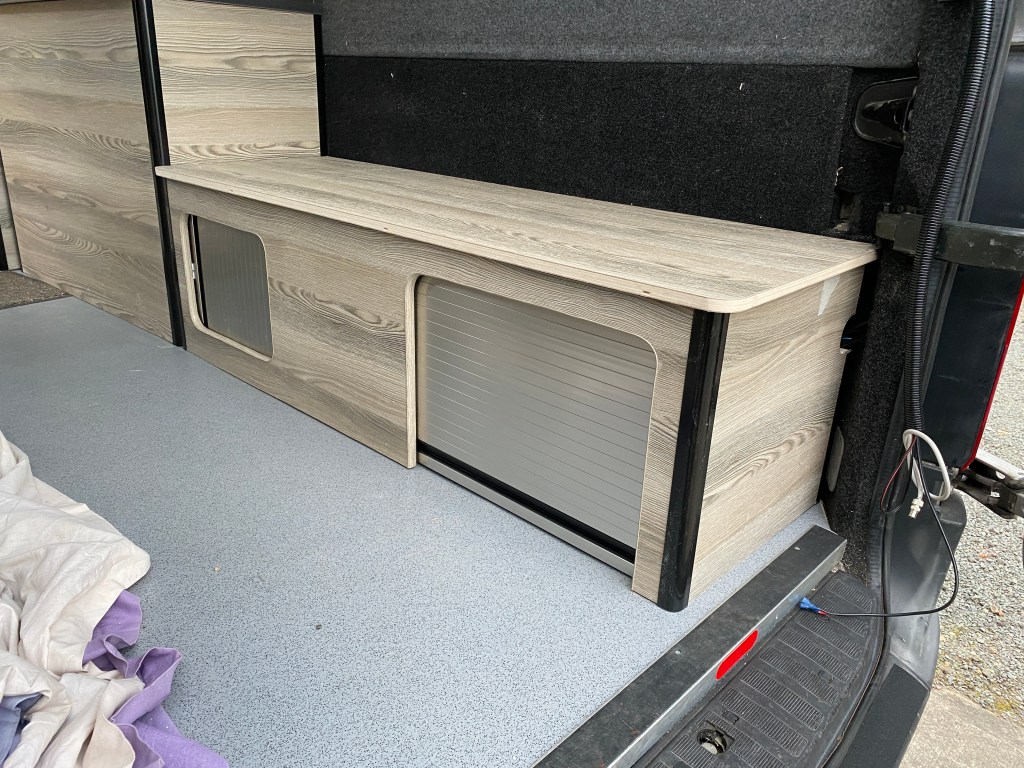
Next on the list was the long unit above the wheel arch, this was having 2 tambour doors fitted and is there to house the porta loo and general bits and bobs, stuff thats not used very often. It’s similar to the first one I did on the opposite side and now I’d figured out how to do the doors it was just a case of cutting, routing, knocking-in, assembling, screwing, fitting doors etc etc.
Cutting.Routing. Knocking in. Fitting doors And Voila, another one knocked up.
It was at this point I decided to change some of the knock in trim and fit black to the horizontal edges to give a bit of flow to the lines when viewed from the rear. So Ebay to the rescue again and I ordered some along with some other bits that you can no longer just pop to the shops for.
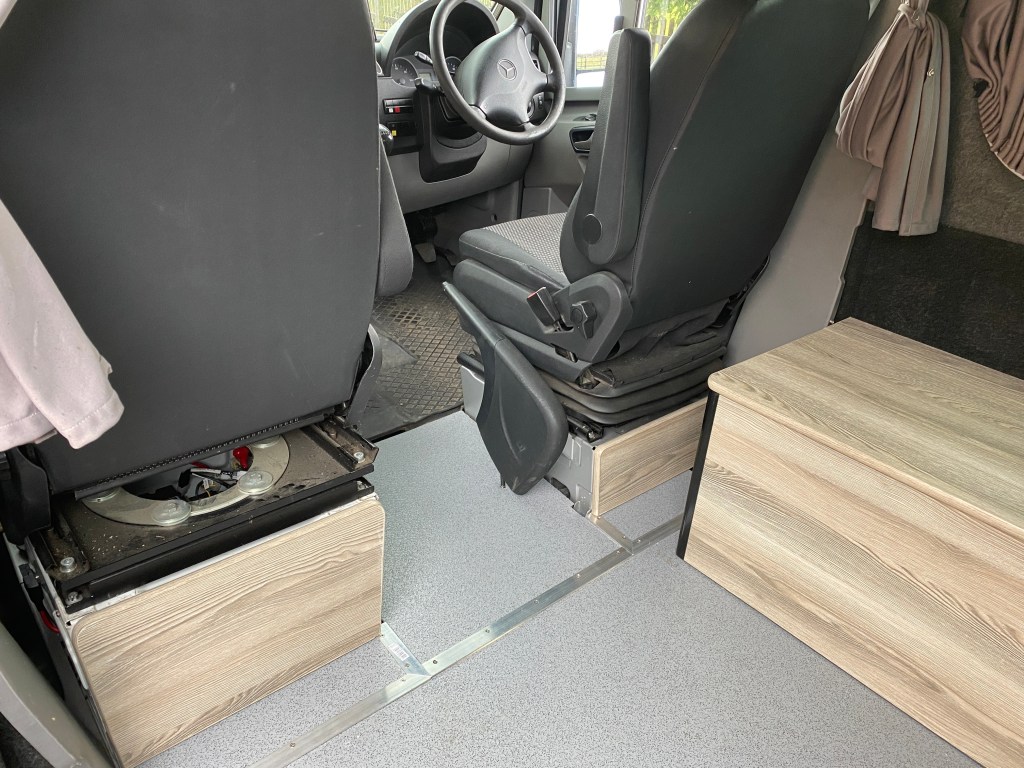
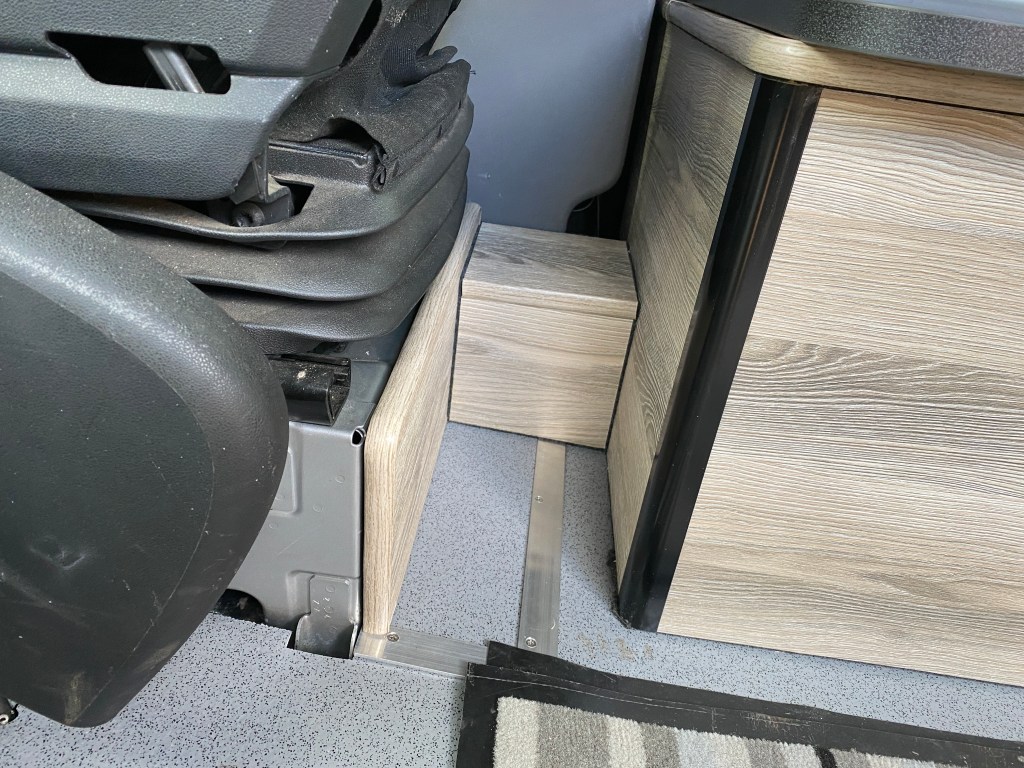
Whilst waiting for the postie to arrive I thought I’d knock up a few bits to tidy up the front of the van, the rear of the front seats was always an untidy place due to it weird shape and the fact that I’ve raised and insulated the floor. I had already trimmed the floor and put down some aluminium strips on the joints so I made up two small pieces to fit on the rear of the seat bases, small things but it does tidy it up a lot.
Bare seat bases.Not so bare seat bases.Messy wiring. And not so messy wiring.
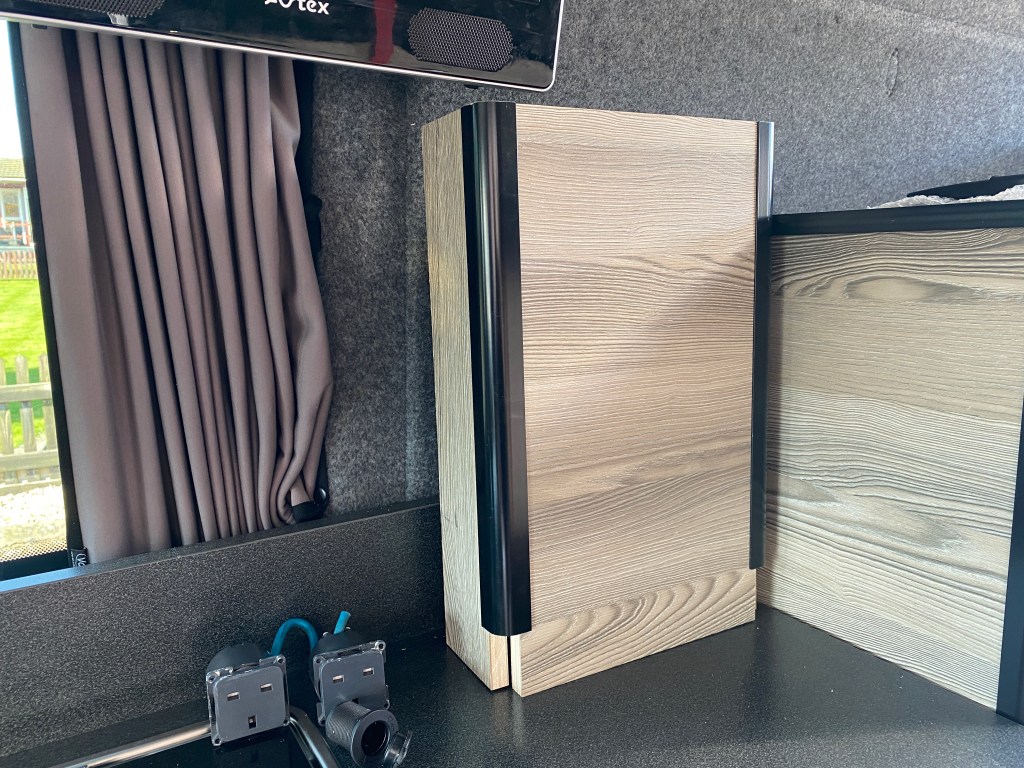
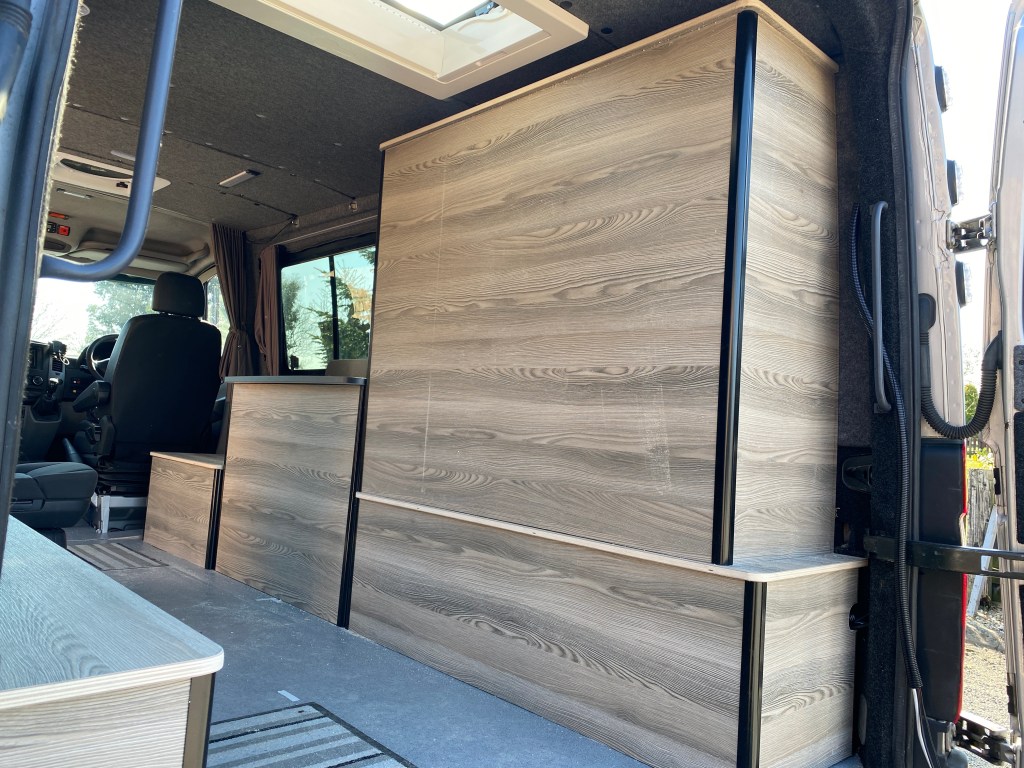
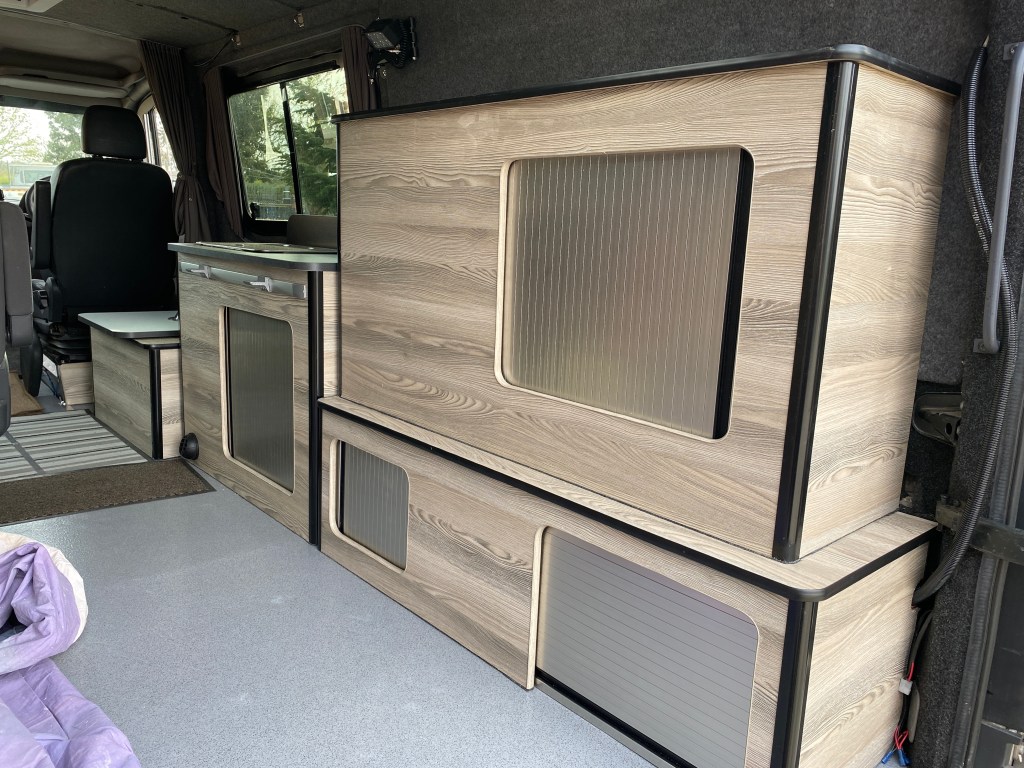
Last but not least was the big wardrobe like structure that seemed to fill the van, I was never happy about that, I actually liked the van without it but I do need some storage whilst travelling so I took the saw to it and reduced the height and depth until I had a happy compromise between the storage I needed and not causing an eclipse of the sun.
The monstrosity !!!!!!!
It worked well on paper during the planning stage, but no, just no.
The compromise, better, but still…….
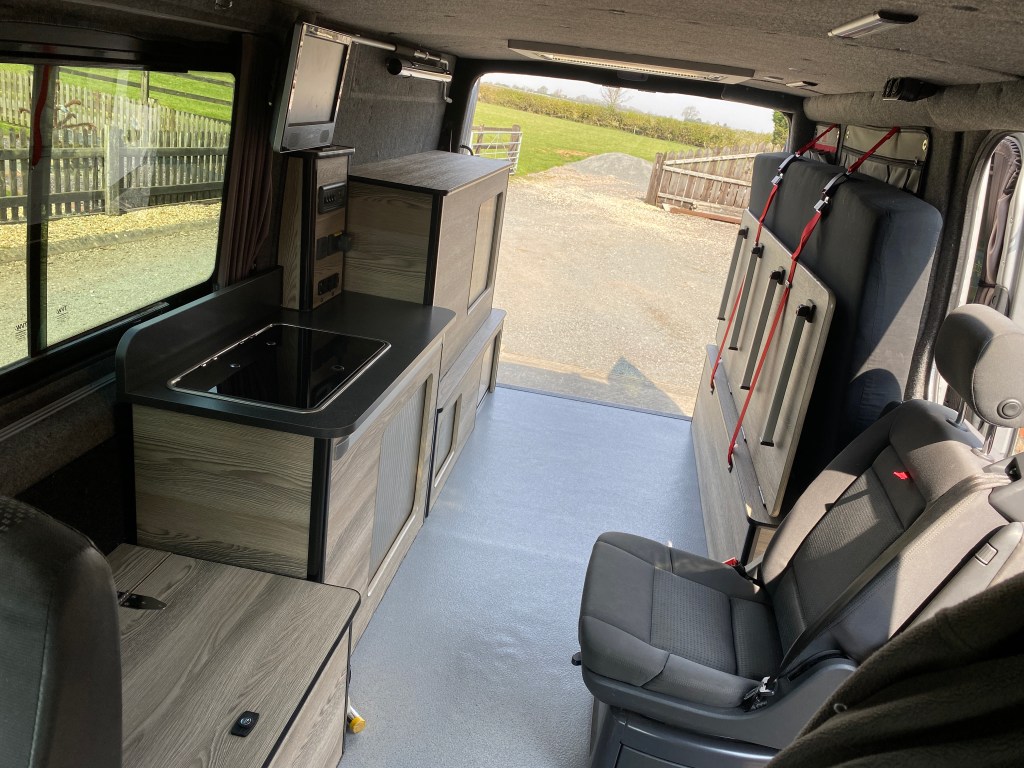
You can see the effect of the black horizontal trim along with the black corner posts, giving a nice outline of each unit, just enough I think.
Another couple of jobs this week were the hinges and a catch on the battery box, and the retaining straps for the fold up bed.
A few finishing touches. A bit of colour never hurts.
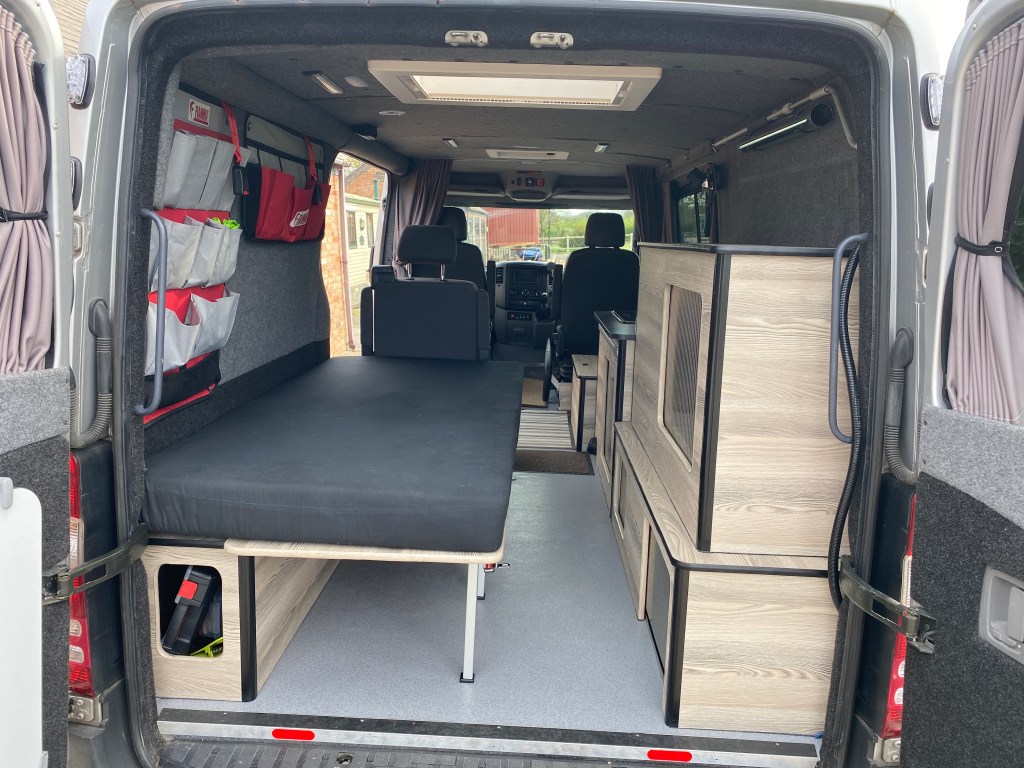
I’m still waiting for the hinges and folding legs to arrive for the bed, theres enough room for the mattress and all the bedding behind the bed when its folded up so its possible to keep everything all ready to go at a moments notice.
Well, thats the main part of the build done, Ive still got some of the electrics to fit in the kitchen area. There are quite a few bits and bobs around the van to do and these will get done as and when.
I’m happy with how its all turned out, after weeks of indecision I’m really pleased with the choice of wood, its feels nice and airy in there now, the contrast between the black trim and the Nordic Ash seems to work ok.
Its been a hectic couple of weekends getting all of the little bits and pieces done, it’s amazing how long the simplest of jobs can take.
Once the rooflights were in and secure the interior roof panels had to be trimmed, fitted and the interior lights had to be wired up in their new position.
Looking tidier…..
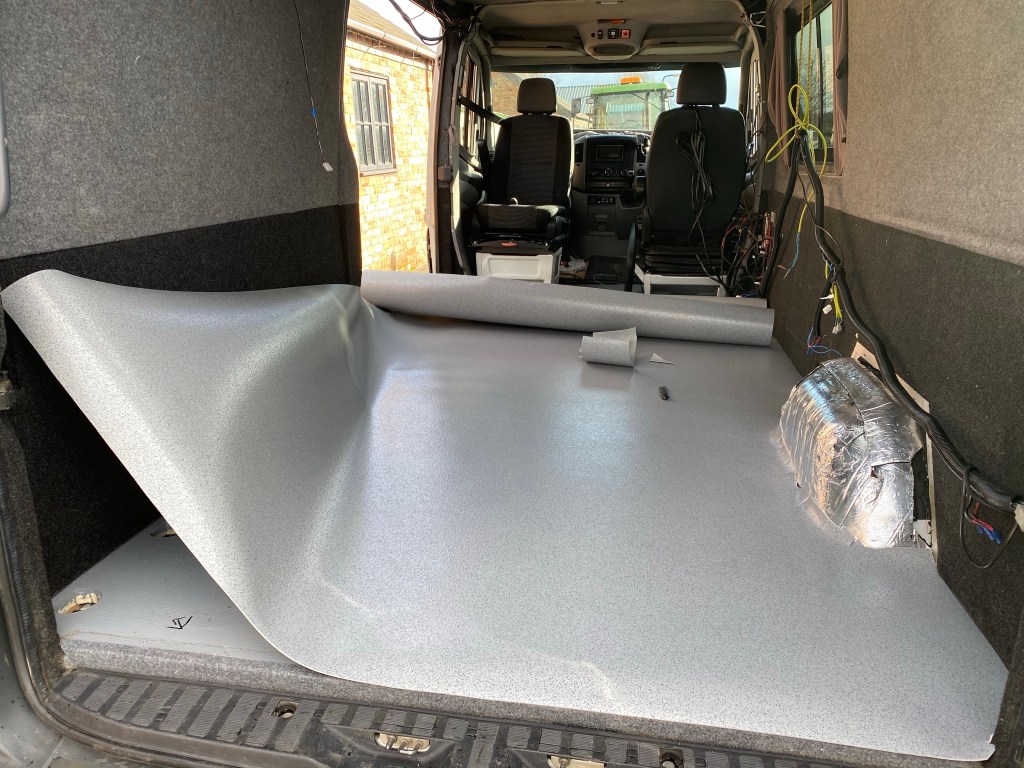
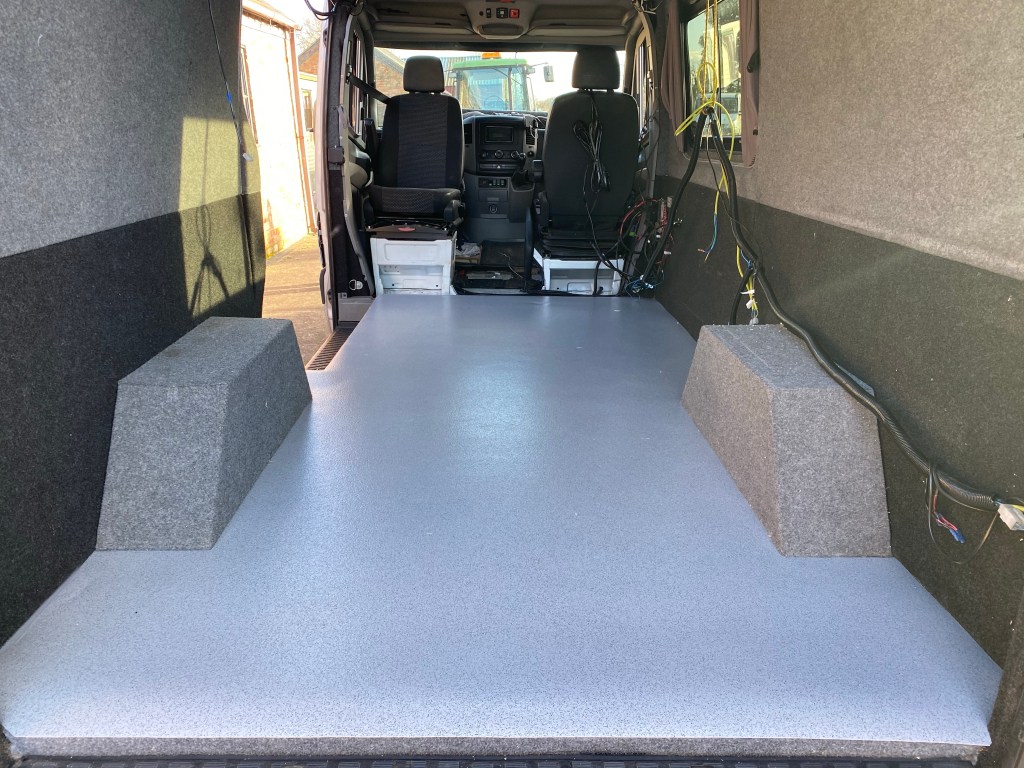
Next on the list was to lay the flooring, this is industrial strength, anti slip Lino, it came in one piece approx 4 metres by 2 metres and is 3mm thick, doesn’t sound too bad, but believe me its a beast of a job to fit. This stuff isn’t the nice soft flexible Lino that you put in your kitchen, no, this stuff was made to withstand a nuclear holocaust, its like trying to lay a steel plate and cutting it was a thing of nightmares, thankfully I bought the Stanley blades by the hundred as after only a couple of cuts the blades were useless.
But once stuck down it transformed the look inside the van, its one of those jobs that you’ll never want to do again but you feel like you’ve really achieched something when you stand back and admire your handiwork.
Its at this stage things start to take shape as all the stuff that was ripped out a month ago can start to go back in. First off it was time to refit the auxiliary batteries and associated electrics.
My original set up includes 2 x 100Ah leisure batteries with a Voltage Sensitive Relay to charge them whilst driving, a Mains hook up with Durite 20 amp charger for when on campsites that have hook-up and a 10 Amp solar charger.
Ignore the messy wiring, it will get tidier….
All these systems charge the leisure and main starter batteries as well as run all the auxiliary stuff like the fridge, tv, lighting, inverter etc etc..
Every single item that uses power is fused, and as such a 12 way fuse box distributes the power all around the van, and this can be isolated by a flick of a switch to ensure that when the van is stood for any length of time there is no accidental drain on the batteries.
Solar panels going back on…..
Once the batteries were back in I was able to refit the solar panels on the roof, these are a great bit of kit and in the sunnier climes of Europe they keep everything topped up with power, reducing the need for electrical hook-ups on sites. As long as I don’t run the inverter I can last indefinitely off grid just from these panels.
I have found that if you stick to 12 volt equipment rather than 240 volt, that has as low a power consumption as possible and use LED’s for your lights its possible to keep your power usage to a minimum when parked up overnight. By far the biggest drain on the batteries is the fridge, and this is where it pays off to get the best you can afford, electric cool boxes are a waste of time as they could drain your battery flat overnight. The best by far are the compressor fridges like the Waeco CFX 50 that I use, these can go down to as low as -18’C to keep food frozen or as a normal fridge at 5’C, thats cool enough to keep them German Pilsners perfectly chilled.
Next up was refitting the night heater, this is the Eberspacher D1, it pumps out 2kw worth of heat and will keep the van nice and toasty warm even once you get down into the minus figures. Essential if you plan on touring the UK, the British summer being what it is.
Tidying up the wiring that could be seen hanging everywhere was needed, the wires on the left hand side near the roof were hidden behind ducting made from cut down plastic guttering thats covered in the same carpet as the walls, with just a few screws holding it up this allows easy access to the wiring if needed.
Before…..After….
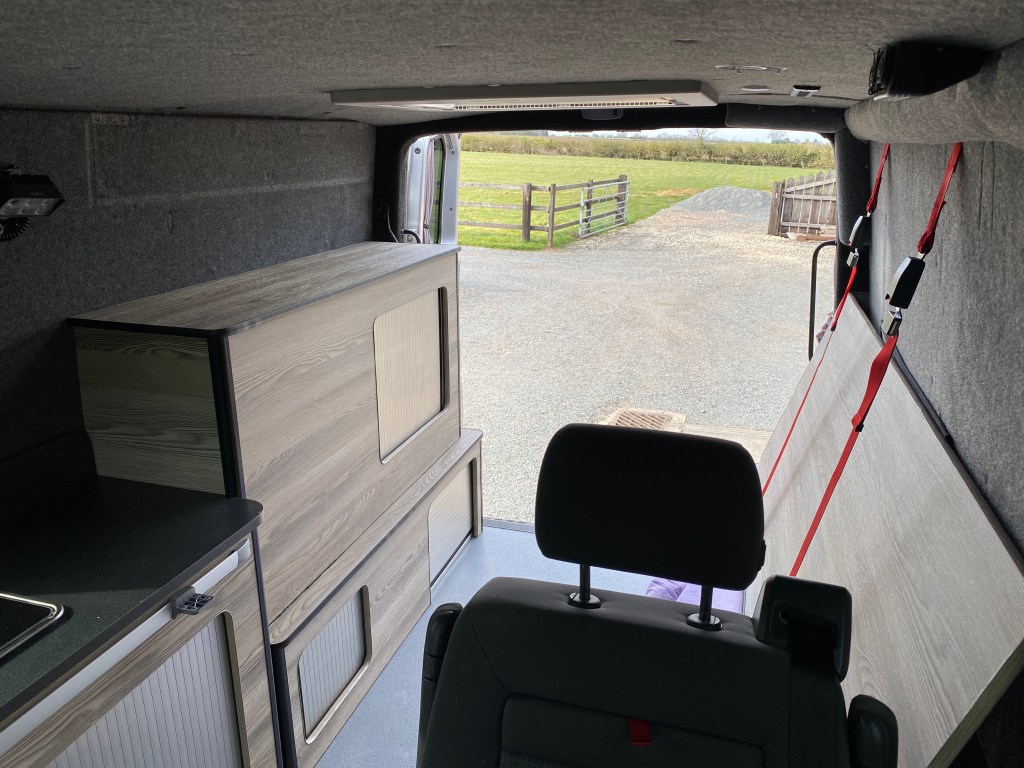
As you can see from the picture above, a big improvement, the wiring on the right hand side will be routed behind the furniture that will be built all along that side. Another addition was to put Lily’s seat back in but I moved this back about 6 inches to make it easier to get in and out the side door and in the final stage of the build the bed will reach from the back doors to the back of the seat.
With all the bits and bobs done it’s now time to plan exactly where everything is going to fit and this will decide the final dimensions for the furniture, no off the shelf stuff here, I’ve already had to change a few things around and all because the folding chair was 2 inches too big, oh well, back to the drawing board.
Starting to plan the layout……..
Thats it for now, when I get time I’ll fetch the plywood and get stuck into building the furniture. I think 2 weeks of self isolation should be enough time to get it finished. Maybe go for the whole 28 days just to be on the safe side……….
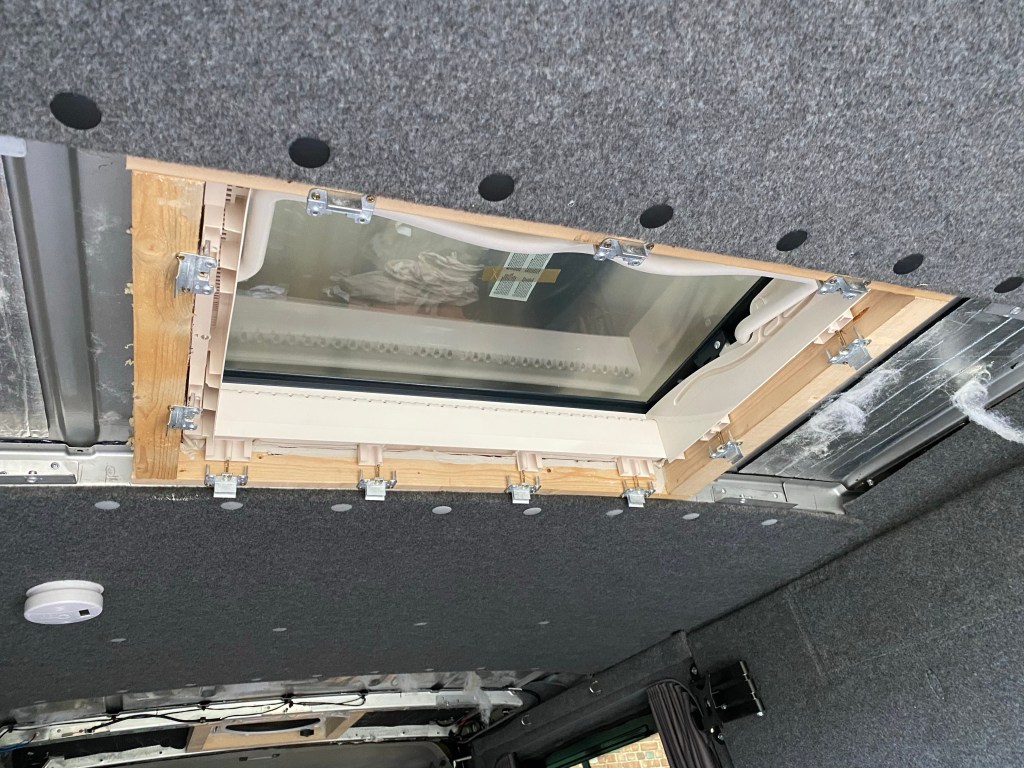
Today’s the day I rip holes in the roof of the van, all a bit daunting as once you start theres no going back.
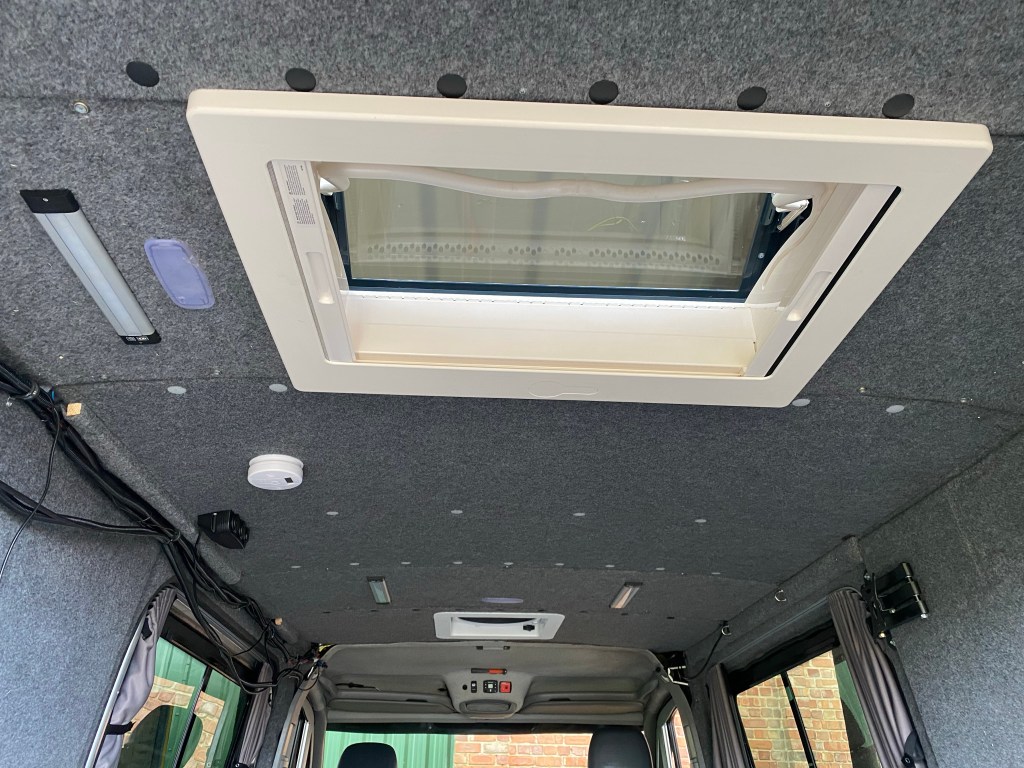
I had decided to go with two roof lights, first is a Heki midi roof light to go over the bed area as these let in loads of natural light and the cover opens to approx 80 degrees allowing plenty of ventilation for those hot hot evenings you only seem to get aboard, combined with the fly screen/blackout blind combination it gives great versatility.
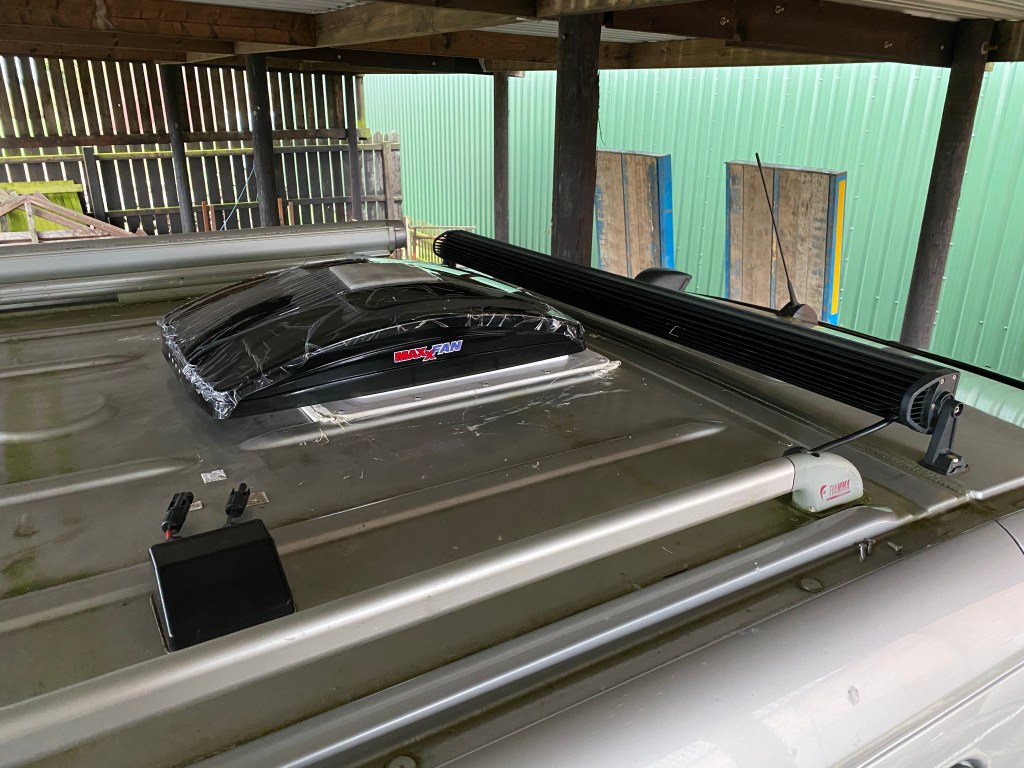
The second roof light is a Maxxair Maxxfan Deluxe, its one of those rare occasions that an American product has been imported into the UK and is a roaring success, especially with the competitive prices and high end spec. These vents have a 10 speed fan that is controlled either manually on the vent itself or via remote control from the comfort of your bed.
With my van being a MWB there is a limit to how much roof space I have to fit everything, I already have two large 100watt solar panels as well as various light bars etc etc. The Heki position was already a given and I decided that the Maxxfan should go as far forward as possible to allow space for the solar panel to sit together in the middle of the roof between the two.
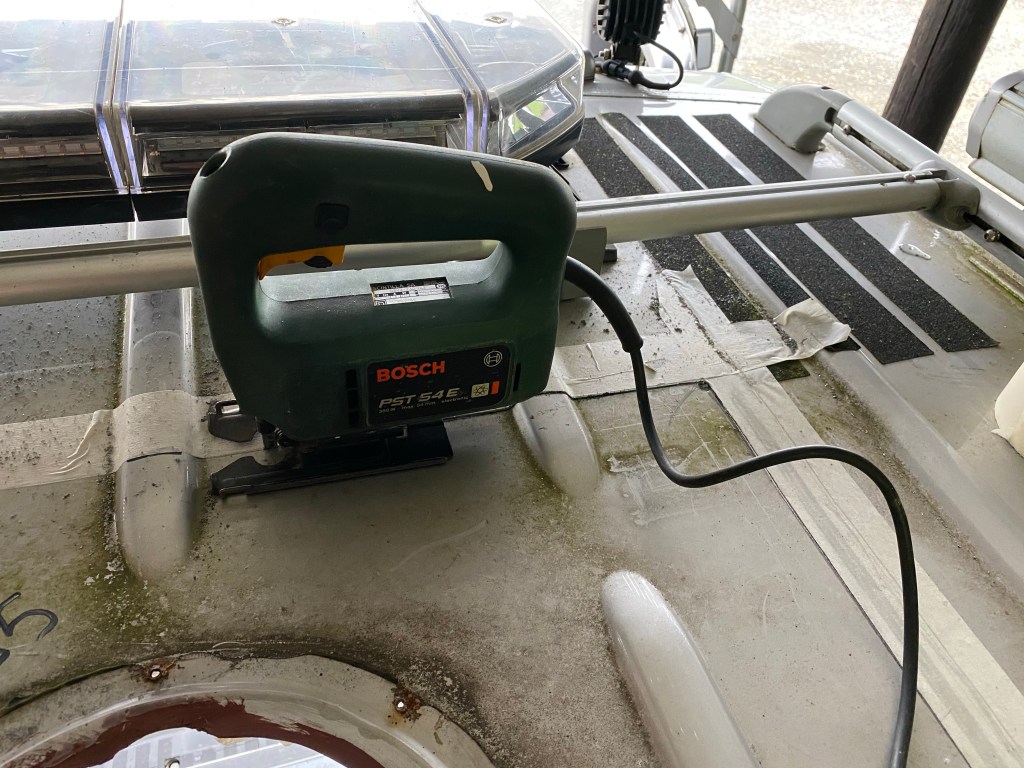
Once all the measuring was double checked and triple checked, I had already stripped the interior parts of the roof where the vents were going. On top of the roof the area outside of the cut was masked off and it was time to drill the corners and take a jigsaw to the steelwork.
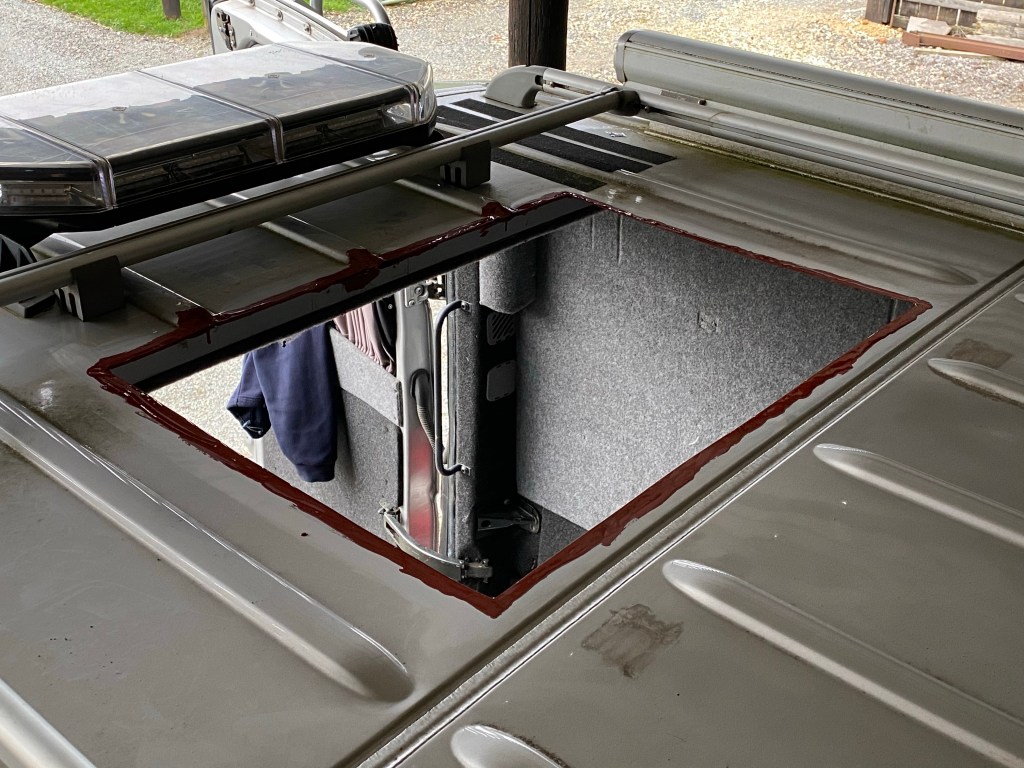
Cutting the hole for the Heki Midi. Hole cut, cleaned and edges sealed with red oxide paint.
Once both holes were cut the bare metal was cleaned up with a file and given a coat of red oxide to prevent the possibility of rust attacking the metalwork.
The insides had to have wooden frames made up to allow for easier fitment of the vents and to strengthen that area of the roof, these frames are bonded into place with adhesive such as Sikaflex 221, or similar.
Wooden frame being bonded to the roof.
Once the frames are set in place its time to start prepping the plastic frames of the vents, these need to be given a bit of a sanding down and a wipe over with a cleaning agent where the sealant is to be applied as its possible the oils in the plastic will prevent the sealant from adhering, and that would lead to them leaking.
On the outside I used some sealant that comes on a roll, this is laid flat on the edge of the hole and pressed firmly into place, making sure it has a perfect seal with the metal surface, then its time to put a bead of sealant onto the upturned plastic frame, again it must cover the whole area with no gaps, the Heki took a good 10mm bead where as the Maxxfan due to the width of the frame took two 6mm beads, inner and outer.
Maxxfan frame in place, screwed down and embarrassingly messy sealant everywhere.Heki stuck down and clamped in place ( Ha, you cant see the messy sealant on this one)
The Maxxfan uses screws to hold the frame in place whereas the Heki has clamps that screw into the wooden frame and then screw into the plastic half of the frame to keep it from falling off. Unfortunately the clamps provided were too small for my van and I’m waiting for the proper ones to arrive, thankfully it’s only a 10 minute job to swap them over.
The Heki in place.The Maxxfan, still with messy sealant, I’ll tidy that up tomorrow.
The idea to do another road trip started as soon as i had finished the trip last year, but after that epic journey the big question was where to go.
My original idea was to head back to Scandinavia, preferably Finland, but that idea was put on hold as I had also enjoyed the idea of touring Austria, plus its a little closer and a bit cheaper. The only downside to Austria is that wild camping is prohibited in the National Parks, but as the campsites are readily available, cheap and being in the mountains have stunning scenery around them its not too much of a downer. So its looking like a visit to a few historic sites in Germany then onto to Austria and possibly return via Lichtenstein and Switzerland. No definite route or timetable planned yet but hopefully its going to be a bit more of a relaxing drive than last time.
The next problem is that the van had been having some major surgery thanks to the over complicated emissions system on it, but touch wood thats all been sorted now.
A big thank you goes out to John Paul and his team at John Paul Transport Maintenance, Navenby, for all their hard work servicing and maintaining the van over the last 5 years, its down to them that last years trip involved nothing more exiting than after topping the oil up, a small amount dropped onto the alternator causing it to drop the charge voltage a bit but after a phone call to Johnny, who was in France at the time, ( I was in Bergen sat outside a Mercedes dealership, credit card in hand), I decided to give it a wipe clean and carry on, after another 1000 miles all was back to normal, and is still working well 7 months later, not bad for a 13 year old motor.
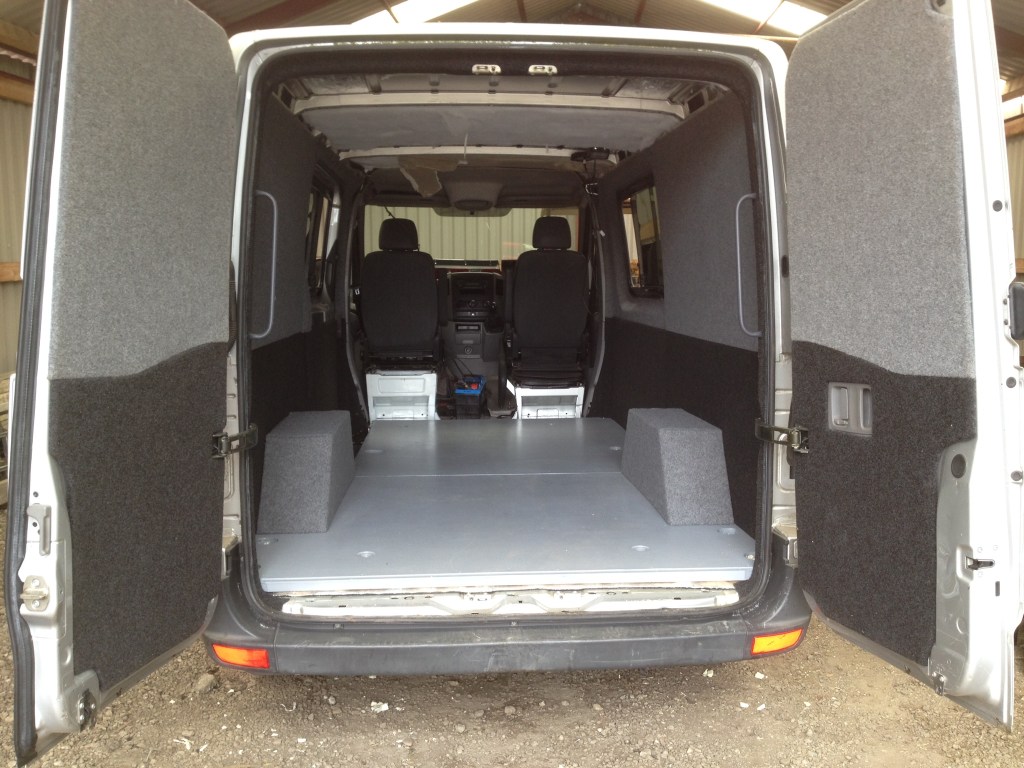
Problem number two is that after spending 4 weeks living in such a small space highlighted the need for an improved layout inside the van, and so Ive stripped out the old furnishings and the planning for the new interior is in progress, along with extra ventilation in the form of large roof lights to let some natural light and fresh air into the interior. There will be a new folding bed system and a smaller kitchen area, as most cooking was done outside, usually on the BBQ. Also when the bed is in use there will be a larger area for storage than the old set up where there had been a real shortage of places to put larger items like the table and chairs. (and the crates of cheap German beer ). I’ll be posting pictures of my progress as it happens.
9-2-20. Re-fit No 3 starts. Just a blank canvas now.
Thats it for now, hope you will all continue to follow this site.
5450 Miles, 956 Litres of diesel, 27 Days, 12 Countries, 11 Ferry crossings and a near heart attack on top of a mountain.
The day after getting home is the same for any holidaymaker / traveller, wether you’ve had a dirty weekend at Blackpool or have just finished crossing the Sahara, there is a kind of anti-climax, a belief that it didn’t actually happen, how can the time you’ve spent on your journey suddenly be over, ended, finished.
You arrive back to realise that life has carried on for your family, your friends, your workmates. They may have missed you but they still have their lives to live, homes to run, work to go to, life’s little problems to solve, and you sit back and contemplate wether what you have just accomplished really makes a difference.
It doesn’t, not really, not in the sense that means anything to anyone else but yourself. It was your journey, your time, your money and your experiences. Other people can look at the pictures, they can read the Blog, but they cant, and never will know the true experience of that journey as that is yours and yours alone.
I’ve already been asked if i would do it again, the simple answer is no, but only because of the things I now know about the journey, the places and the people, I would do some things different, I would miss places out and I would stay longer in others, I would take someone else along for the ride, if only for the company in the evenings and I would research the places along the route better as I know I passed by some places that I should have stopped at for a while longer.
There were times I thought I’d made a huge great mistake even starting such a trip. When your all alone on top of a mountain, thousands of miles from home and things start to go wrong it’s terrifying, it scares the hell out of you, but you have to push on, get through it, there is no other choice and when the disaster your expecting doesn’t actually happen you breath a sigh of relief and under your breath you call yourself a plonker for thinking that way.
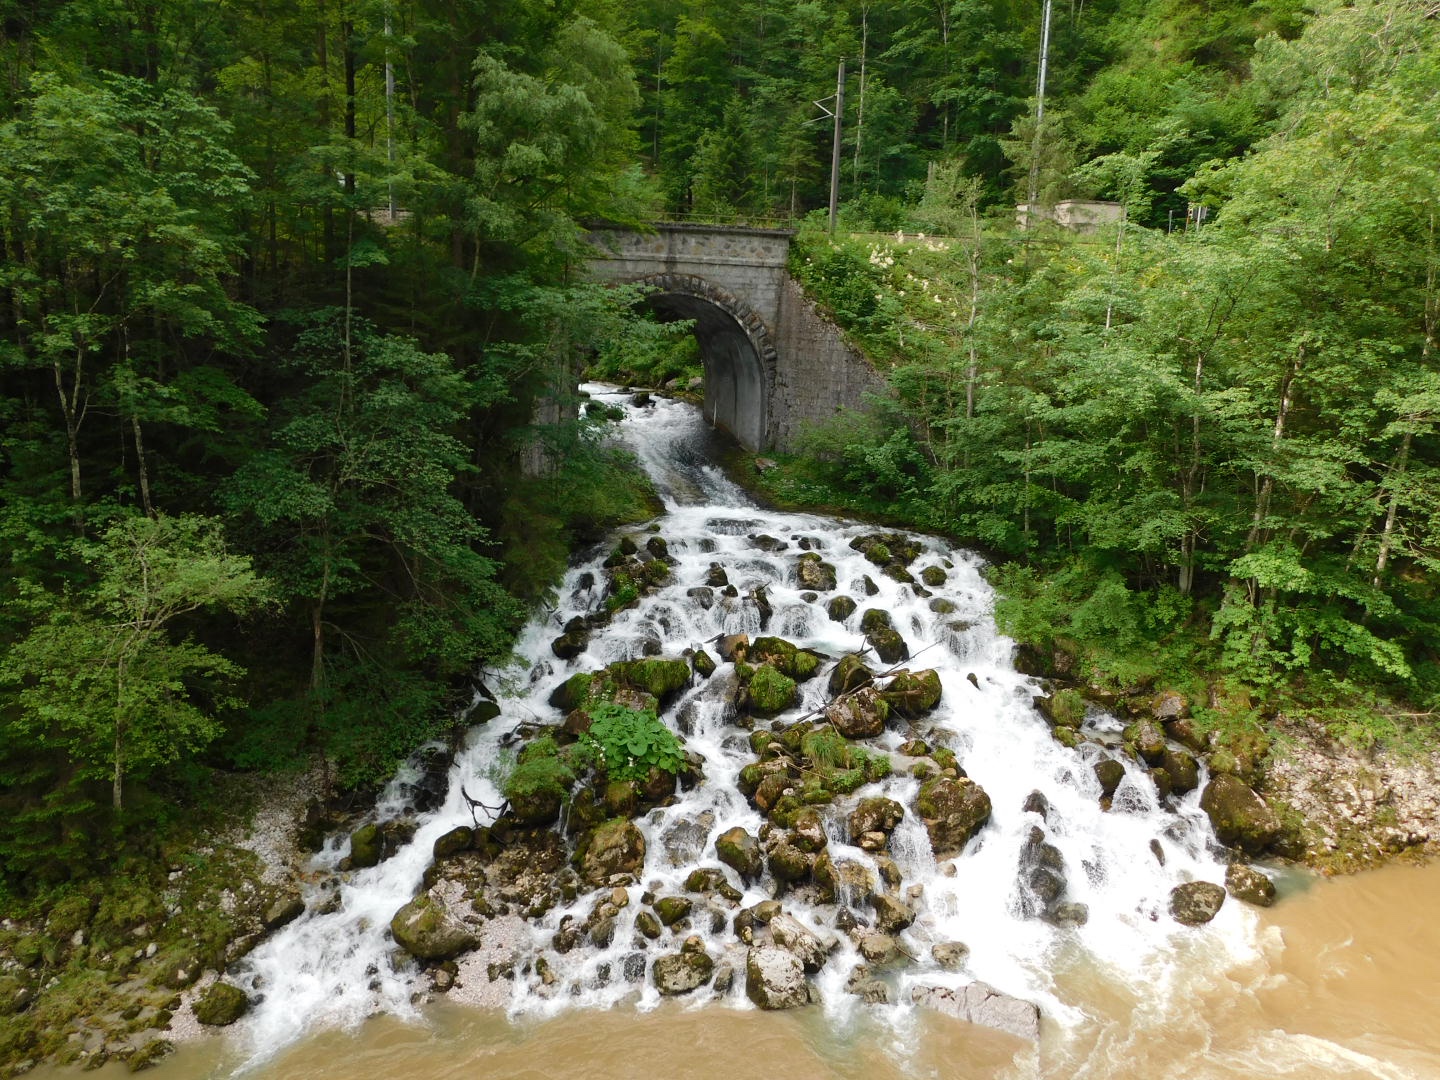
The next day as your feeling a little silly, and you drive around a corner and you see some of the most beautiful scenery ever made on this planet you can forgive yourself for the little hiccup that happened and you promise that next time you’ll just stop and think before panicking.
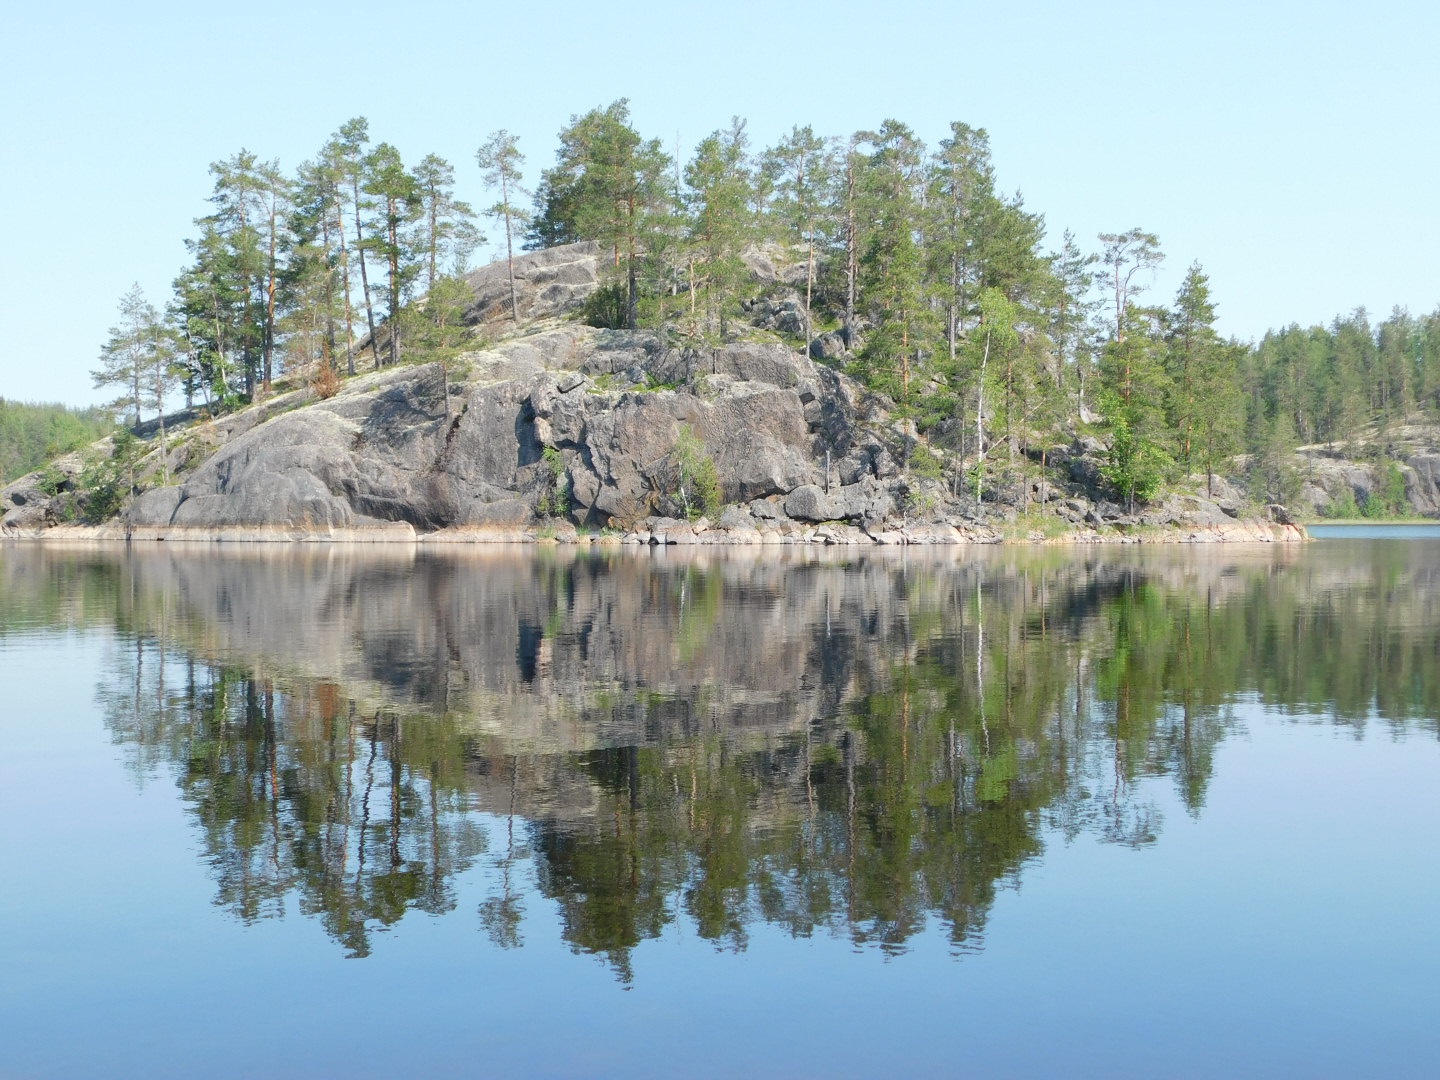
I never made it to Nordcapp, the most northerly point of Norway, my expectations were way over enthusiastic and with a little sadness once I’d reached Trondheim I took a right turn and headed through Sweden and on to Finland, in hind sight that was to be the right decision and one I will never regret.
I hope you’ve all enjoyed reading the Blog, or even just enjoyed the photo’s, if it inspires one person to get out of their routine and go down the road less travelled then it was all worth it.
Total. 5450 Miles. Phew, Thats 1500 Miles more than Google Map predicted.
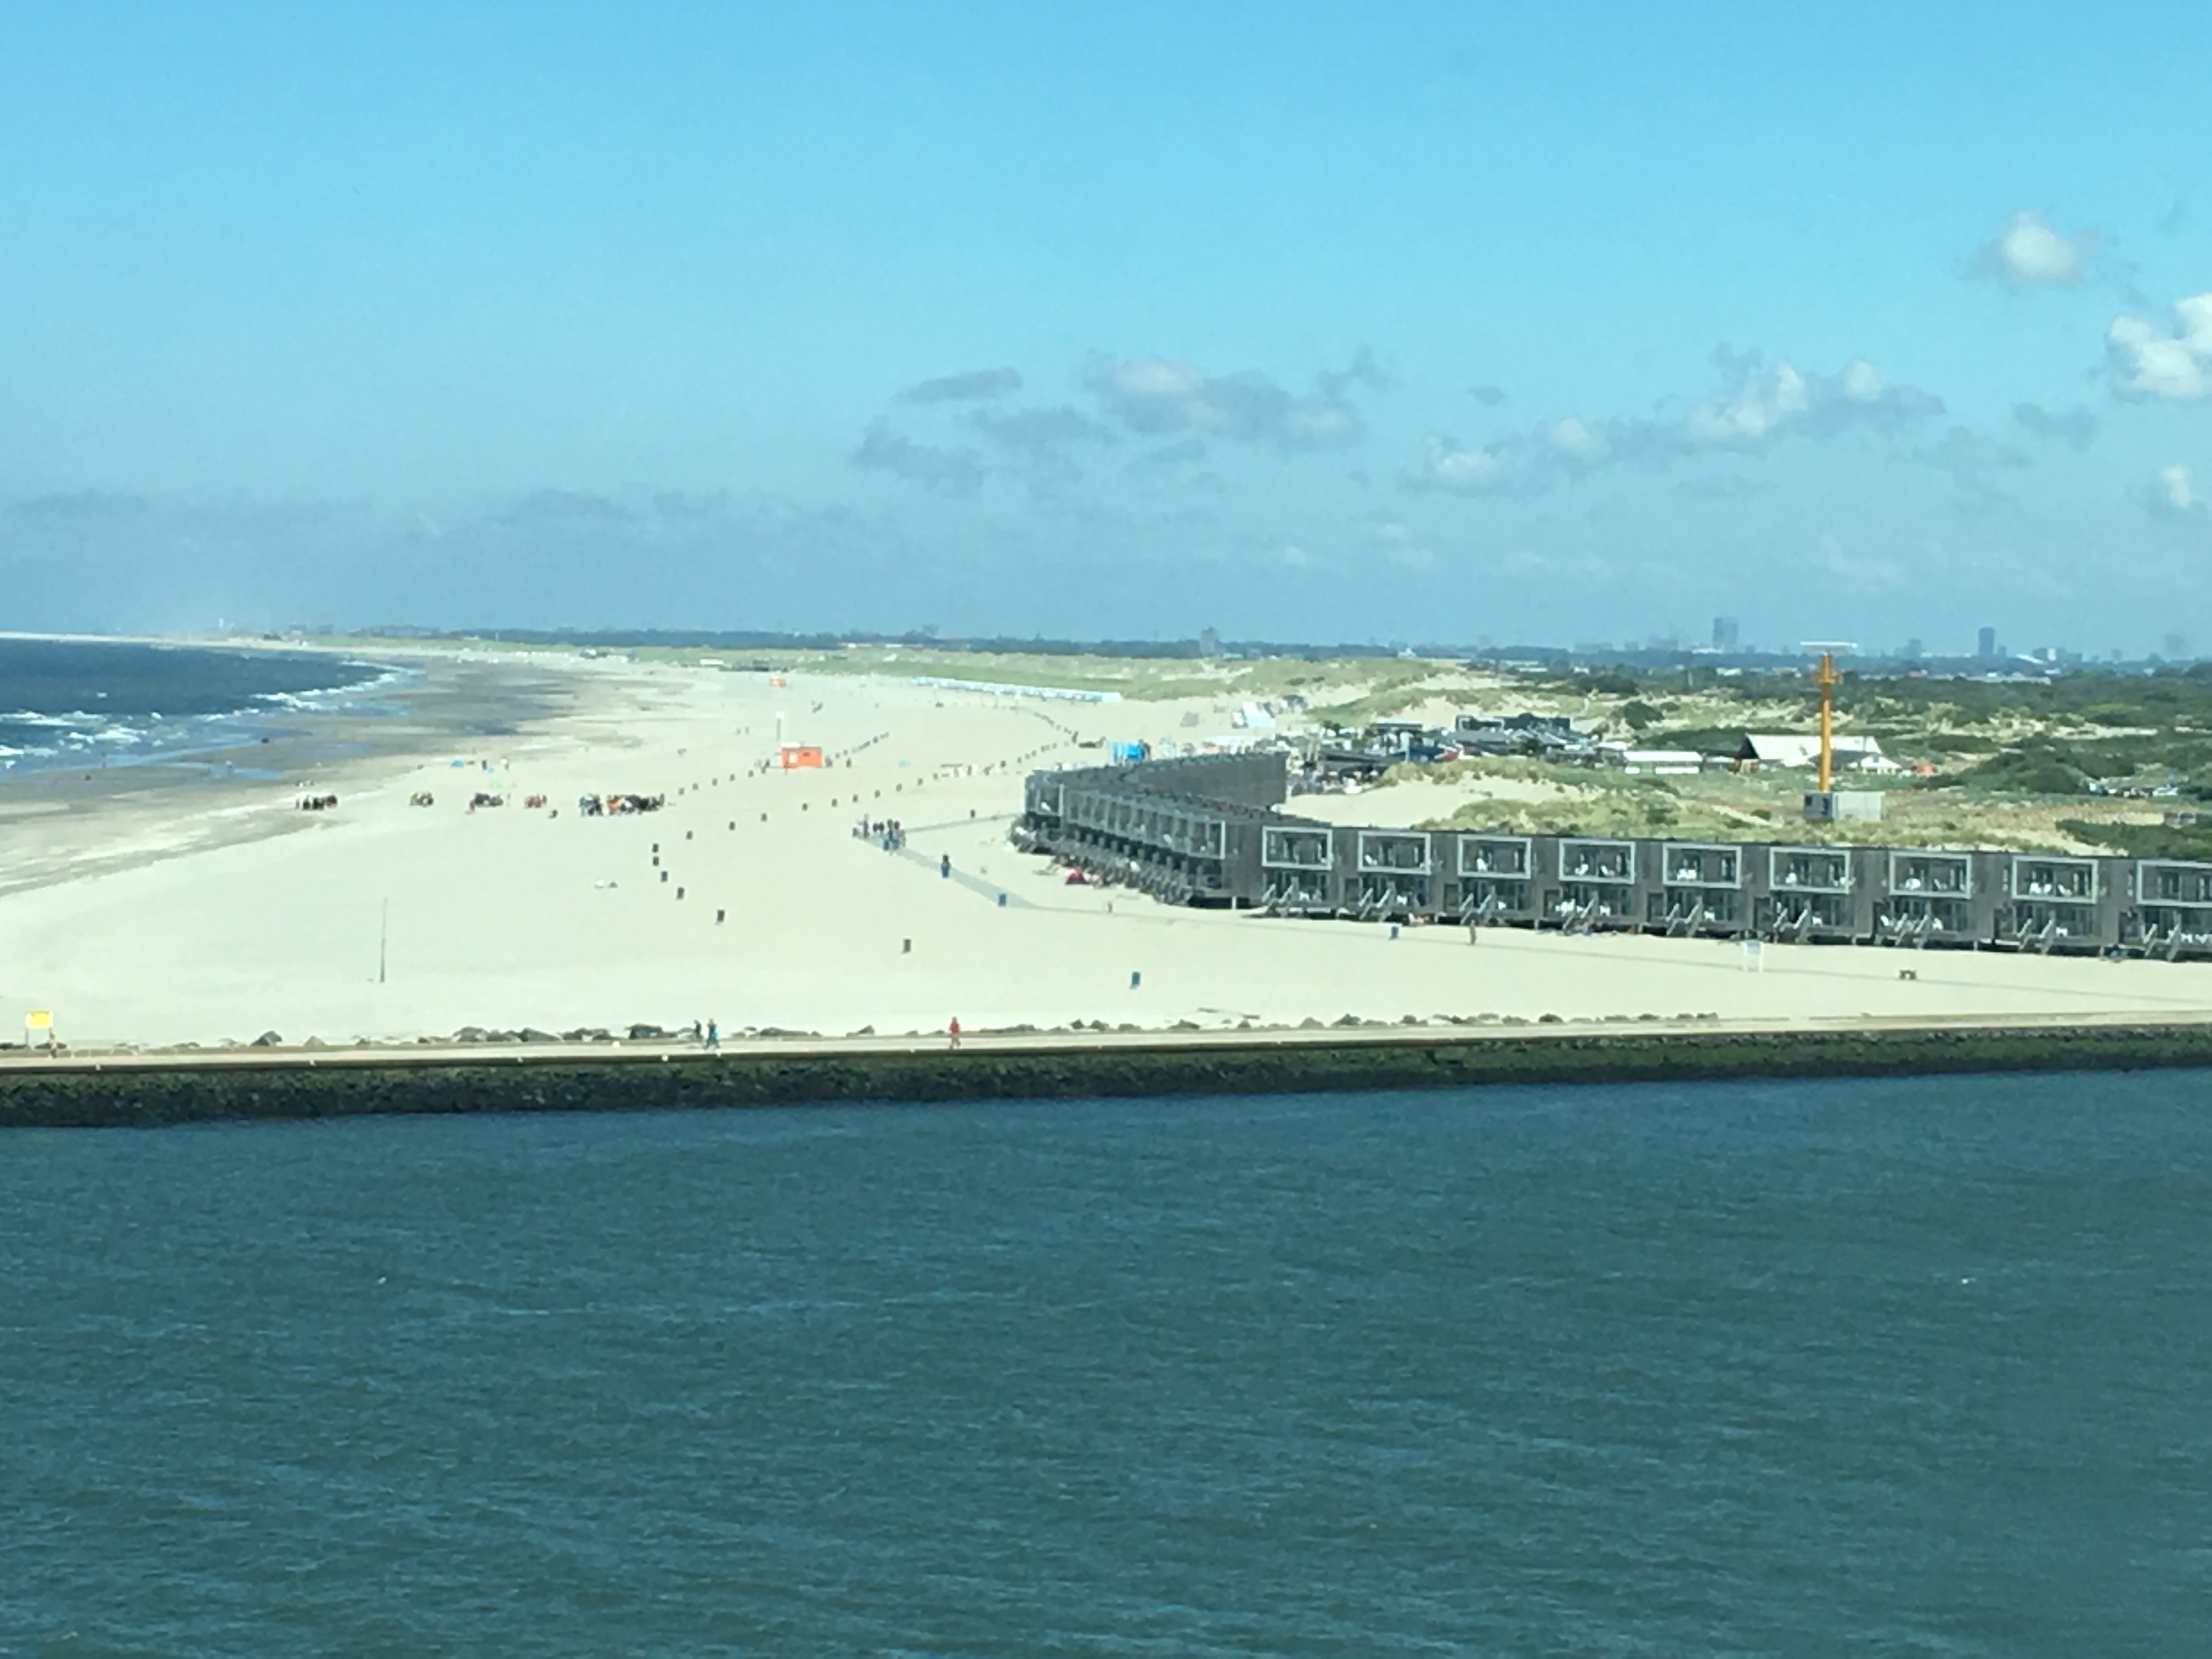
The last day, I still have a long way to go but it is broken up into stages, bit like a rally. The first stage is getting to the Hook of Holland ferry by midday, no problem, I set of at 7:30am and with the expected efficiency of the German Autobahn’s, I’m there in plenty of time to visit Lidl’s to stock up on beer and Regan’s favourite apple drink. I even have time to grab a bit of lunch at an Indian bakery in the Netherlands that sells kebabs, ???? that is another 5 star snack for the guidebook.
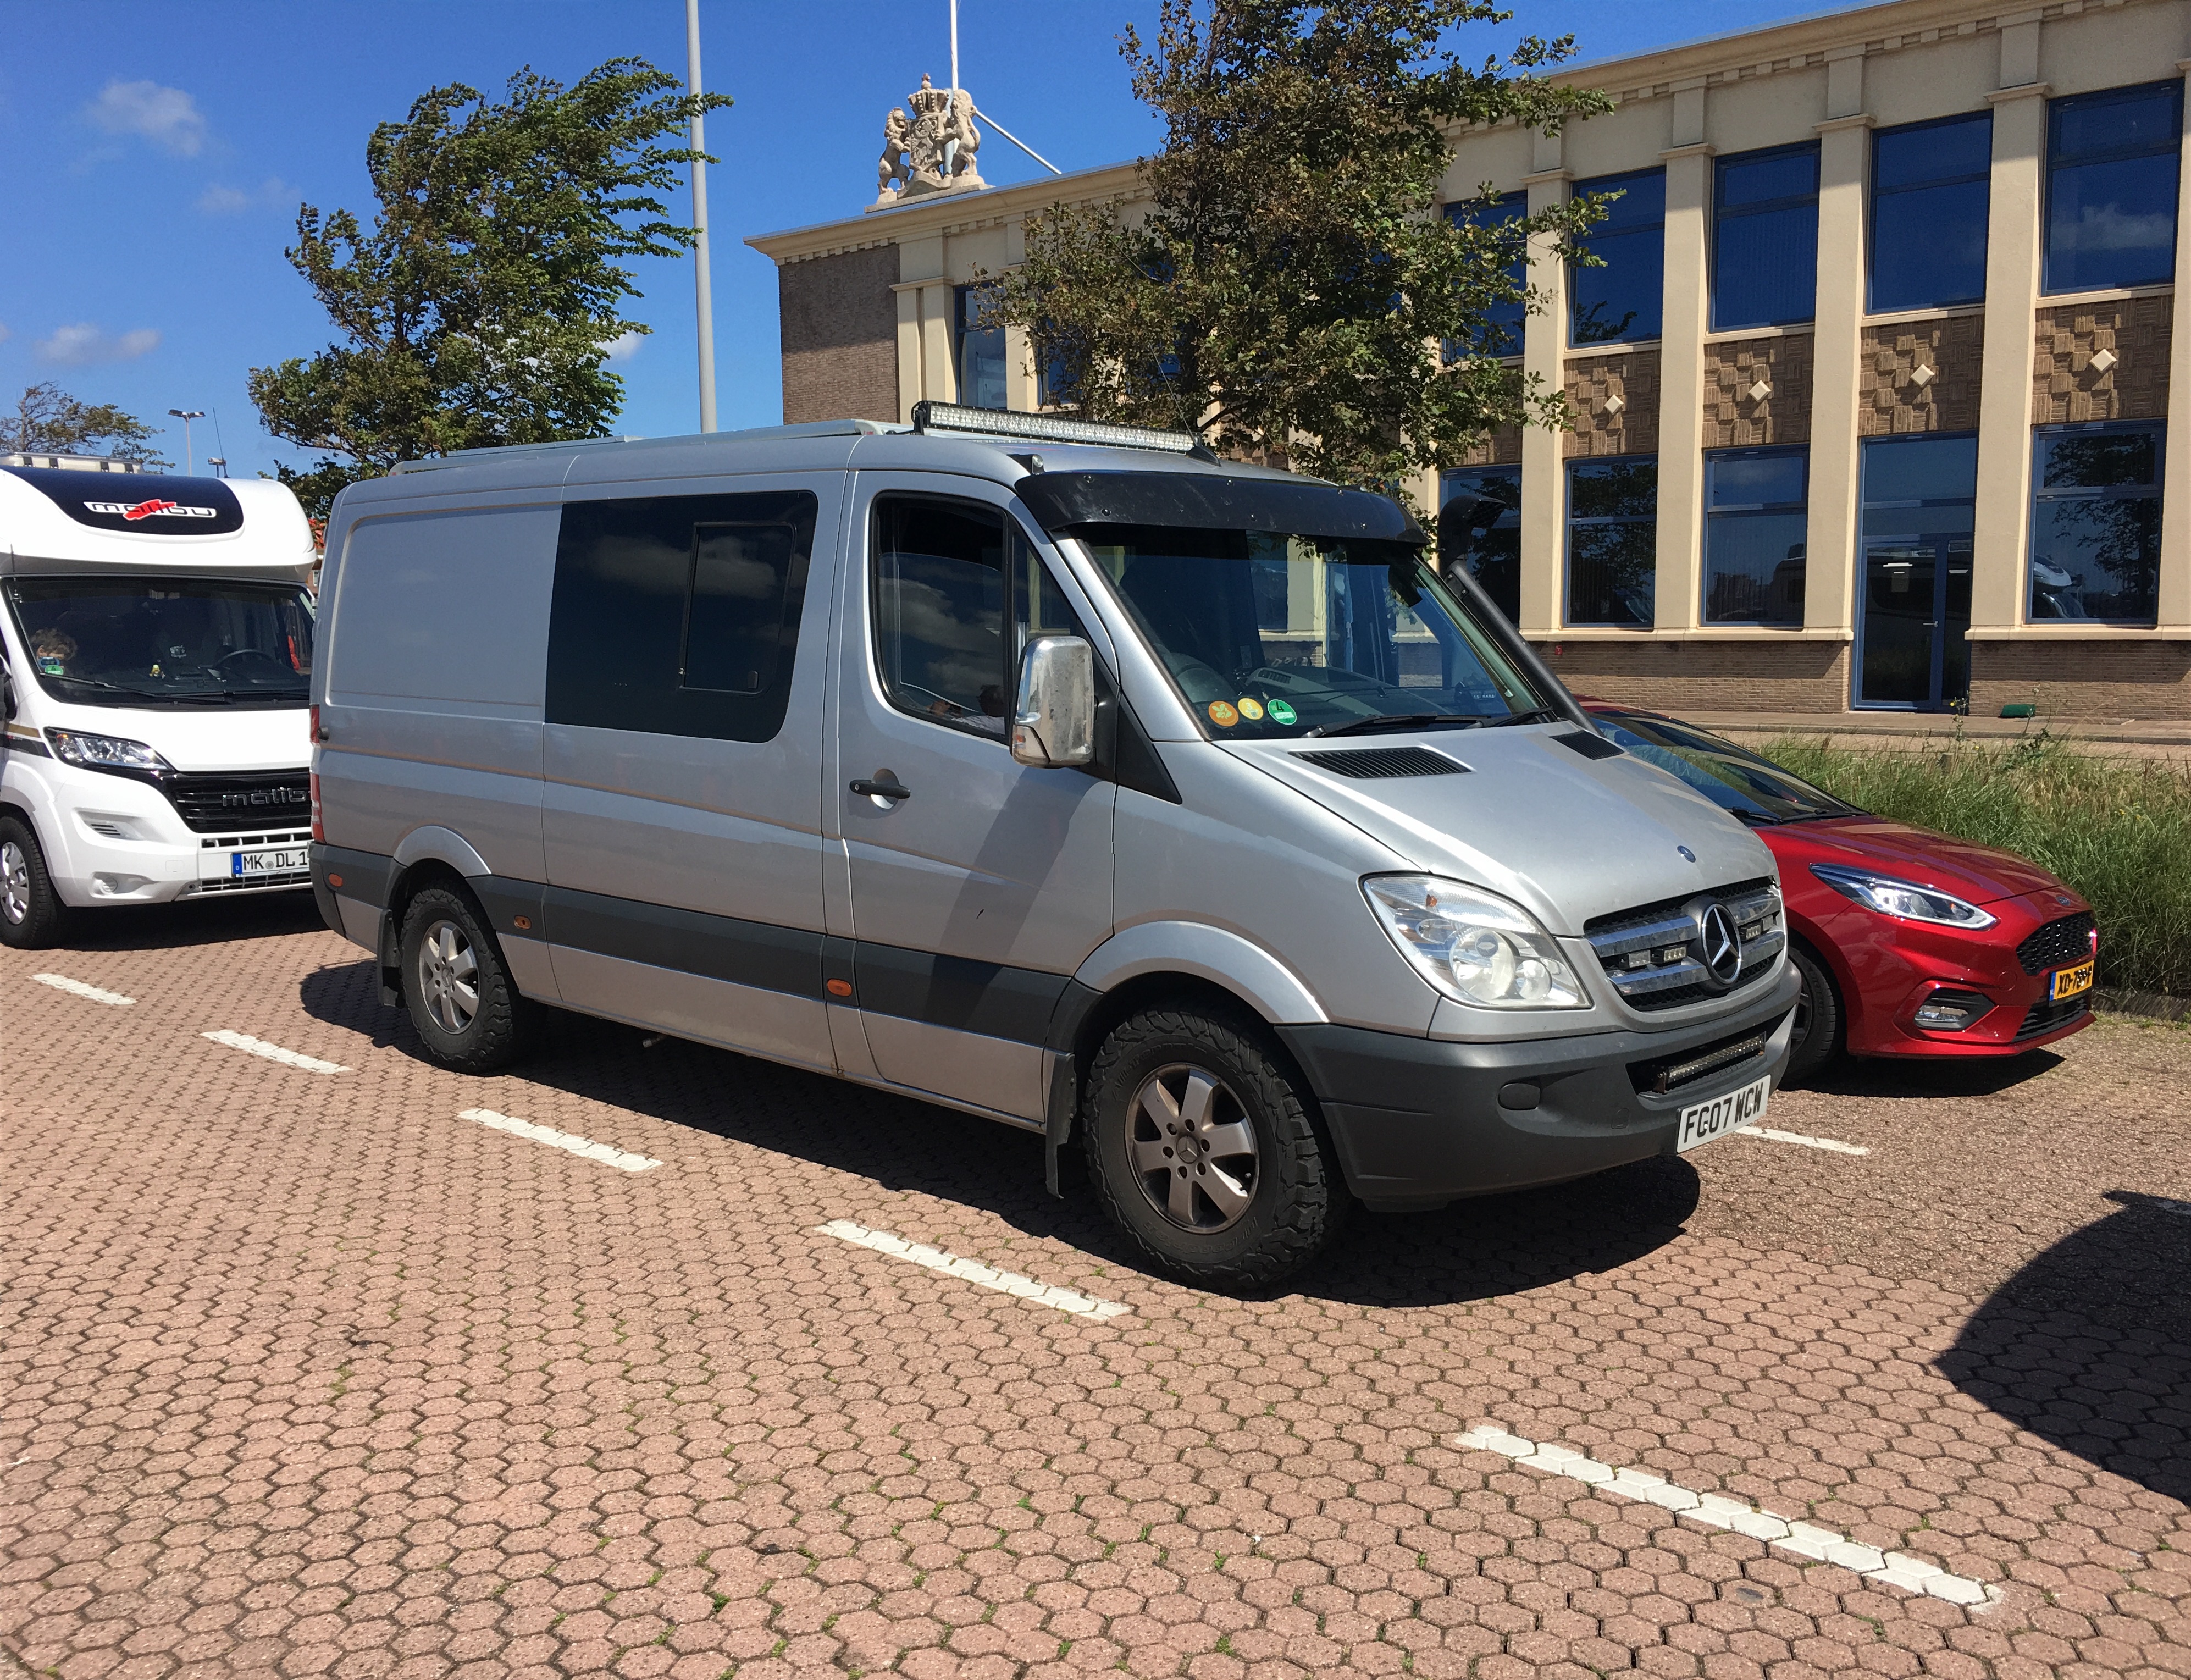
Once checked in to the ferry theres the usual wait for boarding but it gives me a chance to see what the Netherlanders ??? ( Dutch 🙂 ) drive when visiting the UK. And there is a rather nice Mercedes Sprinter camper that puts mine to shame, oh well, never mind.
I have to say that the Stena line ferries are very nice, all clean and tidy, great staff who actually care that you have a pleasant journey, good food in the restaurant’s and although the cabins are small they are very comfortable and clean with spotless on-suite’s.
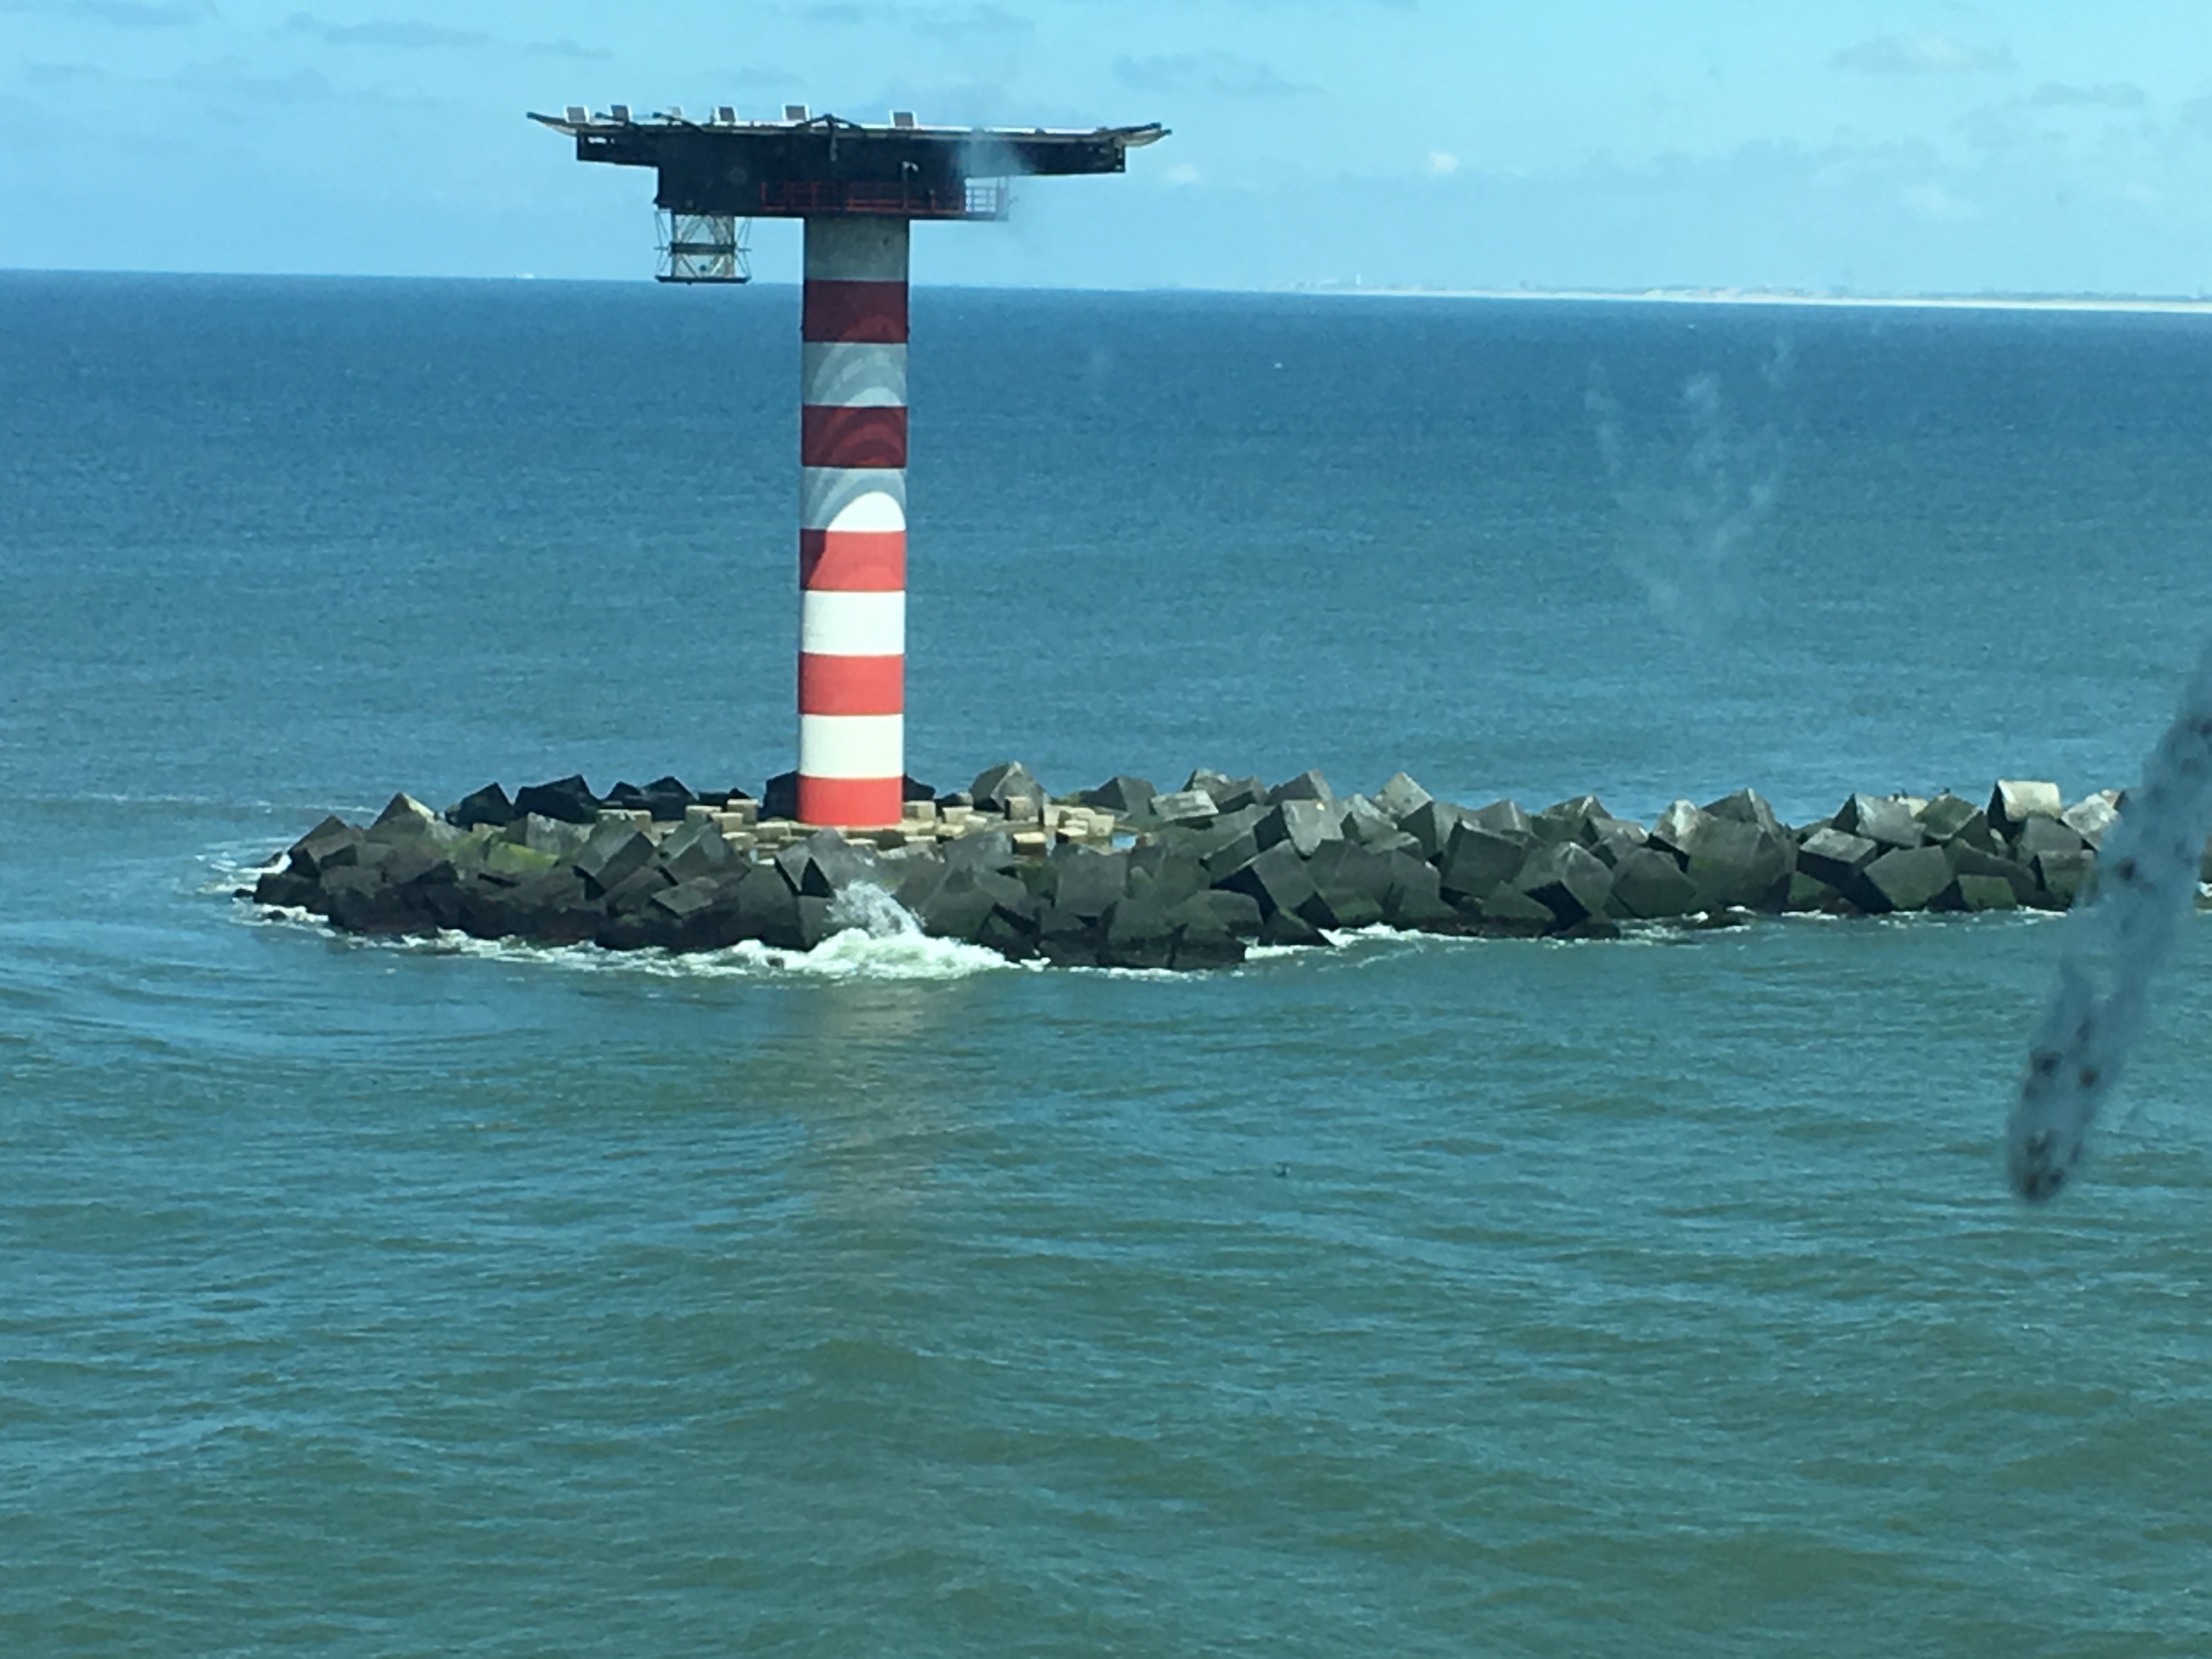
The six hour crossing passes by pretty quickly, by the time you settle into the cabin and then head for the restaurant your already heading out of the harbour into the North Sea which again, as is nice and calm so makes it a smooth crossing.
The on-board tv gives a few British and a few Dutch channels along with the position of the ship as it crosses the busiest shipping lanes in the world. Watching ‘Ello-Ello’ in English but with Dutch subtitles is rather weird, but fun.
Felixstowe, opposite Harwich.
And so as I drive off the ferry back in blighty its a manic three and a half hour drive back to Lincoln to arrive home just before midnight. A long day !!